
Mustang V8-4.6L (2009)
23. Clean and inspect the LH exhaust manifold.
24. Remove and discard the 8 LH exhaust manifold studs.
25. NOTICE: Do not use metal scrapers, wire brushes, power abrasive discs or other abrasive means to clean the sealing surfaces. These may
cause scratches and gouges resulting in leak paths. Use a plastic scraper to clean the sealing surfaces.
Clean the sealing surfaces with metal surface prep. Follow the directions on the packaging.
Installation
1. Install 8 new LH exhaust manifold studs.
-
Tighten to 12 Nm (106 lb-in).
2. Install new exhaust manifold gaskets.
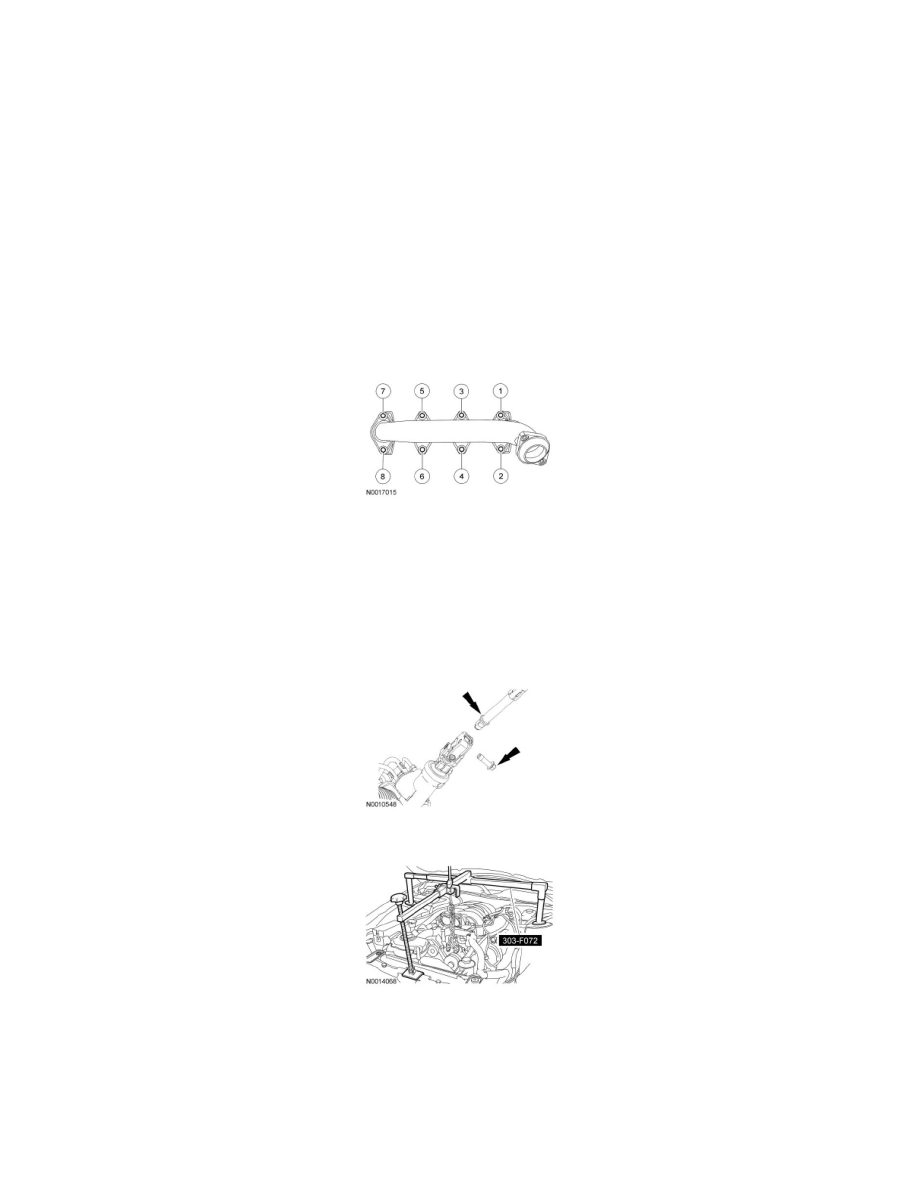
3. Install the exhaust manifold and 8 new nuts.
-
Tighten the nuts in the sequence shown to 25 Nm (18 lb-ft).
4. Install the LH engine support insulator bracket and the 4 bolts.
-
Tighten to 55 Nm (41 lb-ft).
5. NOTICE: Do not allow the steering wheel to rotate while the steering column intermediate shaft is disconnected or damage to the
clockspring can result. If there is evidence that the wheel has rotated, the clockspring must be removed and recentered. For additional
information, refer to Air Bag Systems.
Connect the steering coupling and install the new bolt.
-
Tighten to 25 Nm (18 lb-ft).
6. Using the Engine Support Bar, lower the engine.
7. If equipped, install the strut tower cross brace and the 4 nuts.
-
Tighten to 35 Nm (26 lb-ft).
8. NOTE: RH shown, LH similar.
Install the RH and LH engine support insulator nuts.
-
Tighten to 63 Nm (46 lb-ft).