
Mustang V8-4.6L (2009)
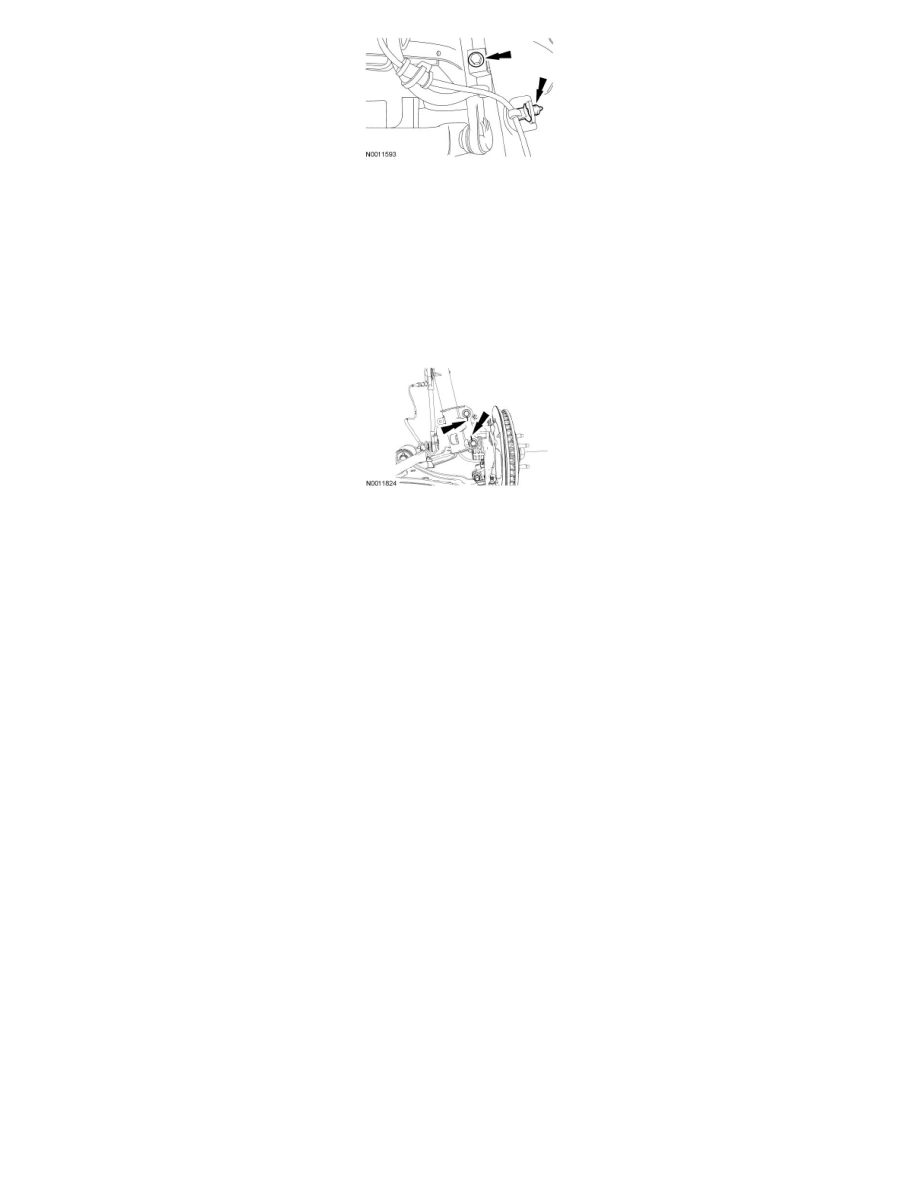
5. NOTICE: Use the hex-holding feature to prevent the studs from turning while removing or installing the stabilizer bar link nuts. The
boot seal must not be allowed to twist at all while tightening the nuts or damage to the boot seal may occur.
Remove and discard the stabilizer bar link upper nut and disconnect the link from the strut.
-
To install, tighten the new nut to 115 Nm (85 lb-ft).
6. Using a suitable jackstand, support the lower control arm.
7. If equipped, index-mark the 2 strut-to-spindle cam bolts.
8. WARNING: Do not apply heat or flame to the shock absorber or strut tube. The shock absorber and strut tube are gas pressurized and
could explode if heated. Failure to follow this instruction may result in serious personal injury.
WARNING: Keep all body parts clear of shock absorbers or strut rods. Shock absorbers or struts can extend unassisted. Failure to
follow this instruction may result in serious personal injury.
NOTE: If equipped, do not discard the strut-to-spindle cam nuts and bolts.
Remove and discard the strut-to-spindle bolts and flagnuts.
-
To install, tighten to 225 Nm (166 lb-ft).
9. NOTICE: Damage to the lower control arm bushings may occur if the lower control arm is not supported.
Carefully lower the lower control arm and remove the strut and spring assembly.
-
To install, the notch and the arrow etched into the upper bearing assembly must face the outboard side of the vehicle.
10. If necessary, disassemble the strut and spring assembly. For additional information, refer to Strut and Spring Assembly See: Overhaul.
11. To install, reverse the removal procedure.
12. Check and, if necessary, adjust the front end alignment.
Rear Suspension
Shock Absorber