
Mustang V8-4.6L DOHC (1996)
RH Timing Chain Tensioner
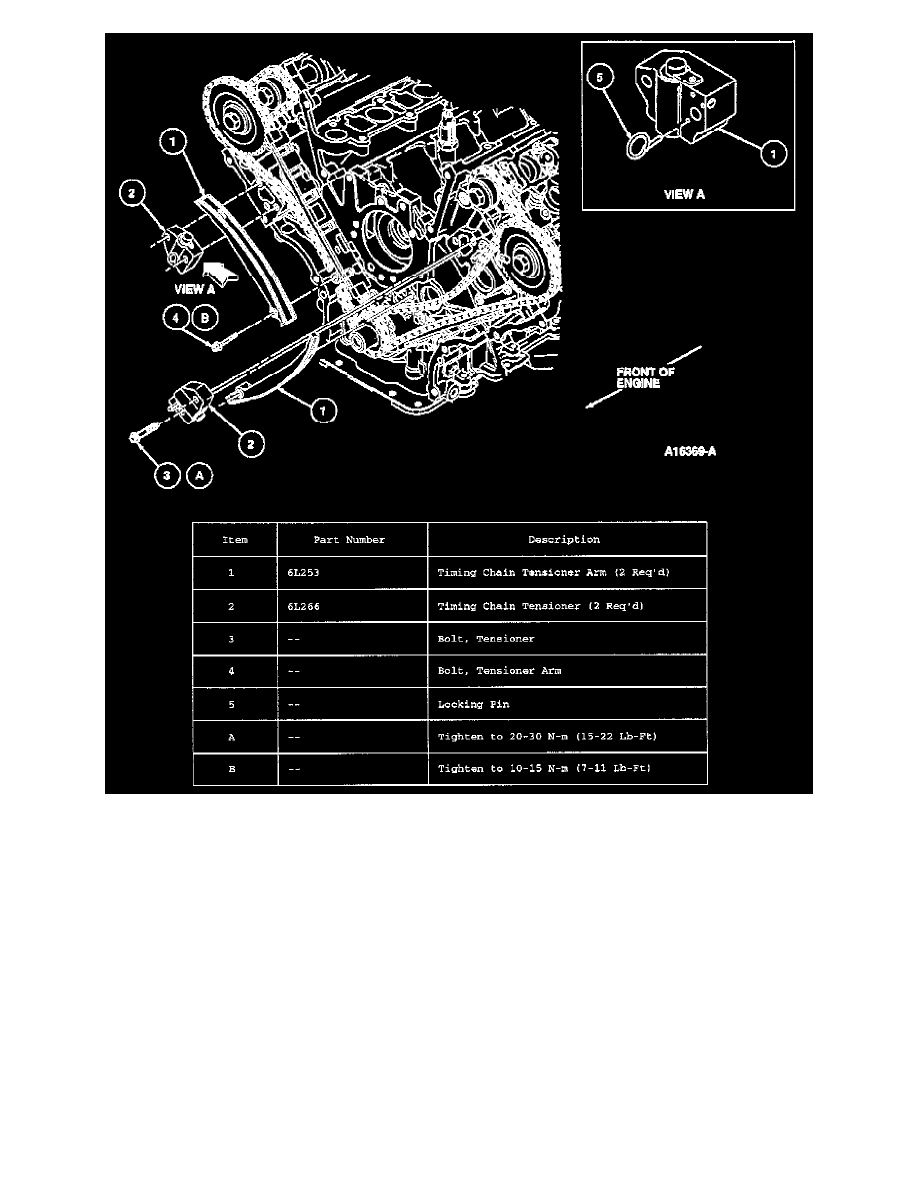
20. Lubricate timing chain tensioner arm contact surfaces with engine oil and install RH and LH timing chain tensioner arms using one bolt each.
Tighten to 10-15 Nm (7-11 ft/lb).
21. Unlock the primary tensioner ratcheting device (using a small pick or similar tool, hold ratchet lock mechanism away from ratchet stem).
22. CAUTION: Tensioner must be compressed slowly or rupture of tensioner body casting will result from excessive hydraulic pressure. Failure to
release ratchet lock mechanism while compressing piston will result in ratchet damage.
Slowly compress primary tensioner piston in small increments with minimal force.
23. Lock the primary tensioner ratcheting device with a small pin (paper clip) once the tensioner is fully compressed and the ratchet stem is flush to
the tensioner body.
24. NOTE: Do not remove lock pins until timing chain guides are installed.
Install RH and LH primary timing chain tensioners and secure with two bolts on each. Tighten bolts to 20-30 Nm (15-22 ft/lb).
25. Remove lock pins from primary timing chain tensioners and make sure all timing marks are aligned.
26. Install crankshaft position sensor pulse wheel with hub facing crankshaft sprocket.
27. Install rocker arms.