
Mustang V8-4.6L SOHC VIN X (2003)
Drive/Propeller Shaft: Service and Repair
Removal and Installation
Driveshaft
Removal and Installation
1. Raise and support the vehicle.
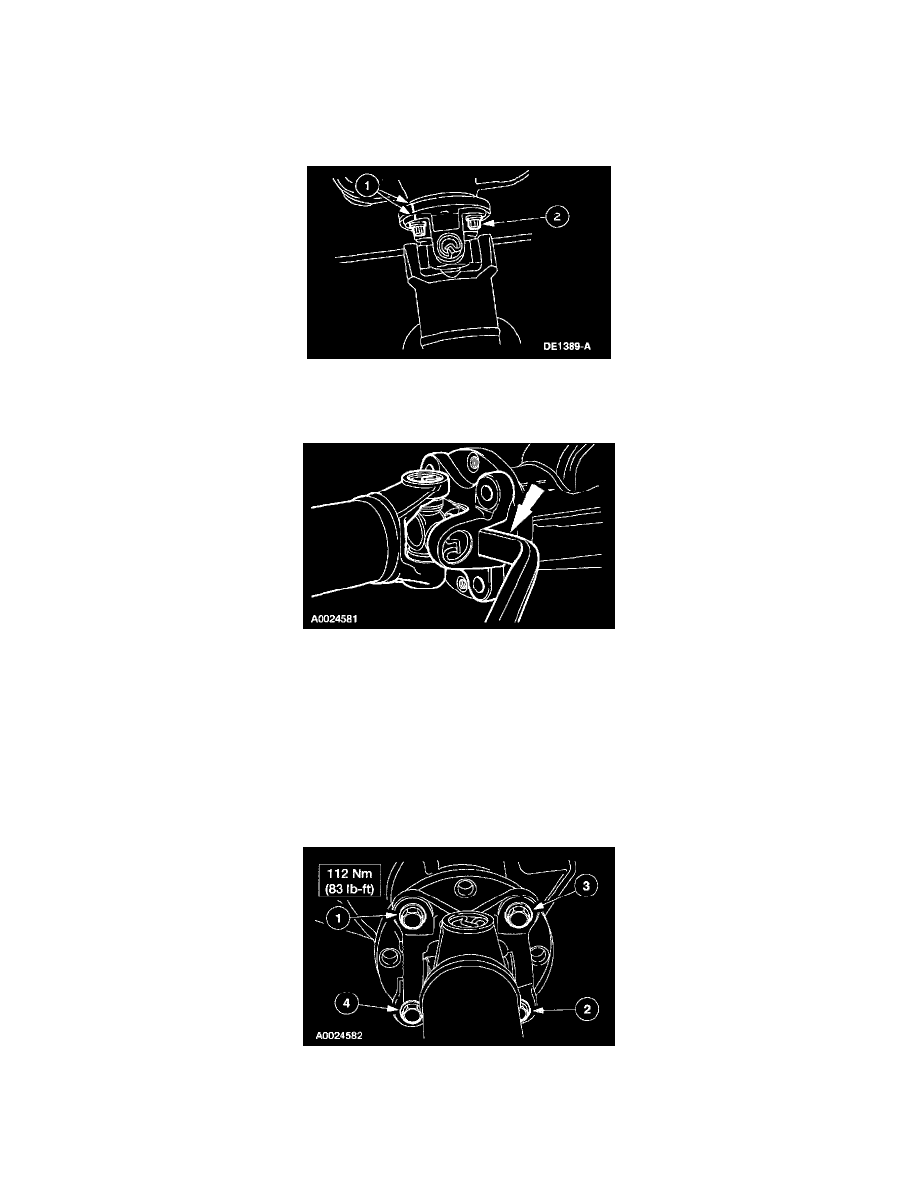
2. Carry out the following:
1
Place an index mark on the rear axle pinion flange and the driveshaft centering socket yoke.
2
Remove the four bolts.
3. CAUTION: The driveshaft centering socket yoke fits tightly on the rear axle pinion flange pilot. Never hammer on the driveshaft or any of its
components to disconnect the yoke from the flange. Pry only in the area shown, with a suitable tool, to disconnect the yoke from the flange.
Using a suitable tool as shown, disconnect the driveshaft centering socket yoke from the rear axle pinion flange.
4. CAUTION: Do not allow the slip yoke to bottom on the transmission output shaft.
Lower the rear end of the driveshaft to clear the rear axle housing. Pull the driveshaft rearward until the driveshaft slip yoke clears the transmission
extension housing.
^
Place a paint index mark on the driveshaft slip yoke and the transmission output shaft.
^
Place a commercially available plug in the extension housing to prevent fluid leakage.
5. CAUTION: Install the driveshaft with new bolts. If new bolts are not available, apply threadlock and sealer to the threads of the original bolts.
CAUTION: Do not allow the slip yoke to bottom on the transmission output shaft.
CAUTION: The driveshaft centering socket yoke fits tightly on the rear axle pinion flange pilot. To make sure that the yoke seats squarely on the