Mustang V8-5.4L SC (2008)

b.
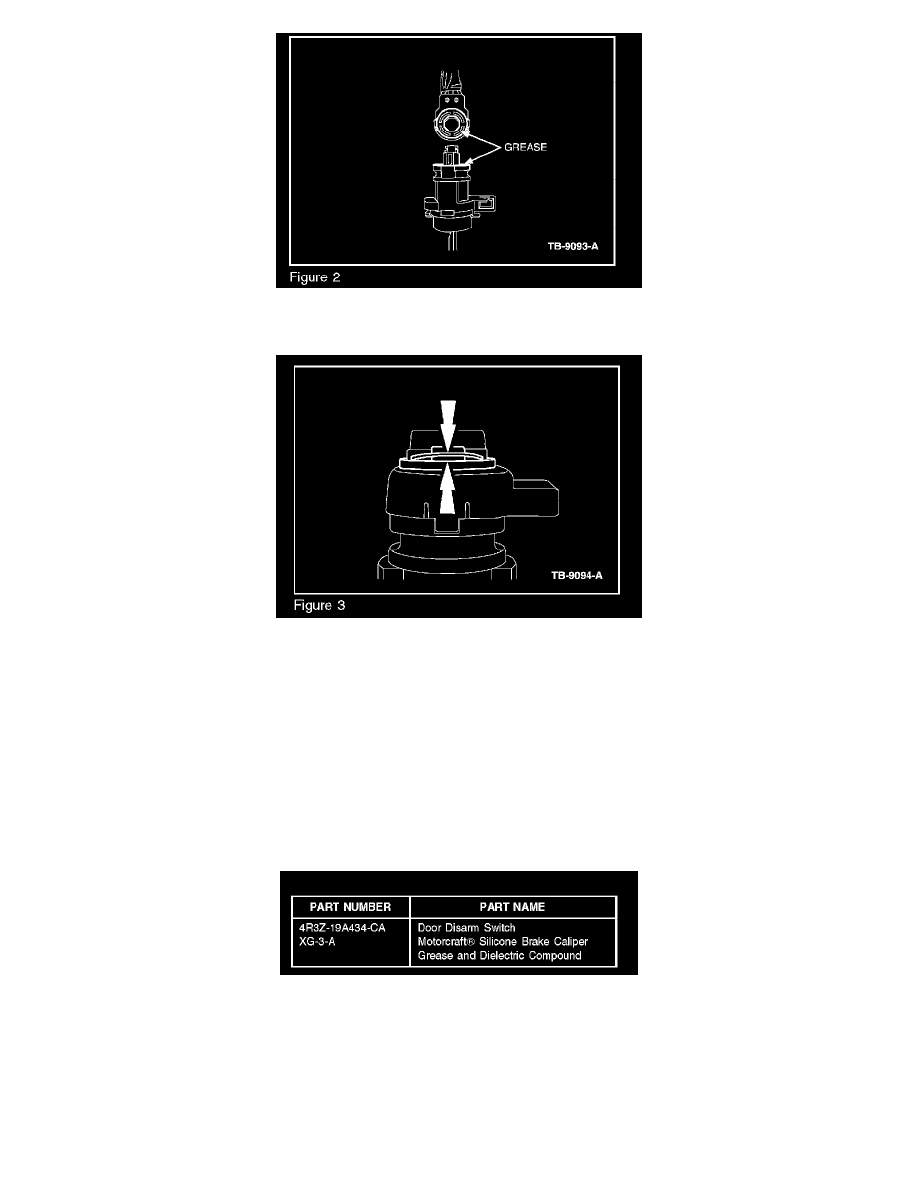
Apply Motorcraft® Silicone Brake Caliper Grease and Dielectric Compound liberally to the switch and lock cylinder mating sur[aces.
(Figure 2)
c.
E-clip must be positioned with the concave side towards the lock cylinder (upside down U) to ensure the proper tension is applied toward
connection. (Figure 3)
NOTE
FAILURE TO PERFORM STEPS IN FIGURES 1-3 MAY RESULT IN REPEAT INTERMITTENT COMPLAINTS.
9.
If equipped, install the rear glass run. Torque the screw to 80 lb-in (9 N.m). Torque nut to 89 lb-in (10 N.m).
10.
Connect the door disarm switch wiring harness retainer to the post on the LH door latch.
11.
Position the watershield back into place.
12.
Install the LH front door trim panel. For additional information, refer to WSM, Section 501-5.
Parts Block
WARRANTY STATUS: Eligible Under Provisions Of New Vehicle Limited Warranty Coverage
IMPORTANT: Warranty coverage limits/policies are not altered by a TSB. Warranty coverage limits are determined by the identified causal part.
OPERATION
DESCRIPTION
TIME
080902A
2007-2008 Mustang:
0.6 Hr.
Replace Door Disarm
