
Mustang V8-5.4L SC (2008)
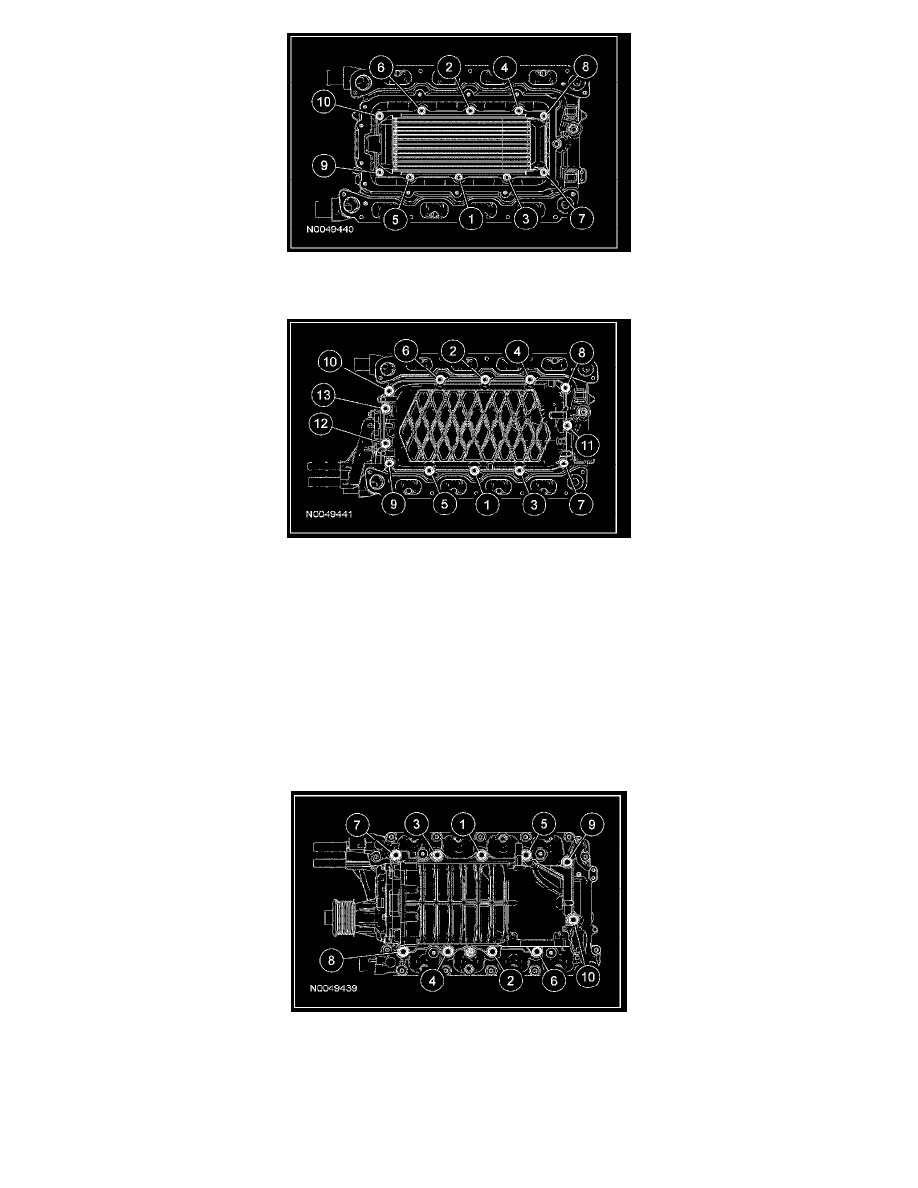
2. Install a new gasket, the lower intake manifold cover and the 13 bolts.
^
Tighten in the sequence shown to 10 Nm (89 lb-in).
3. NOTE: Apply clean engine coolant to the new CAC coolant connector tube O-ring seals.
Install new O-ring seals on the CAC coolant connector tubes.
^
Install the CAC coolant connector tubes.
4. Install a new gasket, the CAC coolant tube assembly and the 5 bolts.
^
Tighten to 10 Nm (89 lb-in).
5. Install the IAT2 sensor.
^
Tighten to 15 Nm (11 lb-ft).
6. Install the vacuum tube.
7. Install a new gasket, the SC and the 10 bolts.
^
Tighten the bolts in the sequence shown in 2 stages:
^
Tighten to 5 Nm (44 lb-in).
^
Tighten to 25 Nm (18 lb-ft).
8. NOTE: Lubricate the new O-ring seal with clean engine oil prior to installation.
Install new O-ring seals on each of the fuel injectors.
9. Install the fuel injectors onto the fuel rail and install the locking clips.
10. Install the fuel rail and fuel injector assembly onto the intake manifold.
11. Install the 4 fuel rail bolts.
^
Tighten to 10 Nm (89 lb-in).