
Mustang Cobra V8-281 4.6L DOHC VIN V MFI (1997)
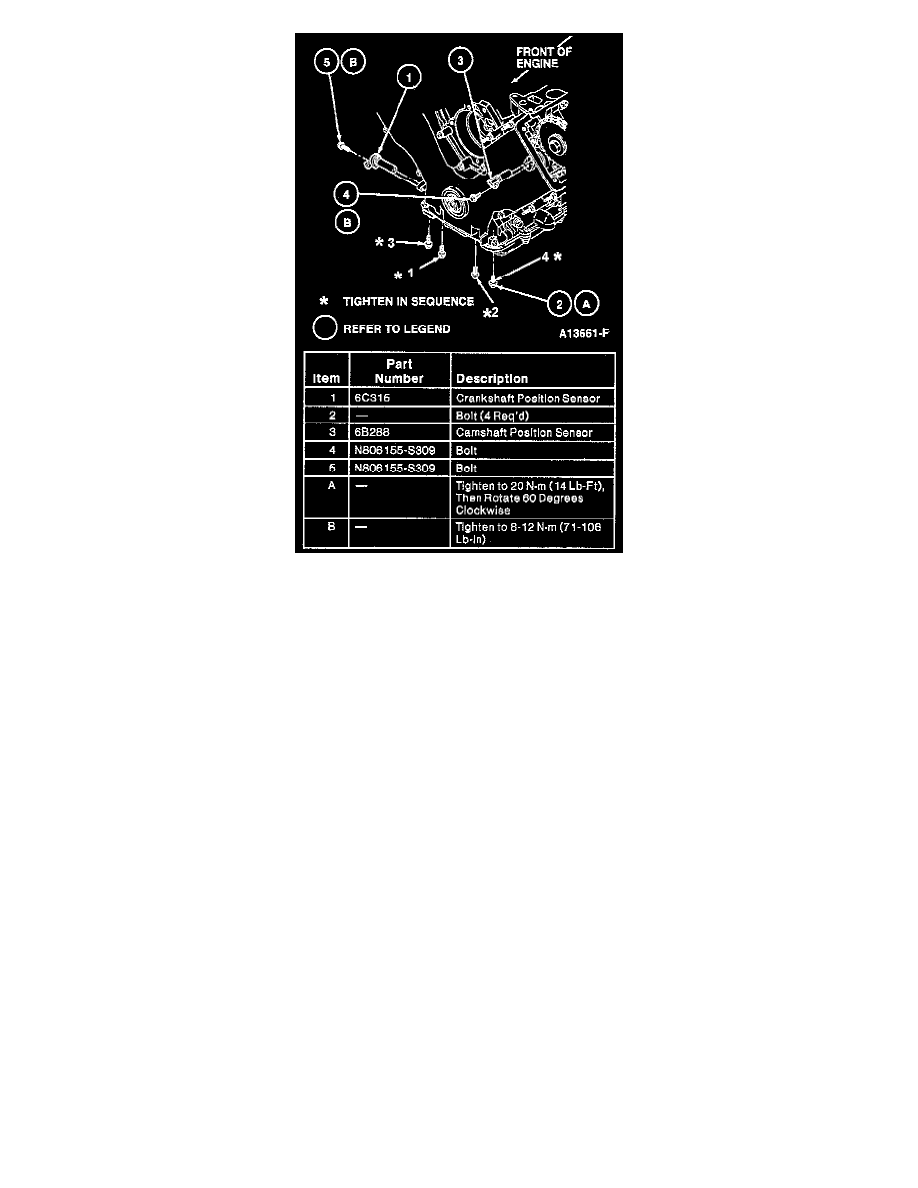
41. Install four bolts retaining oil pan to engine front cover and tighten in sequence shown to 20 Nm (14 ft. lbs.). Then rotate bolts in sequence 60°
clockwise.
NOTE: Silicone Gasket and Sealant F6AZ-19562-A or equivalent meeting Ford specification WSE-M4G323-A6 must be applied to crankshaft
keyway prior to installing crankshaft pulley.
42. Install crankshaft pulley using Crankshaft Damper Replacer T74P-6316-B.
43. Install crankshaft pulley retaining bolt and washer. Tighten in four steps:
Step 1 ... Tighten to 90 Nm (66 ft. lbs.).
Step 2 ... Loosen one full turn 360°.
Step 3 ... Tighten to 50 Nm (36 ft. lbs.).
Step 4 ... Tighten an additional 90°.
44. Clean sealing surfaces of cylinder head and valve covers. Remove all traces of oil, dirt and previously applied sealant from engine front cover and
cylinder heads. Sealing surfaces must be clean and dry before applying sealant.
45. Position and, using a suitable adhesive, glue new perimeter gaskets into valve covers. Replace spark plug bore to valve cover gaskets. No adhesive
is required.
46. Apply Silicone Gasket and Sealant F6AZ-19562-A or equivalent meeting Ford specification WSE-M4G323-A6 in four places where engine front
cover meets cylinder heads and install valve covers into cylinder heads.