Mustang Cobra V8-281 4.6L DOHC VIN V MFI (1997)

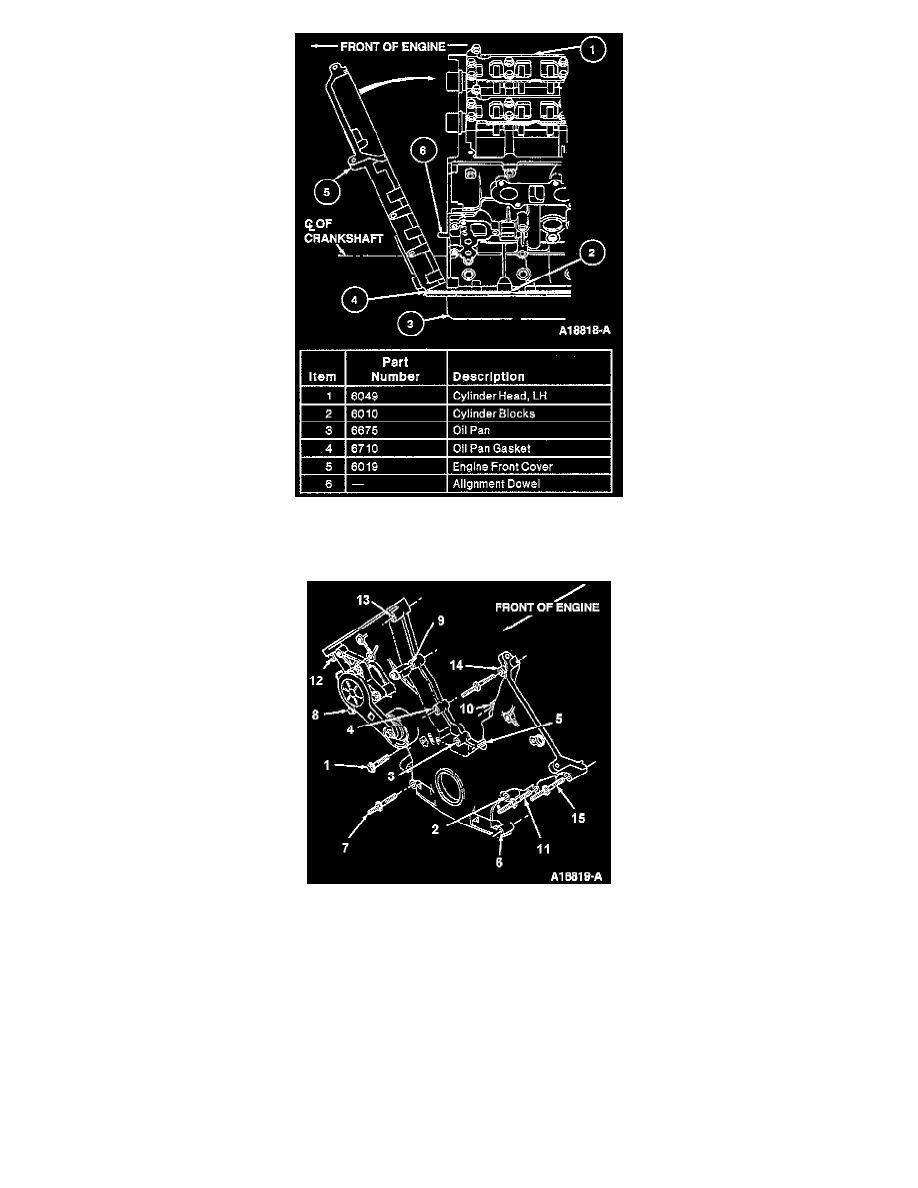
NOTE: Engine front cover must be rolled into place. DO NOT slide on oil pan gasket.
4. Install engine front cover onto engine.
NOTE: Tighten stud bolts and bolts number 6,7,8; 9,10 and 11 in no more than four minutes after applying sealer. Refer to illustration.
5. Install nine stud bolts and six bolts retaining engine front cover to engine. Tighten in sequence in two steps:
Step 1 ... Tighten to 20 Nm (14 ft. lbs.).
Step 2 ... Tighten an additional 60°.
6. Install oil pan-to-engine front cover bolts. Tighten bolts in two steps:
Step 1 ... Tighten to 20 Nm (14 ft. lbs.).
Step 2 ... Tighten an additional 60°.
7. Install accessory drive belt tensioner (6B209) and bolts. Tighten bolts to 20-30 Nm (15-22 ft. lbs.).
8. Install belt idler pulley and bolt. Tighten bolt to 20-30 Nm (15-22 ft. lbs.).
9. Connect fuel charging wiring to the crankshaft position sensor (CKP sensor)(6C315).
10. Position LH ignition coil bracket onto mounting studs and install three retaining nuts and one bolt. Tighten to 20-30 Nm (15-22 ft. lbs.).
11. Position RH ignition coil bracket and install retaining bolts. Tighten to 20-30 Nm (15-22 ft. lbs.).
12. Install power steering pump reservoir to LH ignition coil bracket. Tighten retaining bolts to 8-12 Nm (71-106 inch lbs.).
