
Mustang GT V8-4.6L SOHC VIN X (1998)
Electronic Brake Control Module: Service and Repair
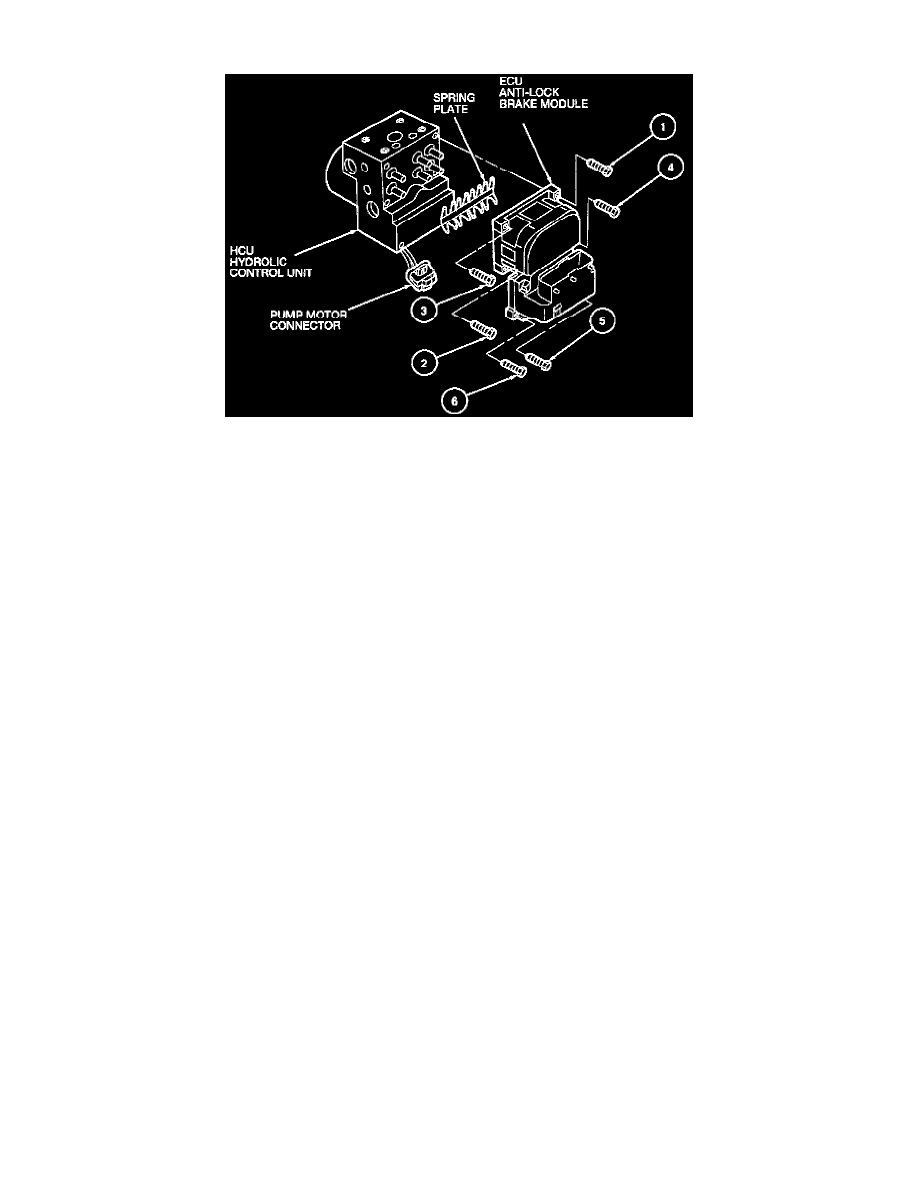
REMOVAL
1. Remove the EHCU.
2. Disconnect the pump motor connector.
3. Remove the six mounting screws.
4. Remove the control module.
INSTALLATION
1. Carefully fit the coils of the control module over the valve bodies of the hydraulic unit.
CAUTION:
-
Position the spring plate for proper installation. Failure to do so can result in the loss of the anti-lock brake system, although normal
braking system will remain.
-
Be sure the sealing surface of the hydraulic unit is clear of all foreign material. Do not use any chemical solvents on the hydraulic unit.
2. Tighten the screws in proper sequence as shown to 2.4-3.4 Nm.
NOTE: Do not reuse the screws, install the new screws that are supplied in the service kit. Hand tighten the six screws into the HCU before
tightening to specification.
3. Remove and retighten the screws to specification as necessary.
NOTE: Check for any gaps between the control module and the hydraulic unit.
4. Connect the pump motor electrical connector.
5. Install the EHCU.
6. Bleed the brake system.