
Mustang GT V8-4.6L SOHC VIN X (1998)
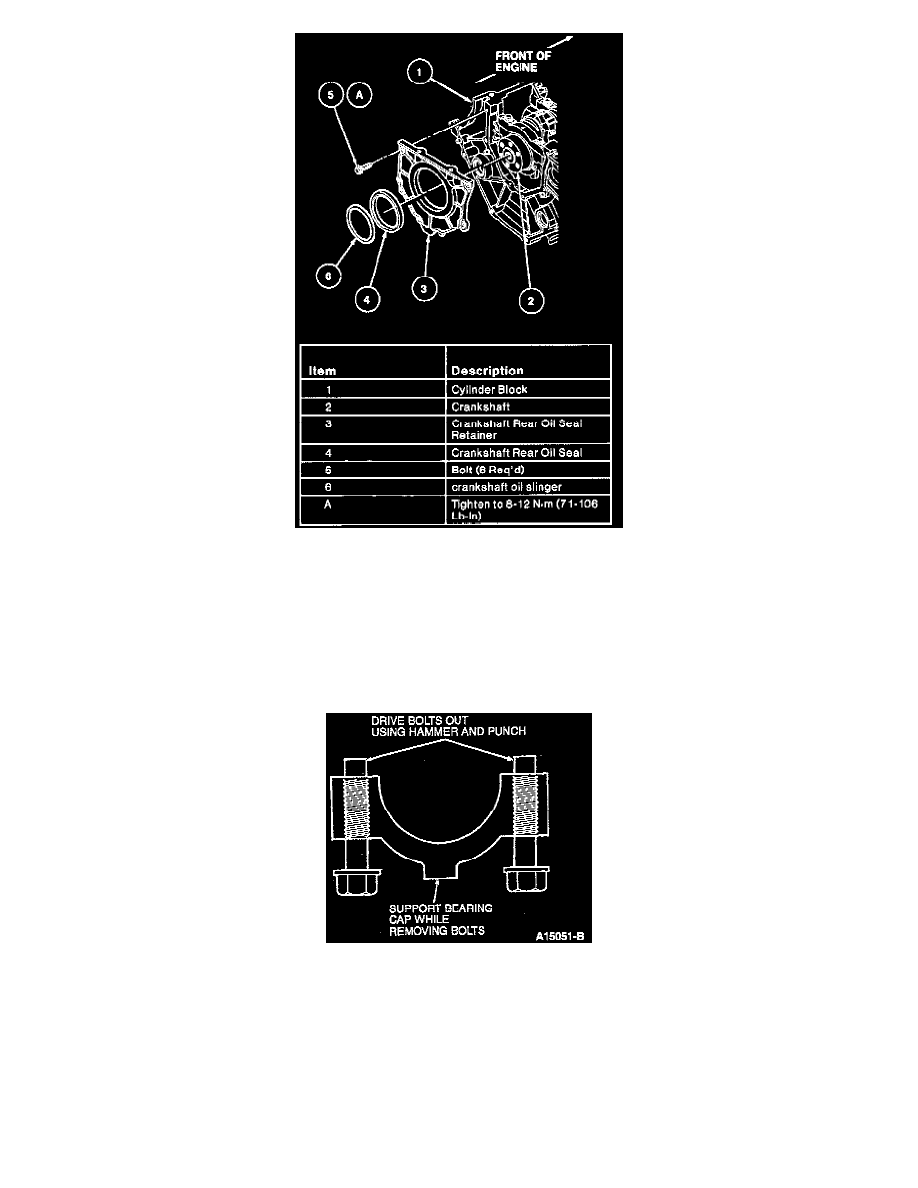
18. Remove crankshaft rear oil seal retainer.
19. Turn crankshaft until connecting rod cap to be removed is accessible. Identify the connecting rods connecting rod caps and connecting rod
bearings for cylinder position.
NOTE: Connecting rods, connecting rod caps and connecting rod bearings should be numbered to make sure they are assembled in their original
positions.
20. Remove the connecting rod cap, lower and upper connecting rod bearing. Keep cap and connecting rod bearings together. Use care to prevent
damage to the bearing and cylinder bore surfaces.
21. Connecting rod bolts are retained in the bolt hole with a light press fit. The connecting rod bolts have been torqued to yield at least twice and must
be discarded. Use a hammer and punch to drive connecting rod bolts from connecting rod cap.
CAUTION: Care should be taken not to damage the cracked rod and cap joint face surfaces. Engine damage may occur.
22. Remove horizontal main bearing cap side bolts from cylinder block.
23. Loosen crankshaft main bearing cap adjusting screws on bearing main caps.
24. Remove bearing main cap retaining bolts. These are torque-to-yield bolts, and should not be reused.