
Mustang GT V8-4.6L SOHC VIN X (1998)
Crankshaft: Testing and Inspection
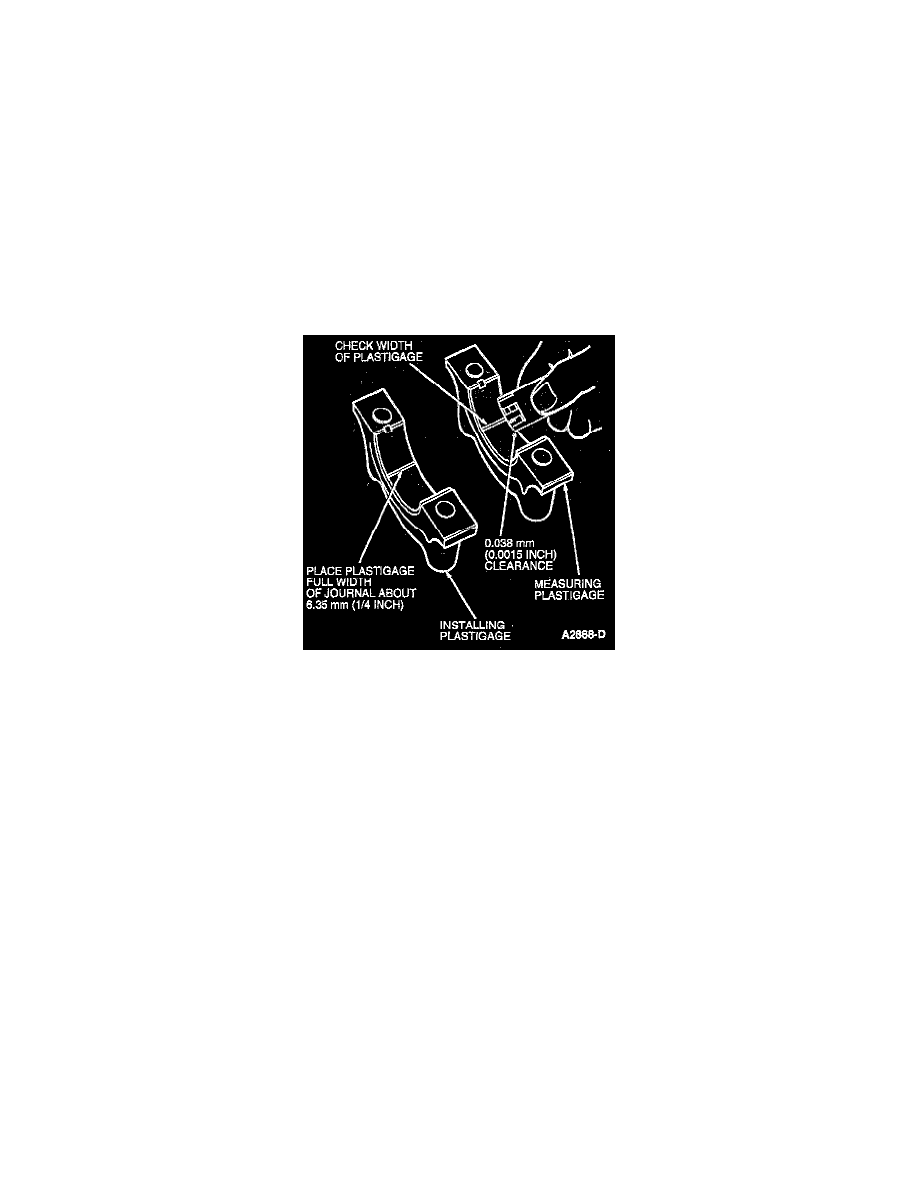
Fitting/Oil Clearance Check
1. Remove intake manifold and valve tappets.
2. Clean crankshaft journals. Inspect journals and thrust faces for nicks, burrs or roughness that would cause premature bearing wear.
3. If fitting crankshaft main bearing in vehicle, position a jack under counterweight adjoining crankshaft main bearing which is being checked.
Support crankshaft with jack so its weight will not compress Plastigage 303-D031 (D81L-6002-B) or equivalent and provide an erroneous reading.
CAUTION: Do not position jack under crankshaft pulley. Crankshaft post damage will result.
4. Place a piece of Plastigage 303-D031 (D81L-6002-B) or equivalent on bearing surface across full width of bearing cup and about 6.35 mm (0.25
inch) off center.
NOTE: Do not turn crankshaft while Plastigage is in place.
5. Install cap and tighten bolts to specification.
6. Remove cap. Using Plastigage scale, check width of Plastigage at widest point to get minimum clearance. Check at narrowest point to get
maximum clearance. Difference between reading is taper of journals.
7. If crankshaft journals are damaged or if bearing clearance exceeds the specified limits, refinish the crank journals to 0.254 mm (0.010 inch)
undersize, and use the appropriate undersize bearings.
8. After bearing has been fitted and cleaned, apply a light coat of clean engine oil meeting Ford specification WSS-M2C153-G to journal and
bearings. Install bearing cap. Tighten cap bolts to specification.
9. Repeat procedure for remaining bearings that require replacement.