
Mustang GT V8-4.6L SOHC VIN X (1998)
Timing Chain: Service and Repair
REMOVAL
1. Remove valve covers, oil pan and engine front cover.
CAUTION: At no time, when the timing chain(s) are removed and the cylinder heads are installed, may the crankshaft and camshafts be rotated.
Failure to follow these directions will result in valve and/or piston damage.
NOTE: Because this is not a free-wheeling engine, if it has jumped time, there will be damage to the valves and pistons and will require the
removal of the cylinder heads. The camshaft sprockets should only be disassembled from the camshafts when one of the components is to be
replaced.
2. Remove crankshaft position sensor pulse wheel.
3. Rotate engine to No.1 Top Dead Center (TDC).
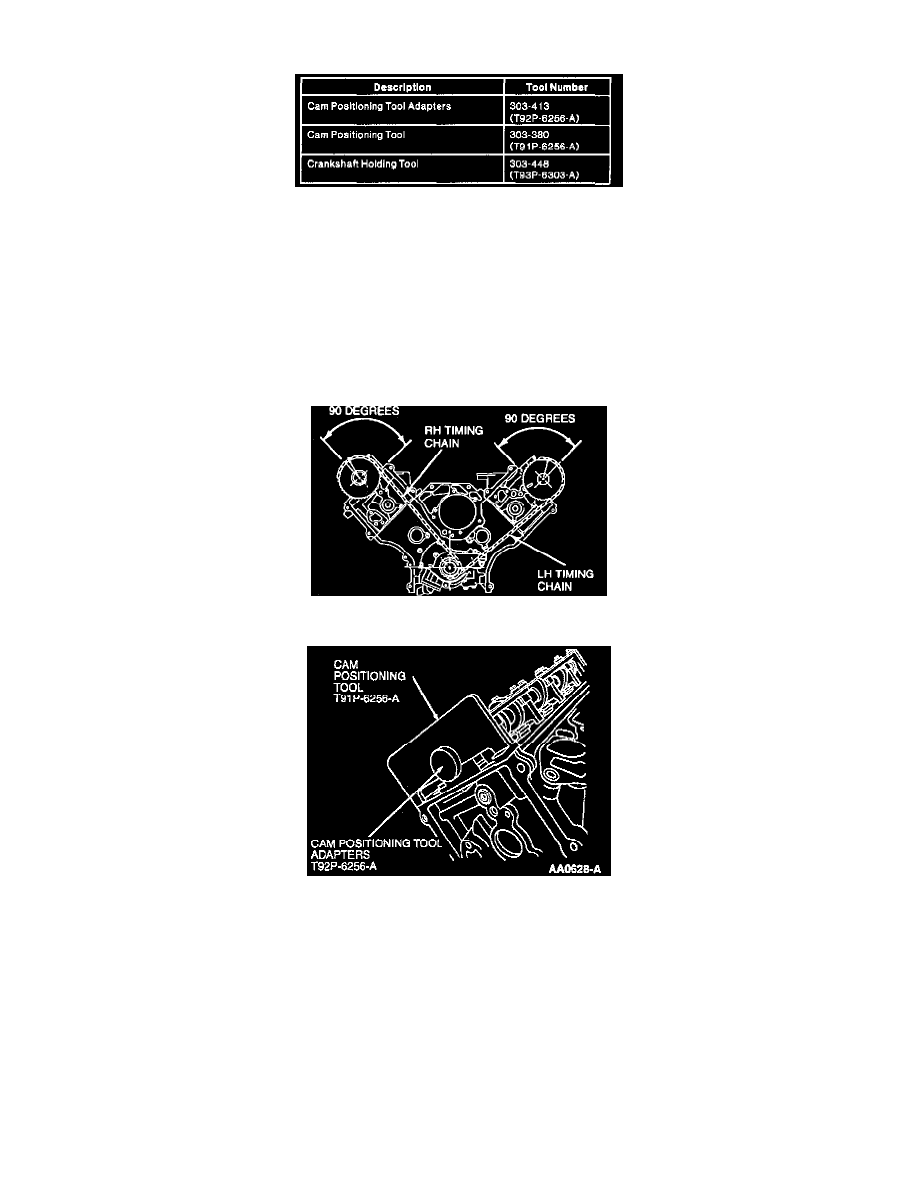
4. Install Cam Positioning Tool Adapters 303-413 (T92P-6256-A) and Cam Positioning Tool 303-380 (T91P-6256-A) on flats of camshafts.
NOTE: Cam Positioning Tool Adapters 303-413 (T92P-6256-A) and Cam Positioning Tool 303-380 (T91P-6256-A) MUST be installed on
camshaft to prevent camshaft from rotating.
5. Remove two bolts retaining RH timing chain tensioner to cylinder head and remove timing chain tensioner.
6. Remove RH timing chain tensioner arm.
7. Remove two bolts retaining RH timing chain guide to cylinder head and remove timing chain guide.
8. Remove RH timing chain from camshaft sprocket and crankshaft sprockets.
9. Remove two bolts retaining LH timing chain tensioner to cylinder head and remove timing chain tensioner.
NOTE: Cam Positioning ToolAdapters303-413 (T92P-6256-A) and Cam Positioning Tool 303-380 (T91P-6256-A) MUST be installed on
camshaft to prevent camshaft from rotating.
10. Remove LH timing chain tensioner arm.