
Mustang GT V8-4.6L SOHC VIN X (1998)
11. Remove two bolts retaining LH timing chain guide to cylinder head and remove timing chain guide.
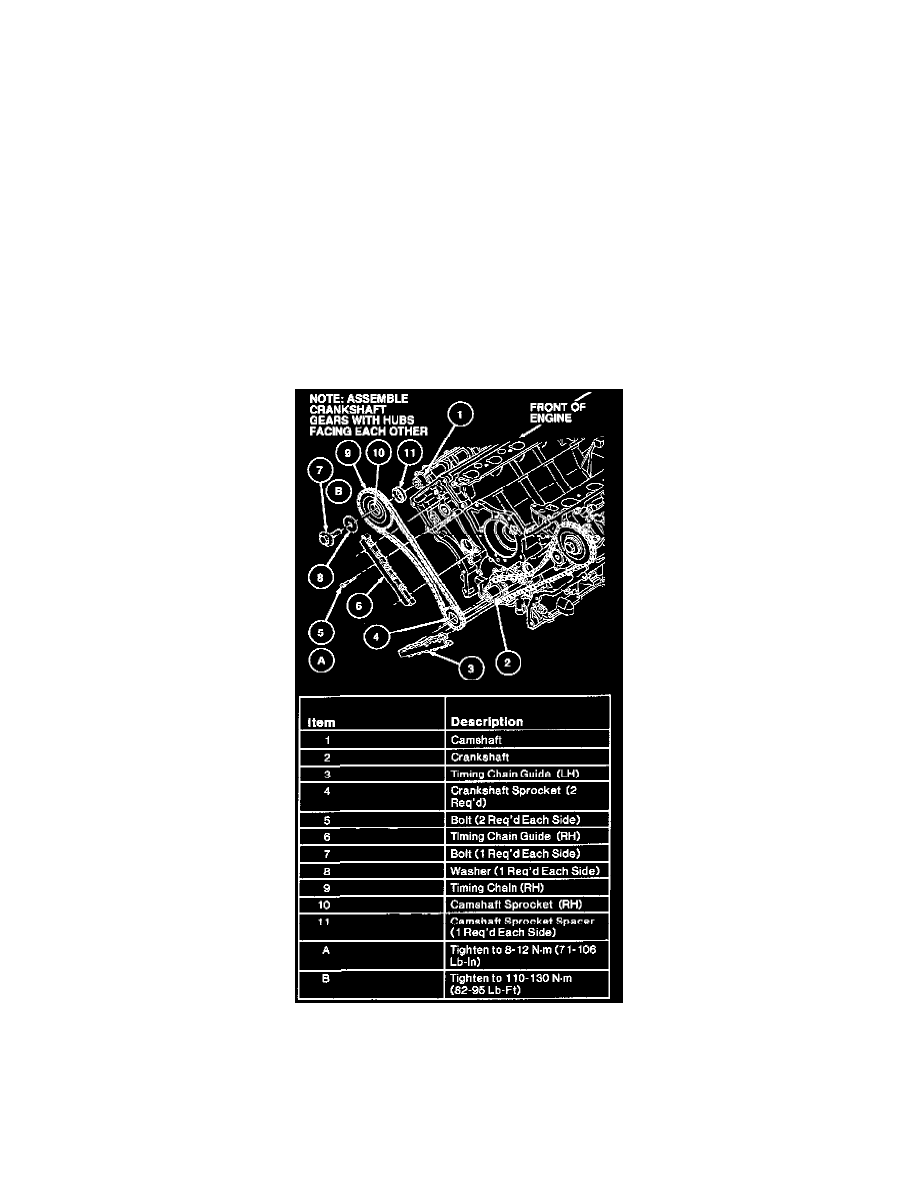
12. Remove LH timing chain from camshaft sprocket and crankshaft sprocket.
13. If necessary, remove camshaft sprockets and crankshaft sprockets.
14. Inspect the plastic running face on timing chain tensioner arms and timing chain guides. If worn or damaged, remove and clean oil pan and oil
pump screen cover and tube.
CAUTION: Do not rotate crankshaft and/or camshafts. Engine damage may occur.
INSTALLATION
1. Install timing chain guides (both sides). Install timing chain guide retaining bolts. Tighten to 8-12 Nm (71-106 in. lbs.).
NOTE:
-
If engine has jumped time, make sure that all repairs to engine components and/or valve train have been made. Then rotate engine
counterclockwise 45 degrees. This will position all pistons below top of deck face. Install cylinder heads.
-
Cam Positioning Tool Adapters 303-413 (T92P-6256-A) and Cam Positioning Tool 303-380 (T91P-6256-A) MUST be installed on camshafts
to prevent camshafts from rotating.
2. If removed, position LH camshaft sprocket spacer and sprocket on camshaft.
3. Install washer and camshaft sprocket retaining bolt. Do not tighten at this time.
4. If removed, position RH camshaft sprocket spacer and sprocket on camshaft.
5. Install washer and camshaft sprocket retaining bolt. Do not tighten at this time.