
Mustang GT V8-4.6L SOHC VIN X (1998)
Accumulator HVAC: Service and Repair
Removal and Installation
SPECIAL SERVICE TOOL(S) REQUIRED
Description
Tool Number
Spring Lock Coupling Disconnect Tool (5/8 Inch)
412-038 (412-038 (T83P-19623-C))
REMOVAL
1. Remove 8 push pins and radiator upper sight shield.
2. Following proper procedures, recover the refrigerant from the A/C system. Observe all safety precautions. See: Service and Repair/Refrigerant
Recovery
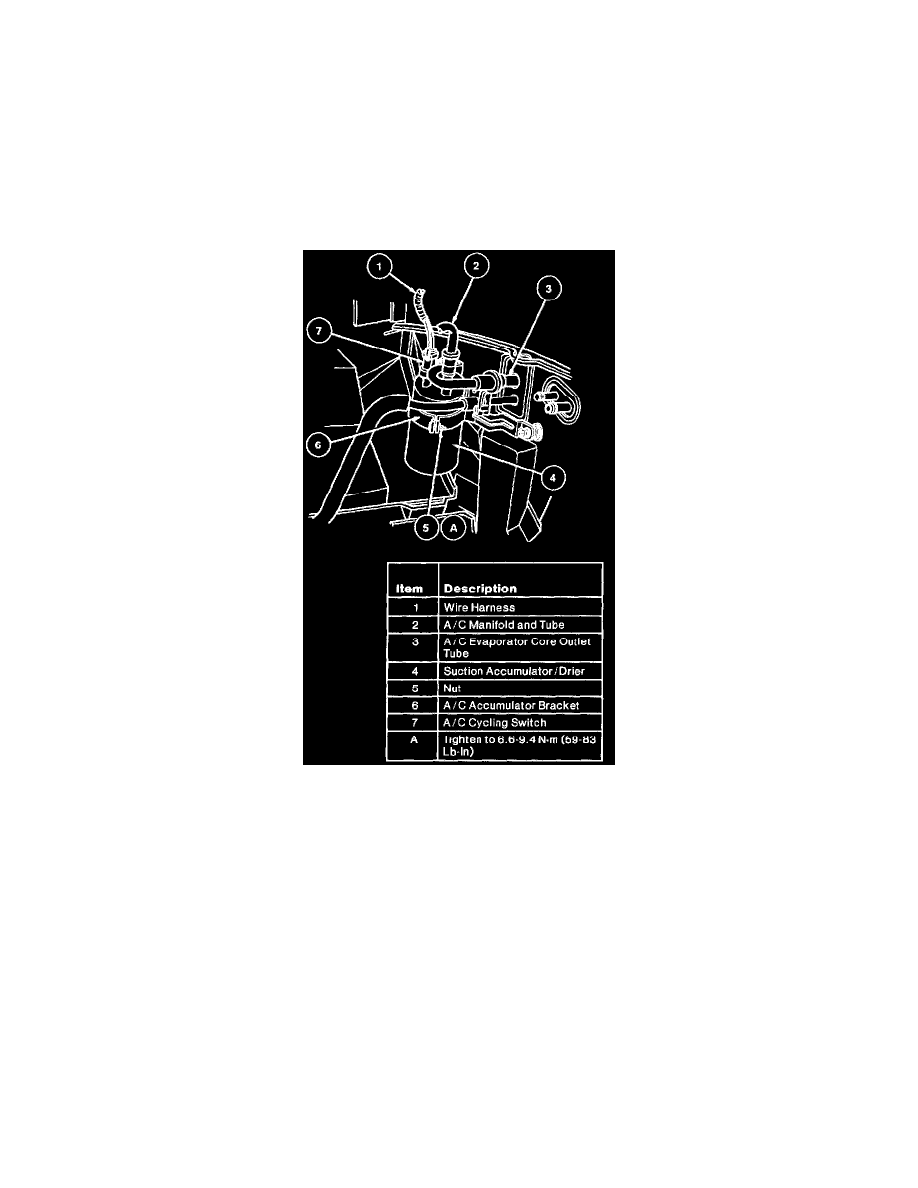
3. Remove A/C cycling switch.
4. Disconnect the A/C manifold and tube at the suction accumulator/drier using 5/8 inch Spring Lock Coupling Disconnect Tool 412-038 (412-038
(T83P-19623-C)) or equivalent. Cap the A/C manifold and tube and suction accumulator/drier to prevent the entrance of dirt and moisture.
5. Remove the nut holding the suction accumulator/drier in the A/C accumulator bracket.
6. Disconnect the suction accumulator/drier inlet tube from the A/C evaporator core outlet tube and remove the suction accumulator/drier.
INSTALLATION
1. Position the suction accumulator/drier into the A/C accumulator bracket.
2. Using new O-rings lubricated with clean Motorcraft YN-12b refrigerant oil or equivalent meeting Ford specification WSH-M1C231-B, connect
the suction accumulator/drier inlet tube to the A/C evaporator core outlet.
3. Install the nut on the A/C accumulator bracket. Tighten nut to 6.6-9.4 N.m (59-83 Lb-In).
4. Using new O-rings seal lubricated with clean Motorcraft YN-12b refrigerant oil or equivalent meeting Ford specification WSH-M1C231-B,
connect the A/C manifold and tube to the suction accumulator/drier.
5. Install the A/C cycling switch and connect wire harness.
6. Leak-test, evacuate and charge the system following the recommended service procedures. Observe all safety precautions. See: Service and
Repair/Evacuation
7. Install radiator upper sight shield.
8. Check the system for proper operation.