
Mustang GT V8-4.6L SOHC VIN X (1998)
2. Following proper procedures, recover refrigerant from A/C system. Observe all safety precautions. See: Heating and Air Conditioning/Service and
Repair/Refrigerant Recovery
3. Disconnect wire harness from intake air temperature sensor and mass air flow sensor.
4. Disconnect crankcase ventilation tube from air cleaner outlet tube.
5. Loosen engine air cleaner tube clamp on air cleaner outlet tube.
6. Remove air cleaner housing.
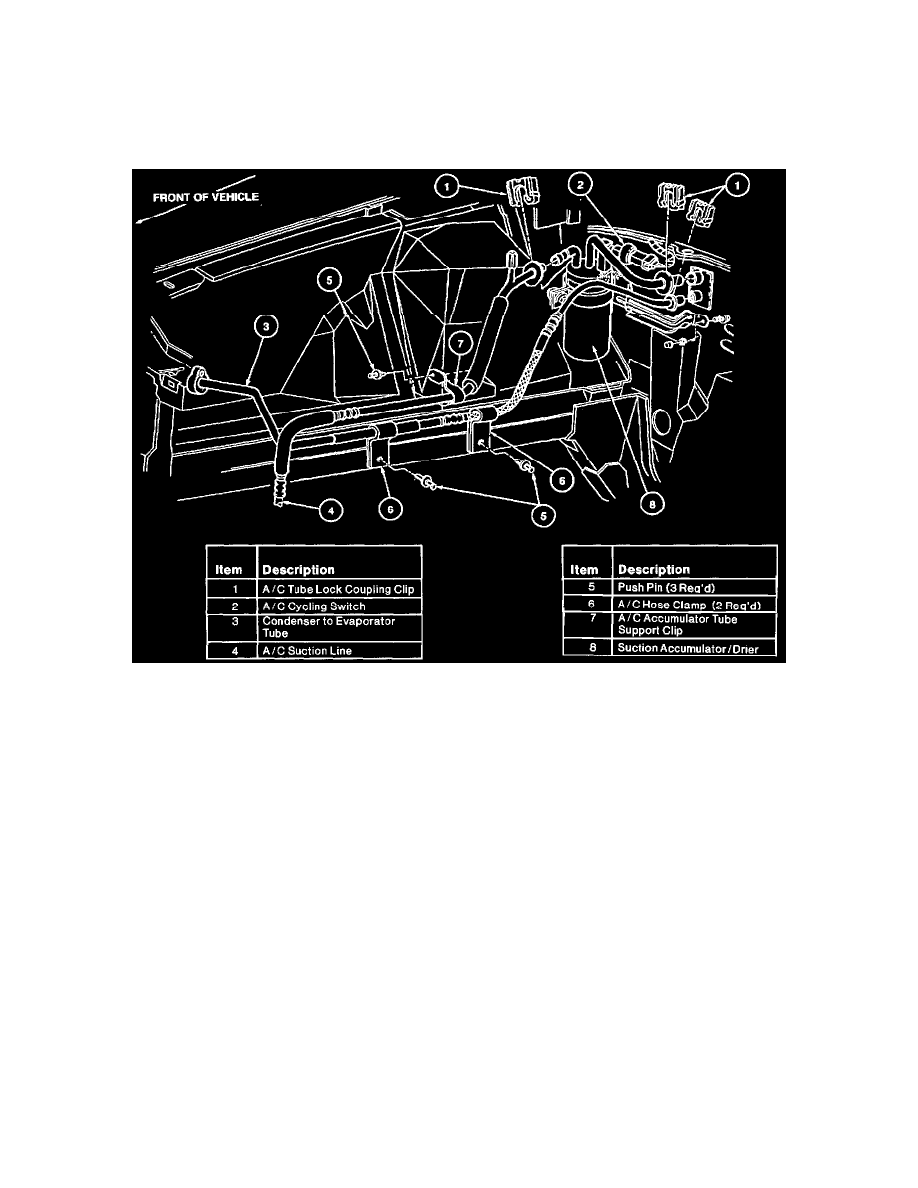
7. Remove push pin from clamp on evaporator to compressor suction line and position evaporator to compressor suction line to improve access to
condenser to evaporator tube.
8. Remove pushpins from two A/C hose clamps.
9. Disconnect condenser to evaporator tube at A/C condenser core. Cap the condenser to evaporator tube and A/C condenser core to prevent the
entrance of dirt and moisture.
10. Disconnect condenser to evaporator tube at A/C evaporator core. Cap the condenser to evaporator tube and A/C evaporator core to prevent the
entrance of dirt and moisture.
11. Remove condenser to evaporator tube from vehicle.
12. Remove A/C hose clamps from condenser to evaporator tube.
INSTALLATION
1. Route new condenser to evaporator tube (and integral A/C evaporator core orifice) with protective caps installed.
2. Remove protective caps and connect new condenser to evaporator tube into system using new O-ring seals lubricated with clean Motorcraft
YN-12b refrigerant oil or equivalent meeting Ford specification WSH-M1C231-B. Connect spring lock coupling. Tighten peanut fitting retaining
nut to 7-9 N.m (62-79 Lb-In).
3. Install two A/C hose clamps with push pins.
4. Install push pin to clamp on evaporator to compressor suction line.
5. Install air cleaner and air cleaner outlet tube by reversing removal procedure. Tighten engine air cleaner tube clamps to 2.3-3.2 N.m (21-28 Lb-In)
. Tighten front fender apron retaining bolt to 7.5-8.5 N.m (67-75 Lb-In).
6. Following proper procedures, leak-test, evacuate and charge refrigerant system. Observe all safety precautions. See: Heating and Air
Conditioning/Service and Repair/Evacuation
7. Install radiator upper sight shield.