
Mustang GT V8-4.6L SOHC VIN X (1998)
5. Disconnect crankcase ventilation tube from air cleaner outlet tube.
6. Loosen engine air cleaner tube clamps on air cleaner outlet tube.
7. Remove air cleaner housing.
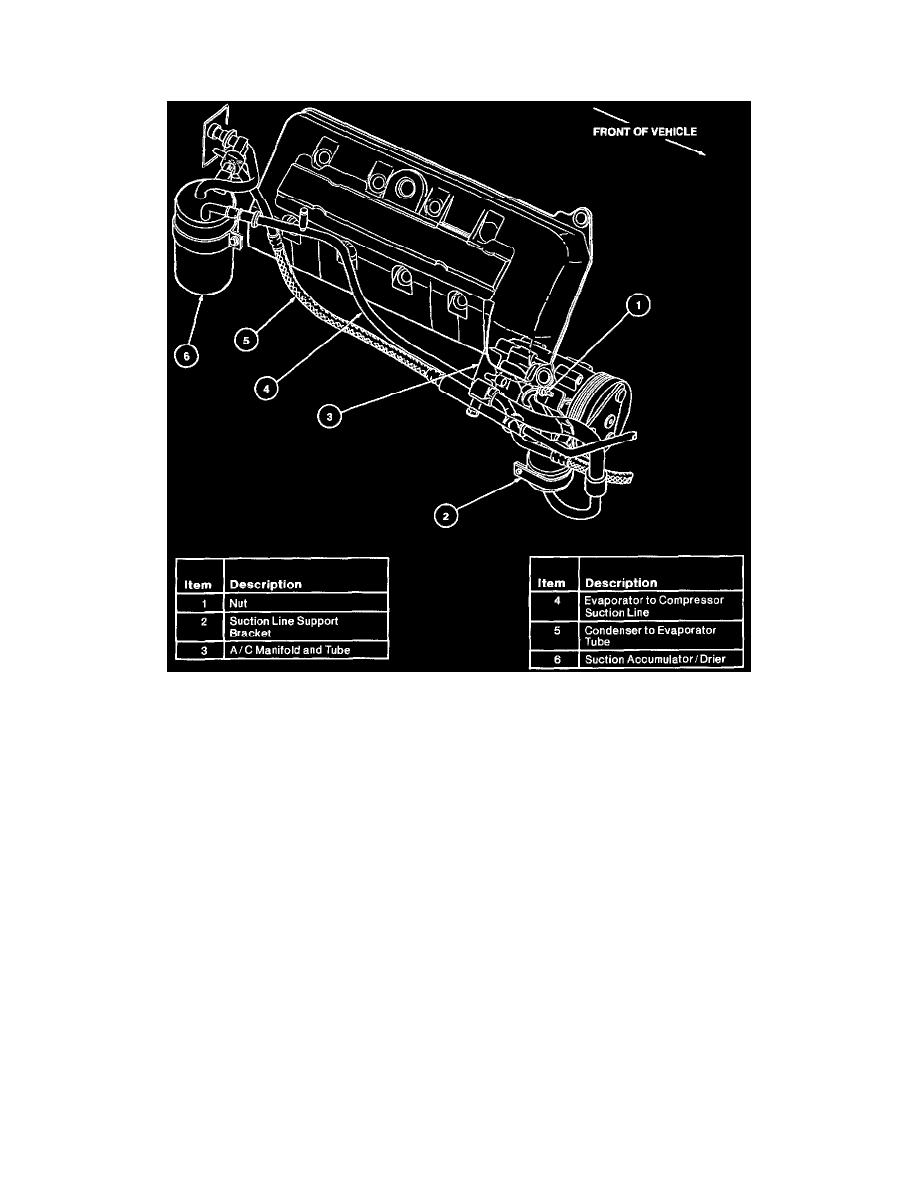
8. Remove push pin from clamp on evaporator to compressor suction line.
9. Disconnect evaporator to compressor suction line using Spring Lock Coupling Disconnect Tool 412-038 (412-038 (T83P-19623-C)) at the A/C
manifold and tube. Cap the evaporator to compressor suction line and A/C manifold and tube to prevent the entrance of dirt and moisture.
10. Disconnect evaporator to compressor suction line using Spring Lock Coupling Disconnect Tool 412-027 (412-027 (T81P-19623-G2)) at the
suction accumulator/drier. Cap the evaporator to compressor suction line and suction accumulator/drier to prevent the entrance of dirt and
moisture.
11. Remove nut retaining suction line support bracket to engine.
12. Remove evaporator to compressor suction line and bracket from vehicle.
13. Remove bracket from evaporator to compressor suction line.
INSTALLATION
1. Install suction line support bracket on evaporator to compressor suction line.
2. Route new evaporator to compressor suction line with protective caps installed.
3. Remove protective caps and connect new evaporator to compressor suction line into system using new O-ring seals lubricated with clean
Motorcraft YN-12b refrigerant oil or equivalent meeting Ford specification WSH-M1C231-B. Connect spring lock coupling.
4. Install suction line support bracket to engine with retaining nut.
5. Following proper procedures, leak-test, evacuate and charge the system. Observe all safety precautions. See: Heating and Air Conditioning/Service
and Repair/Evacuation
6. Install radiator upper sight shield.