
Mustang GT V8-4.6L SOHC VIN X (1998)
Seat Belt: Service and Repair
Service Procedures
Post Collision Inspection
WARNING: ALL SAFETY BELT ASSEMBLIES INCLUDING RETRACTORS, BUCKLES, FRONT SEAT BELT BUCKLE SUPPORT
ASSEMBLIES (SLIDE BAR) (IF EQUIPPED) SHOULDER BELT HEIGHT ADJUSTER (IF EQUIPPED) CHILD SAFETY SEAT TETHER
BRACKET ASSEMBLIES (IF SO EQUIPPED) AND ATTACHING HARDWARE SHOULD BE INSPECTED AFTER ANY COLLISION.
ALL BELT ASSEMBLIES SHOULD BE REPLACED UNLESS A QUALIFIED TECHNICIAN FINDS THE ASSEMBLIES SHOW NO
DAMAGE AND OPERATE PROPERLY. BELT ASSEMBLIES NOT IN USE DURING A COLLISION SHOULD ALSO BE INSPECTED
AND REPLACED IF EITHER DAMAGE OR IMPROPER OPERATION IS NOTED.
The seat and shoulder safety belts are factory-installed in their proper locations. If the belts are removed for any reason, they should be installed. The
7/16 x 20 safety seat belt Torx (R) head anchor bolts should be hand-started and then tightened to 34-46 N.m (25-33 Lb-Ft).
Before installing the new safety belt assembly, the safety belt attaching areas must be inspected for damage and distortion. If the attaching points are
damaged and distorted, the sheet metal must be worked back to its original shape and structural integrity.
Install the new safety belts. Perform Functional Test Procedure. See: Testing and Inspection/Component Tests and General Diagnostics
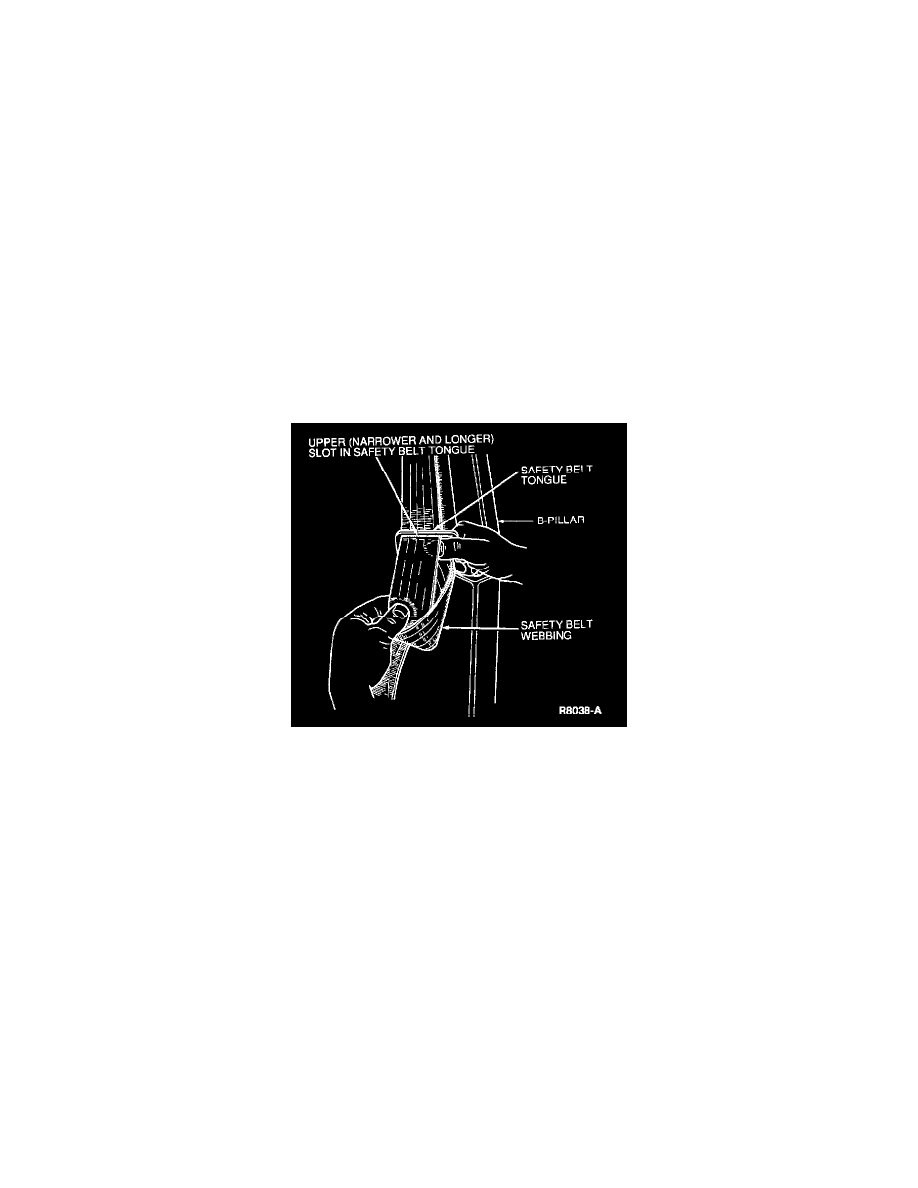
Safety Belt Tongue Rotated on Belt
1. Grasp belt tongue and pull down on belt webbing to form a loop through the upper (narrow and longer) slot in the tongue.
2. Working within the upper slot, rotate and fold belt webbing over itself as required to remove the twist.
3. Pull the excess belt webbing back through the upper slot in the tongue.