
Mustang GT V8-4.6L SOHC VIN X (1998)
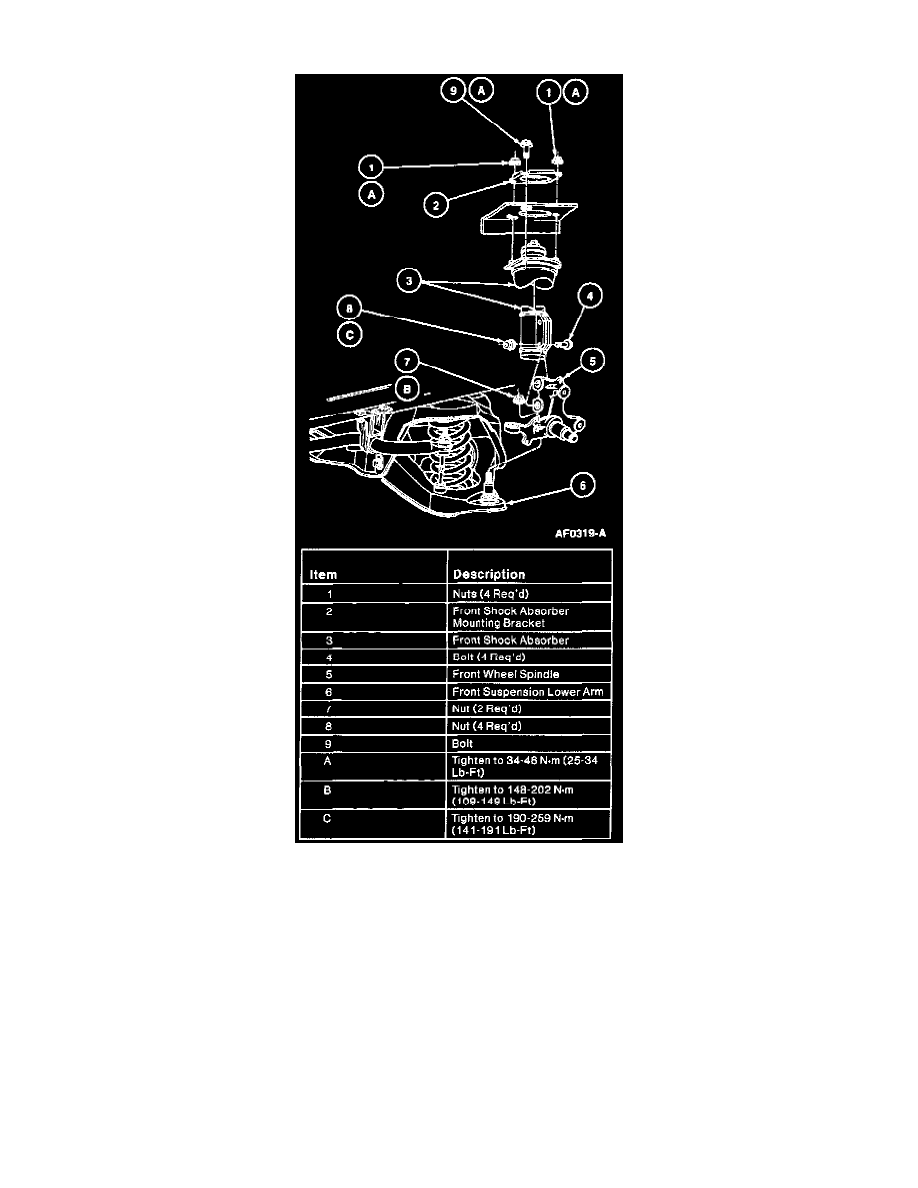
Spindle: Service and Repair
REMOVAL
1. Raise the front of vehicle, and position safety stands under both sides at the jacking pads just behind the front suspension lower arms.
2. Remove wheel and tire assembly. If equipped, remove front brake anti-lock sensor from front wheel spindle.
3. Remove disc brake caliper, front disc brake rotor and front disc brake rotor shield. Remove wheel hub.
4. Remove front stabilizer bar from front suspension lower arm assembly.
5. Remove tie rod end from front wheel spindle with Tie Rod End Remover 211-001 or equivalent.
6. Loosen ball joint nut one or two turns.
CAUTION: To prevent damage to the front suspension lower arm do not remove the nut from the ball joint stud at this time.
7. Tap spindle boss sharply to relieve stud pressure. Take care to avoid damaging ball joint boot seal.
8. Place a floor jack under front suspension lower arm, compress front coil spring. Remove stud nut. Remove front anti-lock sensor bracket. Save nut
for installation.
9. Remove and discard the two bolts and nuts retaining front wheel spindle to the front shock absorber. Compress front shock absorber until working
clearance is obtained.
10. Remove the front wheel spindle.