
Probe V6-153 2.5L DOHC (1994)
7. Remove Fuel Pressure Regulator Control (FPRC) solenoid attaching bolt from right side of air cleaner and position solenoid out of the way.
8. Remove air cleaner attaching nuts and bolts; lift assembly from vehicle.
Distributor R&R
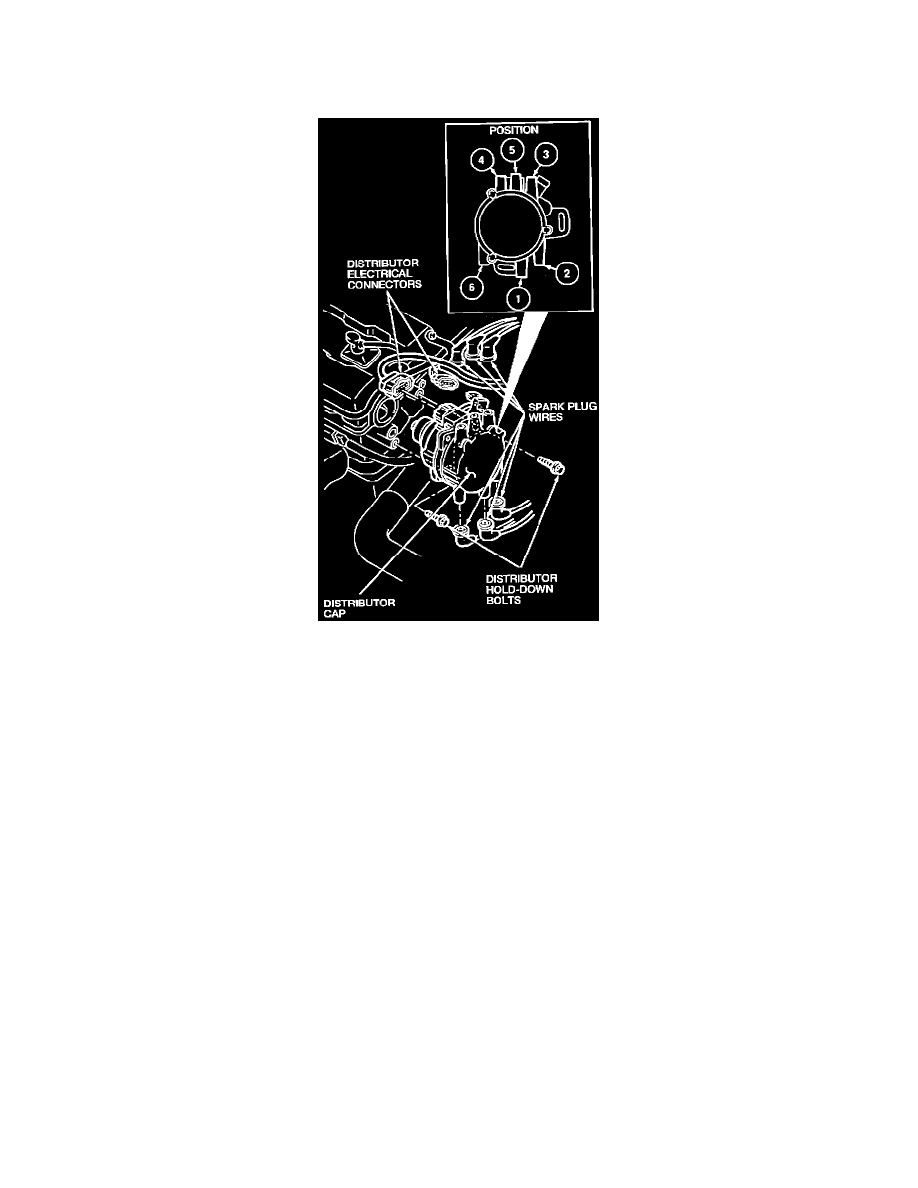
9. Disconnect plug wires from distributor cap.
10. Unplug distributor electrical connectors.
11. Mark distributor and cylinder head for installation reference.
12. Remove distributor hold-down bolts; remove distributor.
INSTALLATION
NOTE: One distributor shaft tang is larger than the other. The distributor can only be installed in one position.
1. Align distributor shaft to camshaft end and slide distributor into position.
2. Install hold-down bolts but do not tighten completely.
3. Plug in electrical connectors. Attach plug wires to distributor cap.
4. Install air cleaner assembly and tighten fasteners:
Torque To:
19-25 Nm (14-18 ft lb)
5. Install FPRC solenoid to right side of air cleaner. Connect canister vacuum hose to clip at front of air cleaner.
6. Plug in VAF meter electrical connector. Connect air cleaner to intake manifold tube to VAF and tighten clamp.
7. Align intake tube and install it to air cleaner. Loosen spring clamp and slide into position.