
Probe V6-153 2.5L DOHC (1994)
HAVE THE MODIFIED SEPARATOR PLATE.
4.
Remove oil pipe, oil baffle, 2-3 shift solenoid and 3-4 shift solenoid.
NOTE:
THE MAIN CONTROL AND BOLTS HAVE LETTERS WHICH INDICATE THE PROPER POSITION.
5.
Remove bolts F, G, and K as shown in Figure 2.
6.
Carefully remove the rear control valve body and rear control separator plate gasket.
NOTE:
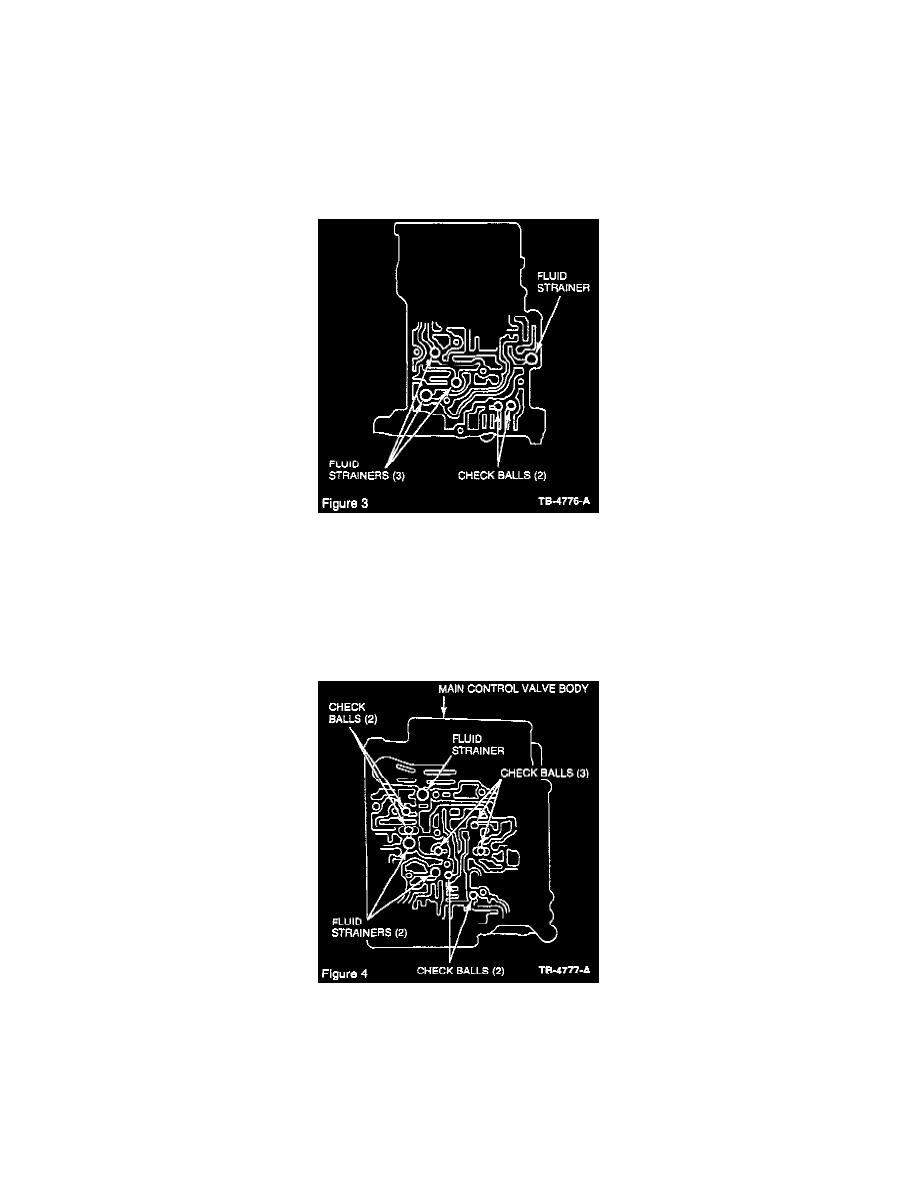
THE TWO (2) CHECK BALLS AND FOUR (4) STRAINERS ARE LOCATED UNDER THE CONTROL. USE CARE TO MAKE SURE
STRAINERS AND CHECK BALLS ARE NOT MISPLACED (FIGURE 3).
7.
Memorize location of the two (2) balls and the four (4) fluid strainers (Figure 3).
8.
Lightly tap on separator plate surface to make sure check balls stay in the main control and then remove the separator plate and main control
separator plate gasket.
9.
Clean the surface of the main control valve body and check the location of the seven (7) check balls and three (3) fluid strainers (Figure 4).
10.
Install main control Separator Plate Gasket (F32Z-70155-AA), Separator Plate (-7A008-), and rear control Separator Plate Gasket
(F32Z-70155-BA) to main control valve body.
11.
Install the two (2) check balls and the four (4) fluid strainers in the same position as before disassembling (Figure 3).
12.
Clean and install rear control valve body and torque bolts to 6.5-7.8 N.m (58-69 lb-in).