
Probe V6-182 3.0L (1990)
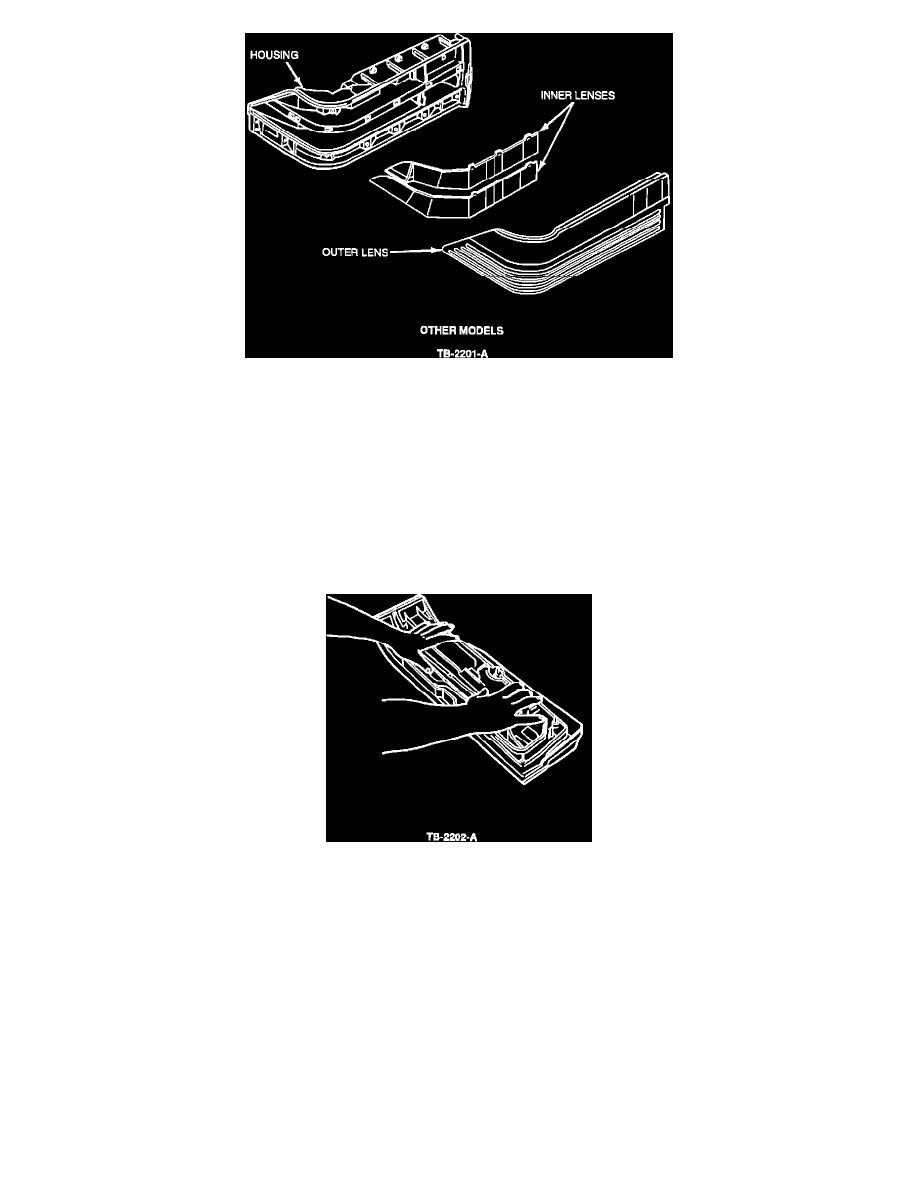
Figure 5
NOTE:
WHILE HEATING THE LAMP HOUSING, REMOVE THE GLUE/SEALER BEFORE THE SEALER HARDENS.
6.
With the outer lens removed from the lamp housing, remove the damaged inner pieces from the lamp housing, Figures 4 and 5.
NOTE:
THERE ARE 5 INTERNAL LAMP PARTS FOR 1990-91 GT MODELS. THERE ARE 3 INTERNAL LAMP PARTS FOR 1990-91 GL/LX
MODELS.
INSTALLATION PROCEDURE
1.
Refer to the parts block and Figures 4 or 5 for correct parts usage depending on model.
Figure 6
2.
Apply silicone sealer (D6AZ-19562-AA) to the housing groove, then firmly press the new outer lens against the housing to allow the sealer to
bond together, Figure 6.
NOTE: IF MOISTURE CONDENSATION WAS A CONCERN, SPECIAL ATTENTION MUST BE GIVEN TO THE SEALING OF THE LENS
COVER TO THE LAMP HOUSING TO PROPERLY SEAL THE ASSEMBLY. USE OF THE DOUBLE GASKET AS NOTED IN TSB
90-8-12 WILL PROVIDE ADDITIONAL SEALING OF THE LAMP TO THE VEHICLE BODY.
3.
Position the upper and lower combination lens pieces and secure them with the attaching screws.