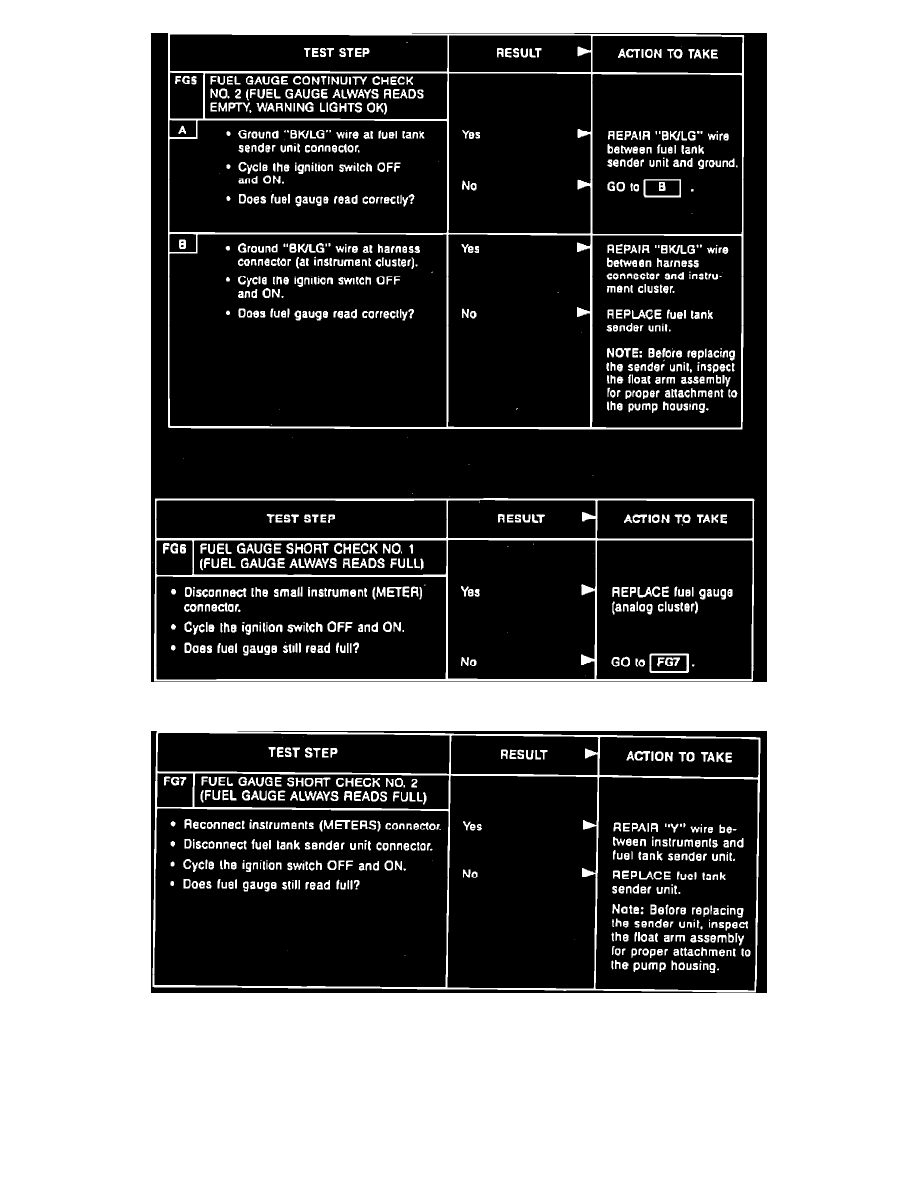
Fig. 4 Fuel Indicating System Diagnosis (Part 3 Of 6)
Fig. 4 Fuel Indicating System Diagnosis (Part 4 Of 6)