
Probe V6-182 3.0L (1990)
5.
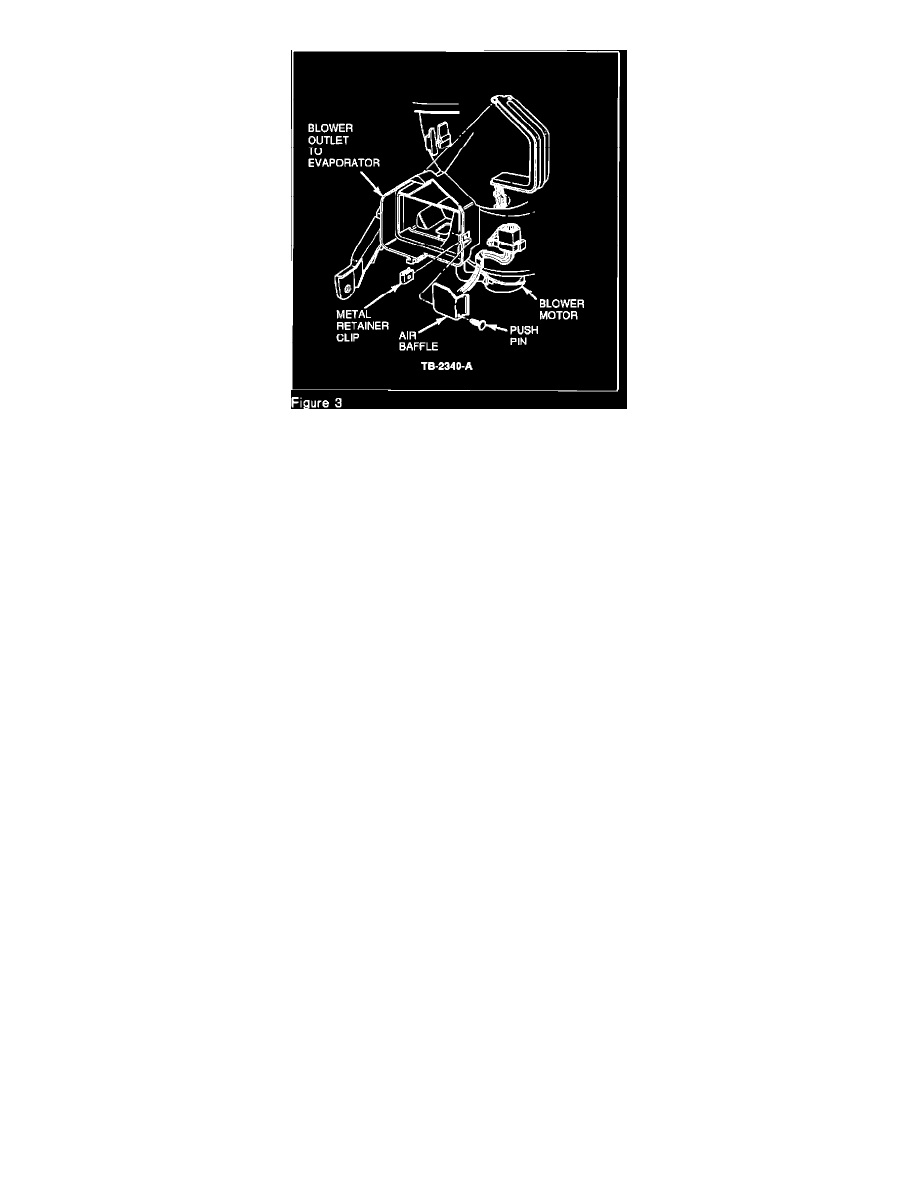
Refer to Figure 3 for the installation location of the special air baffle (F12Z-18A384-A).
6.
Unhook the evaporator to blower motor housing air duct band and slide it out from the two housings. This will expose the slot opening where the
baffle will be installed.
7.
Install the baffle by sliding it into the gap between the two housings. The baffle tab must rest flat and be toward the blower motor housing.
a.
Align the hole in the baffle with the metal retainer clip in the blower motor housing.
NOTE:
THE METAL RETAINER CLIP IS ONLY USED ON MANUAL A/C. IF A PROBE WITH ELECTRONIC A/C IS INVOLVED, INSTALL A
METAL RETAINER CLIP (E92Z-14A163-D) IN THE BLOWER MOTOR HOUSING. THEN, INSTALL THE BAFFLE TO THE BLOWER
MOTOR HOUSING.
b.
Insert a plastic push pin (F1CZ-5831172-B) through the baffle and retainer clip to secure it to the blower motor housing, Figure 3.
8.
Install the air duct band, making sure it covers and secures the tab of the baffle. This will prevent the baffle from rotating or moving out of
position.
9.
Activate the A/C system.
a.
Start the engine.
b.
Depress the A/C button.
c.
Place the air control in the "FRESH" position.
d.
Turn the blower to the Number 1 position.
e.
Leave the vehicle doors open.
f.
Allow the engine to run for about 10 minutes.
10.
After about 10 minutes, proceed as follows:
a.
Turn the blower motor to the highest position.
NOTE:
IF THE AIR CONTROL CABLE "WALKS" OR MOVES FROM FRESH TO RECIRCULATE (FROM RIGHT TO LEFT), REFER TO TSB 91-17-3
FOR THE CABLE ADJUSTMENT PROCEDURES.
b.
Inspect for moisture leaking or dripping from the blower motor housing to the evaporator housing joint and/or from the evaporator to heater