
Probe V6-182 3.0L (1990)
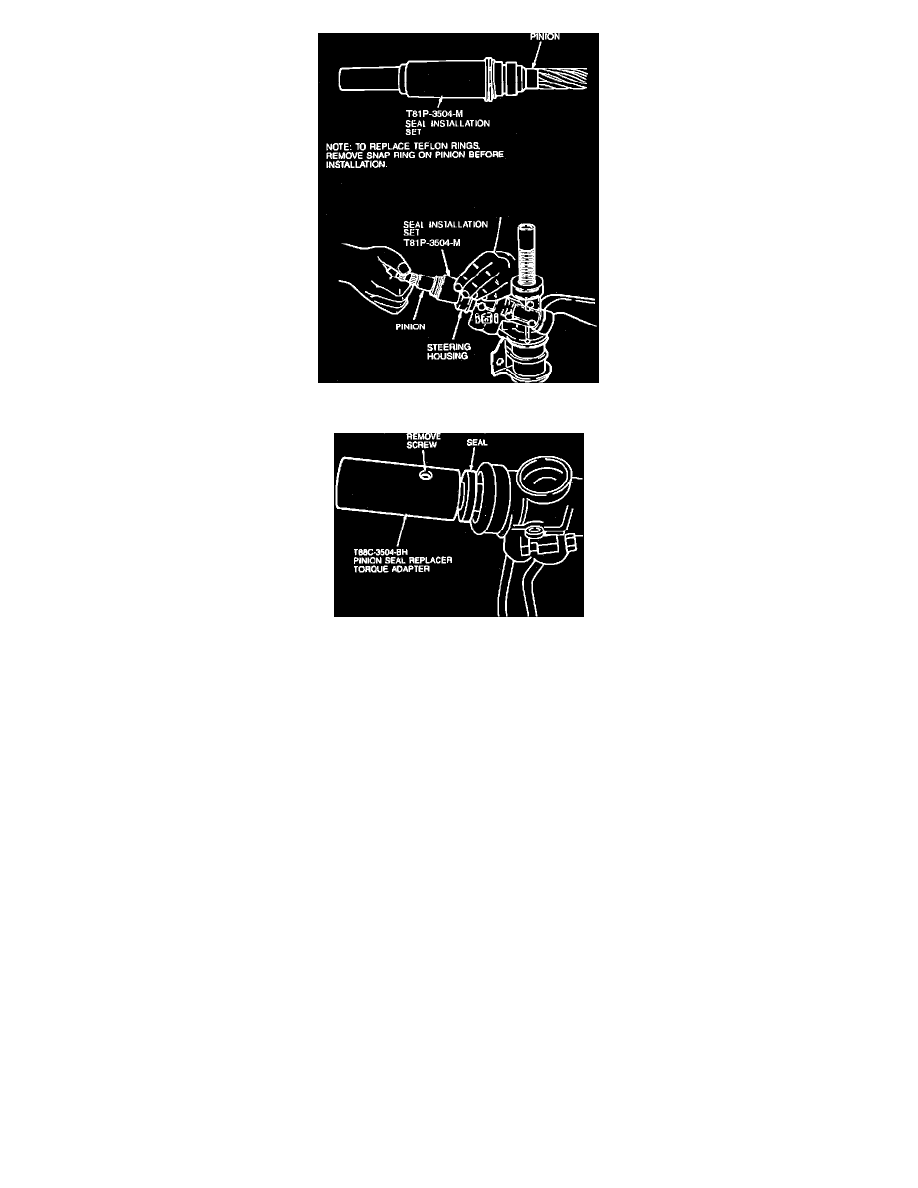
Fig. 6 Installing Seals & Pinion Into Housing
Fig. 7 Installing Upper Seal
9.
Using seal installation set No. T81P-3504-M, install three teflon seals onto the pinion, Fig. 6.
10.
Using set No. T81P-3504-M, install pinion into steering housing.
11.
Install upper pinion bearing.
12.
Install input shaft seal protector tool No. T81P-3504-P, then install upper pinion seal into steering housing.
13.
Remove screw from torque adapter tool No. T88C-3504-BH, then use tool to seat upper seal, Fig. 7.
14.
Install pinion snap ring. Ensure snap ring is fully seated in groove.
15.
Using tool No. T88C-3504-BH to hold pinion, install pinion locknut and tighten to specifications.
16.
Apply suitable thread sealer to housing cover, then install housing cover and tighten to specifications.
17.
Using a suitable center punch, stake housing cover in place.
18.
Install pressure pad, spring and adjust cover.
19.
Using yoke torque gauge tool No. T88C-3504-AH, torque adjust cover to 7.2 ft. lbs., then loosen adjust cover and torque to 3.6 ft. lbs., loosen
adjust cover 45°.
20.
Using pinion torque adapter tool No. T88C-3504-BH and a suitable inch lb. torque wrench, measure pinion torque. Pinion torque should measure
88.5-123.9 inch lbs., if torque is not within specifications repeat step 19 as necessary.
21.
Install adjust cover locknut.
22.
Using yoke locknut wrench tool No. T88C-3504-KH, tighten locknut to specifications.
23.
Using a 30mm crowfoot wrench, install tie rod assembly into steering rack and tighten to specifications.
24.
Install roll pin.
25.
Install two hydraulic lines and routing clamp, then install clamp screw and tighten securely.
26.
Install two remaining hydraulic lines, fitting protector and remaining clamp on steering housing.