ford Workshop Repair Guides

Ford Workshop Service and Repair Manuals

303-06 Starting System > < Accessory Drive Belt
Accessory Drive - Accessory Drive Puma 1998 (06/1997-12/2001)
Diagnosis and Testing

Inspection and Verification

  1. Verify the customer concern.
  1. Visually inspect for obvious signs of mechanical damage.

Visual Inspection Chart

Mechanical
  • Damaged or contaminated accessory drive belt
  • Damaged or contaminated pulley(s)
  • Incorrect accessory drive belt
  • Incorrect fitment of the accessory drive belt
  • Accessory drive belt tensioner
  • Accessory drive belt idler pulley
  • Generator
  • Power steering pump
  • Power steering pump leakage
  • Air conditioning (A/C) compressor
  • Pulley(s)
  • Loose hardware
  1. If an obvious cause for an observed or reported concern is found, correct the cause (if possible) before proceeding to the next step.

Accessory Drive Belt Concerns

CAUTION:
CAUTION:Do not lubricate the accessory drive belt, accessory drive belt tensioner or idler pulley(s) as potential damage to the accessory drive belt material construction, accessory drive belt tensioner damping mechanism, accessory drive belt tensioner pulley bearing and idler pulley(s) bearing may occur.

Cracking

Accessory drive belts are made from rubber which hardens with time and can develop cracks. As the accessory drive belt runs on the back of some of the pulleys, the cracks are opened up. Small cracks are not considered to be a failure of the accessory drive belt. Only if the crack is deep enough to reach the bottom of the groove to expose the cord or any chunks are found to be missing from the accessory drive belt, is the accessory drive belt condition considered to be unacceptable.

  1. Check the accessory drive belt for cracks. If the damage exceeds the acceptable limit, install a new accessory drive belt.
  • REFER to: Accessory Drive Belt (303-05 Accessory Drive, Removal and Installation).

Chunking

Chunking describes the condition where long lengths of rubber become detached from the ribs of the accessory drive belt. This is considered to be a failure of the accessory drive belt.

  1. Check the accessory drive belt for damage. If any chunks are found to be missing, install a new accessory drive belt.
  • REFER to: Accessory Drive Belt (303-05 Accessory Drive, Removal and Installation).

Pilling

Pilling is dust that forms in between the ribs of the accessory drive belt from rubber that is worn off the accessory drive belt when it is new. There may also be loose particles left on the accessory drive belt during the manufacturing process. These are worn off and form into small balls of rubber that then get trapped in the grooves of the accessory drive belt. This condition will usually clear itself within 4800 km - 8000 km (3000 miles - 5000 miles) of normal driving.

  1. Check the accessory drive belt for pilling. The condition of the accessory drive belt should be compared against the illustration.
    1. Small scattered pills. Not considered a concern. No action required.
    1. Small scattered pills. Not considered a concern. No action required.
    1. Longer pills up to 50% of the rib height. Possible noise concern. INSTALL a new accessory drive belt if noise is apparent.
      REFER to: Accessory Drive Belt (303-05 Accessory Drive, Removal and Installation).
    1. Longer pills up to 50% of the rib height. Possible noise concern. INSTALL a new accessory drive belt if noise is apparent.
      REFER to: Accessory Drive Belt (303-05 Accessory Drive, Removal and Installation).
    1. Heavy deposits in the grooves. Possible noise and stability concern. INSTALL a new accessory drive belt.
      REFER to: Accessory Drive Belt (303-05 Accessory Drive, Removal and Installation).
    1. Heavy deposits in the grooves. Possible noise and stability concern. INSTALL a new accessory drive belt.
      REFER to: Accessory Drive Belt (303-05 Accessory Drive, Removal and Installation).

Fraying - Vehicles without accessory drive belt tensioner built up to 02/2003

Due to the manufacturing process, the accessory drive belt edge may appear frayed, but this frayed appearance does not necessarily affect the durability or performance of the accessory drive belt. If a concern is raised during a service or repair over the level of fraying, the condition of the accessory drive belt should be compared against the illustrations.

  1. Check the accessory drive belt for fraying.
    1. No fraying (new accessory drive belt). Not considered a concern. No action required.
    1. Fraying just starting. Not considered a concern. No action required.
    1. Slight fraying. Not considered a concern. No action required.
    1. High amount of fraying without cord cuts. INSTALL a new accessory drive belt.
      REFER to: Accessory Drive Belt (303-05 Accessory Drive, Removal and Installation).
    1. High amount of fraying with cord cuts. INSTALL a new accessory drive belt.
      REFER to: Accessory Drive Belt (303-05 Accessory Drive, Removal and Installation).

Incorrect fitment

Accessory drive belt noise can be generated by the accessory drive belt being incorrectly fitted on the pulley as shown in the following illustration. Make sure that all the V grooves on the accessory drive belt contact correctly with the pulley.

  1. If the cause is not visually evident, verify the symptom and refer to the Symptom Chart.

Symptom Chart

Symptom Chart

Symptom Possible Sources Action
Accessory drive belt noise
*
Accessory drive system - Vehicles with accessory drive belt tensioner
*
CHECK the system with the engine running and the accessory drive belt removed (only run the engine for a very short period). If a noise is apparent, the cause is not the accessory drive system. If a noise is not apparent, the cause is the accessory drive system. CHECK where the noise is coming from. Use a stethoscope or other listening device to determine the source of the noise. INSTALL new components as necessary. TEST the system for normal operation.
*
Accessory drive system - Vehicles without accessory drive belt tensioner
*
Use a stethoscope or other listening device to determine the source of the noise. INSTALL new components as necessary. TEST the system for normal operation.
*
Accessory drive belt incorrectly installed.
*
CHECK the accessory drive belt is correctly installed in the pulley grooves. INSTALL a new accessory drive belt as necessary.
REFER to: Accessory Drive Belt (303-05 Accessory Drive, Removal and Installation).
TEST the system for normal operation.
*
Pulley(s).
*
CHECK the pulley(s) for damage, freedom of rotation, stone entrapment and alignment. INSTALL new components as necessary. TEST the system for normal operation.
*
Lubricant or other contamination.
*
CHECK the accessory drive belt for contamination or damage. RECTIFY the source of the leak and INSTALL a new accessory drive belt.
REFER to: Accessory Drive Belt (303-05 Accessory Drive, Removal and Installation).
TEST the system for normal operation.
NOTE:
NOTE:Squeal is defined as a continuous shriek, most noticeable when the engine is being accelerated or with electrical load.
Accessory drive belt squeal
*
Accessory drive belt tensioner worn, damaged or contaminated with oil.
*
CHECK the accessory drive belt tensioner for correct operation, damage or contamination. REFER to the Accessory Drive Belt Tensioner Component Test in this procedure. INSTALL a new accessory drive belt tensioner as necessary. TEST the system for normal operation.
NOTE:
NOTE:Whine is defined as a continuous noise at the same frequency, generally associated with plastic pulleys.
Accessory drive belt whine
*
Poor surface finish on accessory drive belt idler pulley flat surface(s).
*
REMOVE the accessory drive belt.
REFER to: Accessory Drive Belt (303-05 Accessory Drive, Removal and Installation).
INSPECT the idler pulley(s) for surface finish. INSTALL a new idler pulley(s) as necessary. TEST the system for normal operation.
*
Accessory drive belt idler pulley bearing failure.
*
REMOVE the accessory drive belt.
REFER to: Accessory Drive Belt (303-05 Accessory Drive, Removal and Installation).
INSPECT the idler pulley(s) for smooth rotation. INSTALL a new idler pulley(s) as necessary. TEST the system for normal operation.
NOTE:
NOTE:Chirp is defined as a twittering noise, often intermittent
Accessory drive belt chirp
*
Pulley misalignment (usually evident at idle).
*
CHECK that the accessory drive belt is running centrally on the flat pulleys. TEST the system for normal operation.
*
CHECK the pulleys for excessive end float and bent flanges.
*
With the engine running at idle, use a stethoscope to identify the source of the noise. INSTALL new components as necessary. TEST the system for normal operation.
NOTE:
NOTE:Rattle is defined as a metallic knocking noise
Accessory drive belt rattle
*
Accessory drive belt tensioner hitting the end stops.
*
CHECK the accessory drive belt tensioner for correct operation or damage. REFER to the Accessory Drive Belt Tensioner Component Test in this procedure. INSTALL a new accessory drive belt tensioner as necessary. TEST the system for normal operation.
*
Loose components or hardware.
*
CHECK the components or hardware for correct installation and tighten as necessary. TEST the system for normal operation.
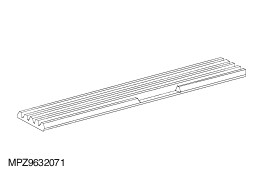
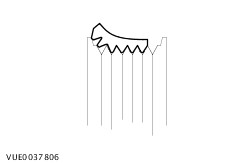
Accessory drive belt fraying
*
Accessory drive belt.
*
Pulley(s).
*
CHECK the extent of the fraying by referring to the illustrations shown in the Visual Inspection section. Only INSTALL a new belt if the fraying is within the criteria quoted in the Visual Inspection section. TEST the system for normal operation.
*
CHECK the pulley(s) for damage, freedom of rotation and alignment. INSTALL new components as necessary. TEST the system for normal operation.

Component Tests

Accessory Drive Belt Tensioner - Static Check

The accessory drive belt tensioner may be checked statically as follows:

  1. Inspect the area surrounding the accessory drive belt tensioner for lubricant or other contamination. Rectify any leaks before installing a new accessory drive belt tensioner. If the accessory drive belt tensioner is contaminated, do not attempt to clean it as the damping mechanism inside may be damaged. INSTALL a new accessory drive belt tensioner as necessary. TEST the system for normal operation.
  1. Detach the accessory drive belt in the area of the accessory drive belt tensioner.
  1. NOTE:
    NOTE:The accessory drive belt tensioner has a damping feature, which is usually a friction device, therefore some friction within the system is normal.
    Using the correct tool, move the accessory drive belt tensioner from its relaxed position through its full stroke and back to the relaxed position to make sure there is no excessive stick, grab or bind, and to make sure there is tension on the accessory drive belt tensioner spring.
  1. Rotate the accessory drive belt tensioner pulley and check for damage, freedom of rotation and alignment. INSTALL a new accessory drive belt tensioner as necessary. TEST the system for normal operation.
  1. If the accessory drive belt tensioner meets the above criteria, proceed to test the accessory drive belt tensioner dynamically. If the accessory drive belt tensioner does not meet the above criteria, INSTALL a new accessory drive belt tensioner. TEST the system for normal operation.

Accessory Drive Belt Tensioner - Dynamic Check

The accessory drive belt tensioner may be checked dynamically as follows:

  1. With the engine running, observe the accessory drive belt tensioner movement. The accessory drive belt tensioner should move (respond) when the engine is accelerated rapidly or when the A/C clutch cycles ON and OFF (the degree of movement can be up to 4 mm). If the accessory drive belt tensioner movement is not constant without engine acceleration or A/C clutch cycling, a pulley or shaft is possibly bent, out of round, or the damping mechanism inside the accessory drive belt tensioner may be damaged. INSTALL a new accessory drive belt tensioner as necessary. TEST the system for normal operation.
  1. Excessive accessory drive belt rideout (uneven depth of grooves in the accessory drive belt) may cause excessive accessory drive belt tensioner movement. Check the condition by installing a new accessory drive belt.
    REFER to: Accessory Drive Belt (303-05 Accessory Drive, Removal and Installation).
    TEST the system for normal operation.

303-06 Starting System > < Accessory Drive Belt