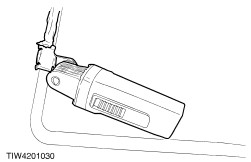
| Removal and Installation Hot Air Gun Direct Glazing Cutter for Bonded Glass Mixer/Application Gun Removal | | -
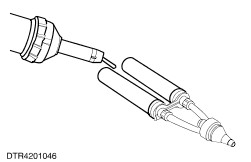
NOTE:Should the ambient temperature fall below 10°C, heat the cartridges for approximately 15 minutes by placing them on a warm radiator, or by using a heat gun set at approximately 25°C. Heat the adhesive if required. | | | -
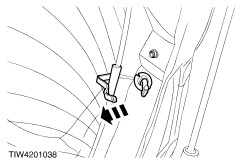
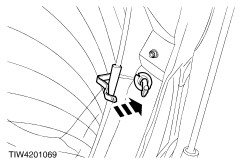
Disconnect the heated rear window electrical connector. | | | -
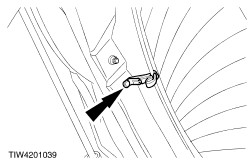
Disconnect the rear window ground connection. | | | -
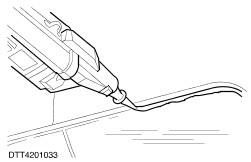
CAUTION:Care must be taken at the points where the cutting blades and cutting depths are changed to avoid damage to the body. Cut out the rear window following the proprietary tools manufacturers instructions. | | | -
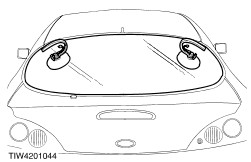
With the aid of another technician using suction pads, remove the rear window. | Installation | | -
CAUTION:Avoid touching the trimmed surface as this will inhibit the new adhesive from bonding. Remove the excess PU adhesive from the opening. - Carefully trim the remaining PU adhesive from the liftgate opening to leave approximately 1mm of trimmed PU adhered to the bodywork.
| | | -
CAUTION:To make sure that the PU adhesive cures, it is essential that the bonding surfaces are free of moisture. Using a heat gun, apply warm air (25°C) to the window opening and glass bond line to remove all traces of moisture. | | | -
Prepare the rear window and window opening in accordance with the instructions supplied with the adhesive kit. | | | -
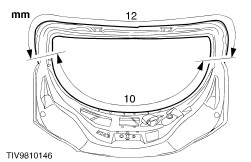
NOTE:Discard the first 100 mm (4in) of PU adhesive as this may have a reduced working time. To avoid water leaks, any breakage in the continuous bead should be overlapped by 20 mm (0.75in). Apply the PU adhesive in a continuous bead between 8 and 10 mm in height to the rear screen along the bond line. | | | -
Install the rear window with the aid of another technician, using suction pads to carefully lift the glass and align it in position over the window opening. - Firmly and evenly press into position.
| | | -
Should the ambient temperature fall below 10°C, use a heat gun at a distance of approximately 50 mm from the opening and apply warm air (25°C) continuously for 15 minutes (inside or outside the vehicle). | | | -
Connect the heated rear window ground connection. | | | -
Connect the heated rear window electrical connector. | | |