
Ranger 2WD L4-122 2.0L SOHC (1984)
Installing The Anchor Pin Plate
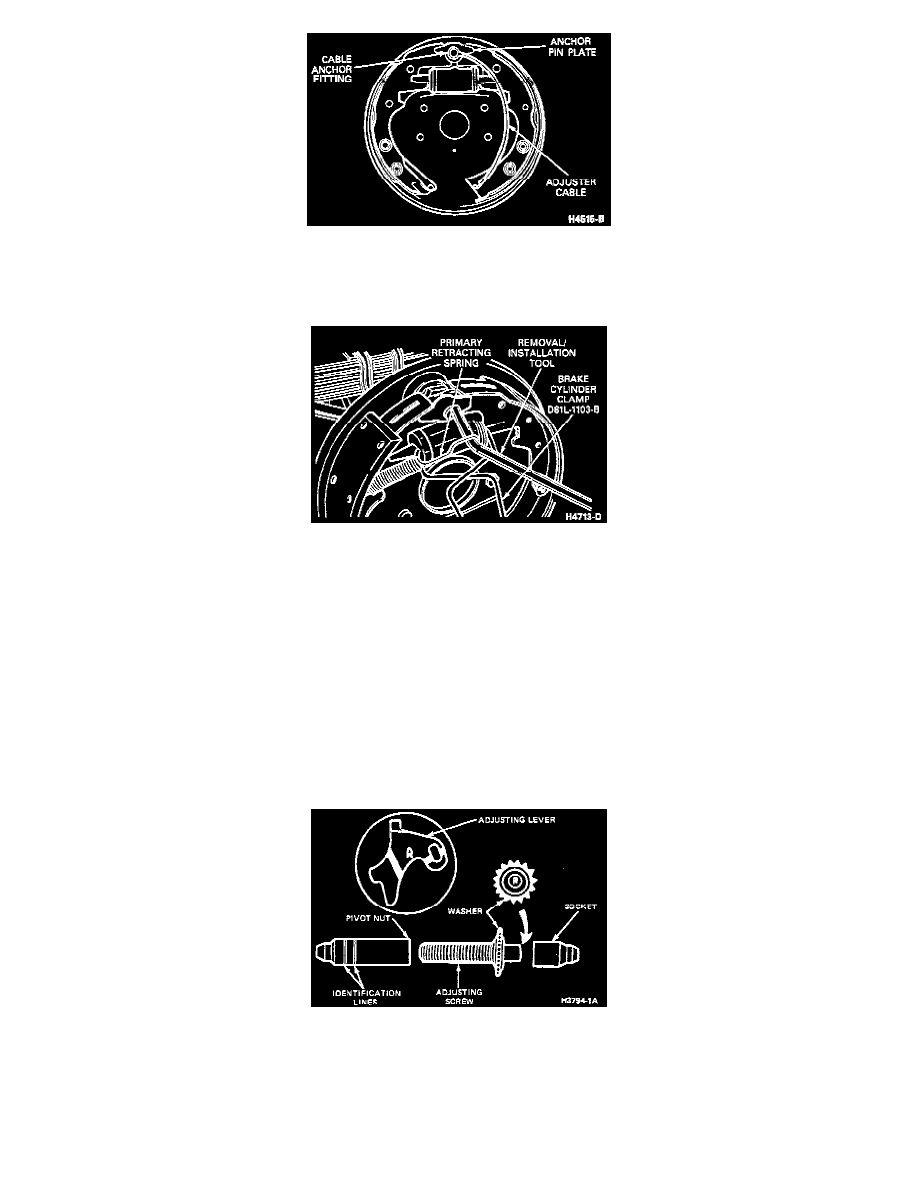
5. Install the anchor pin plate. if equipped. Place the cable anchor over the anchor pin with the crimped side toward the backing plate.
Installing Springs
6. Install the primary shoe-to-anchor spring using a brake spring removal/installation tool.
7. Install the cable guide on the secondary shoe web with the flanged holes fitted into the hole in the secondary shoe web. Thread the cable around
the cable guide groove.
NOTICE: Make sure the cable is positioned in this groove, and not between the guide and the shoe web.
8. Install the secondary shoe-to-anchor (long) spring.
NOTICE: Make sure the cable end is not cocked or binding on the anchor pin when installed. All parts should be flat on the anchor pin.
9. Remove the brake cylinder clamp.
10. Apply a long-life grease to the threads and the socket end of the adjusting screw. Turn the adjusting screw into the adjusting pivot nut to the end of
the threads and then loosen it one-half turn.
Adjusting Screw Identification
CAUTION: Install the adjusting screw assembly in the same location from which it was removed. Interchanging the brake shoe adjusting screw
assemblies from one side of the vehicle to the other will cause the brake shoes to retract rather than expand each time the automatic adjusting
mechanism is operated.
NOTICE: To prevent incorrect installation, the socket end of each adjusting screw is stamped with R or L to indicate their installation on the