
Ranger 2WD L4-2.3L (2009)
Removal and Installation
1. With the vehicle in NEUTRAL, position it on a hoist.
2. Remove the front wheel and tire.
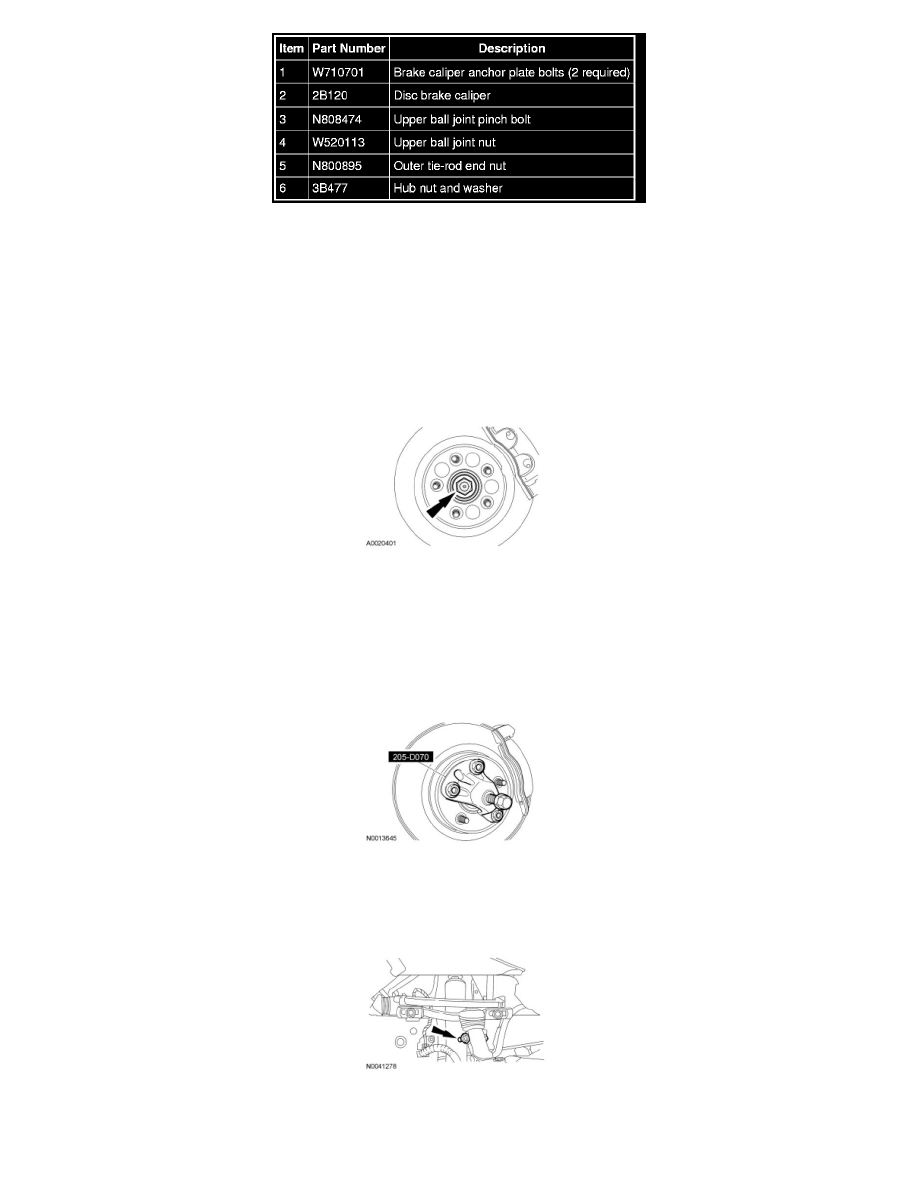
3. NOTICE: Do not reuse the torque prevailing design hub nut and washer assembly or damage to the component may occur.
Remove and discard the hub nut and washer assembly.
-
To install, tighten to 250 Nm (184 lb-ft).
4. NOTE: Do not allow the disc brake caliper to hang suspended from the brake hose. Provide a suitable support.
Remove the 2 front disc brake anchor plate bolts from the knuckle. Lift the caliper assembly from the brake rotor and position the assembly aside.
5. NOTICE: Do not use a hammer to separate the outboard front wheel halfshaft joint from the wheel hub. Damage to the outboard
constant velocity (CV) joint stub shaft threads and internal CV joint components may result.
Using the Front Wheel Hub Remover, separate the outboard front wheel halfshaft joint from the wheel hub.
6. Support the front suspension lower arm.
7. Remove the nut and bolt retaining the upper ball joint to the front wheel knuckle.
-
To install, tighten to 63 Nm (46 lb-ft).
8. Using the Tie-Rod End Remover, separate the outer tie-rod end from the wheel spindle.
-
To install, tighten to 80 Nm (59 lb-ft).