
Ranger 2WD V6-177 2.9L (1989)
f.
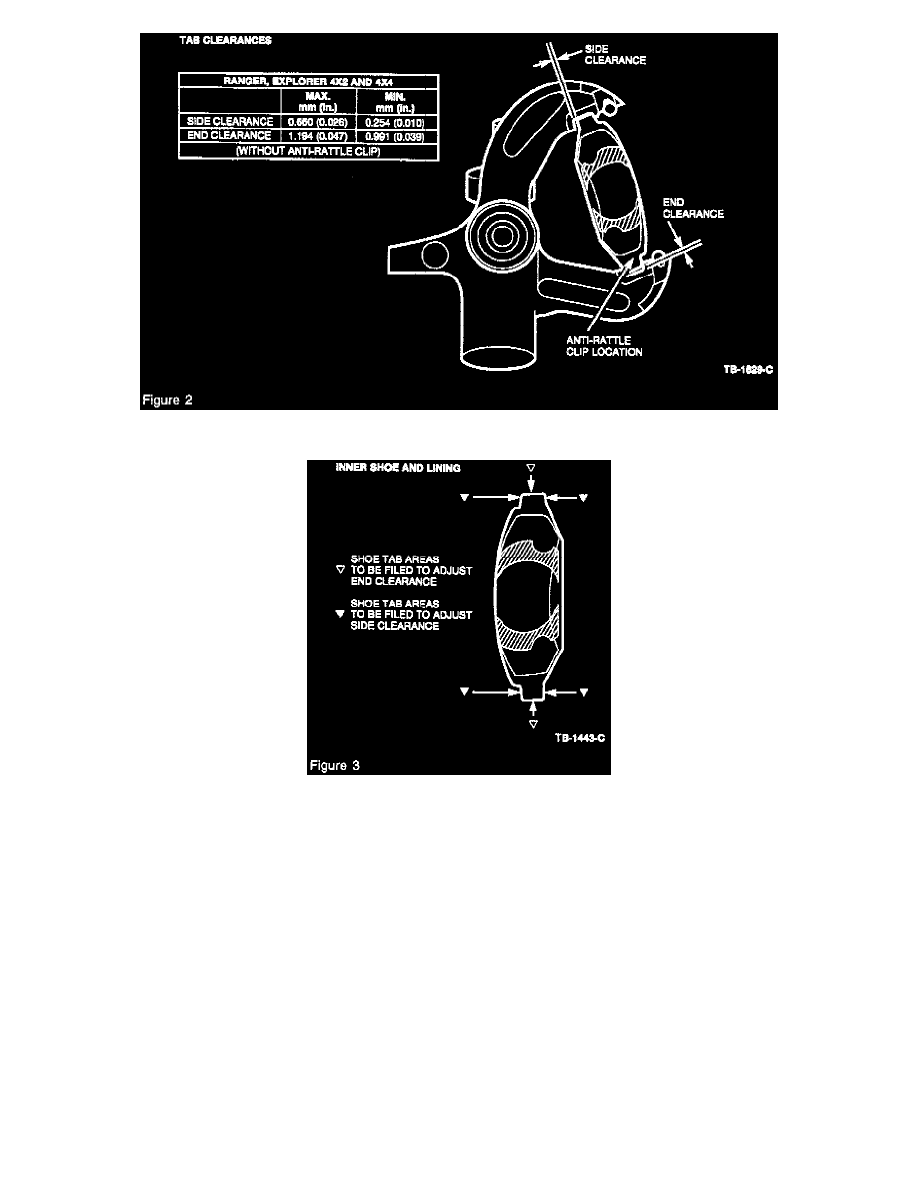
Reinstall pad and check the side and end clearances with a feeler gauge (Figure 2).
g.
If the pad clearances are within specification, go to Step 1h. If the pad clearances are not to the required dimensions, file the steel backing
plate. File material at ends of shoes, removing equal amounts from both sides or ends (Figure 3).
CAUTION:
DO NOT GRIND THE STEEL BACKING PLATE. IT IS POSSIBLE TO REMOVE TOO MUCH MATERIAL WHEN GRINDING.
h.
Check the tab clearances and install anti-rattle clip on the lower pad tab (Figure 2).
CAUTION:
MAKE SURE THE LUBRICANT DOES NOT GET ON THE ROTORS, LININGS, OR ON THE CALIPER PISTON BOOTS.
2.
During reassembly:
^
Clean the caliper slide surfaces of corrosion, contamination, and burrs with a wire brush or portable wire wheel
^
Polish with crocus cloth
^
Lubricate and corrosion protect by applying a light coat of Silicone Brake Caliper Grease and Dielectric Compound (D7AZ-19A331-A), or
equivalent meeting Ford specification ESE-M1C171-A, to the inner knuckle top and bottom pad groove and caliper rails (Figure 1)
^
Replace the caliper pins with new Caliper Pins (F2TZ-2C150-A)