
Ranger 2WD V6-182 3.0L (1995)
Brake Shoe: Service and Repair
Removal
9 Inch Brakes
1. Remove the wheel (1007) and brake drum (1126).
2. Inspect rear wheel cylinder (2261) for signs of leaks or presence of rust by removing the boots and inspecting interior surfaces. Water leaking into
the rear wheel cylinder past the boots will cause rust to form and may cause the rear wheel cylinder to seize.
NOTE: If the boots are not removed, brake fluid leakage past the cups may go undetected because the boots may seal the fluid in the rear wheel
cylinder. If leaks are found, the rear wheel cylinder must be repaired or replaced.
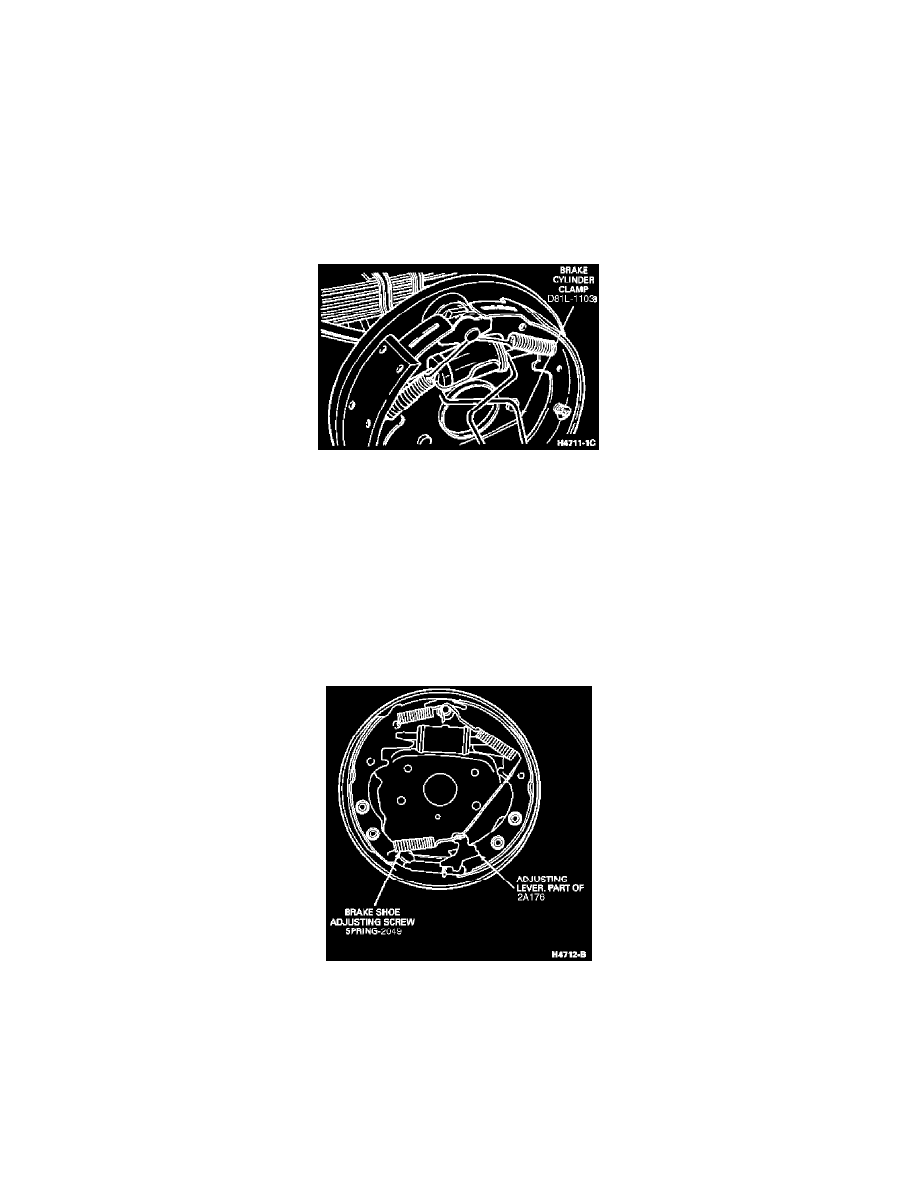
3. If no leaks are found, install Brake Cylinder Clamp D81L-1103-B or equivalent over the ends of the rear wheel cylinder as shown.
4. Contract the shoes as follows:
a. Disengage the adjusting lever part of brake shoe adjusting lever kit (2A176) from the adjusting screw part of brake adjuster screw (2041) by
pulling backward on the brake shoe adjusting lever cable (2A178).
b. Shorten the length of the adjuster by screwing the threaded rod in. This is done by moving the outward side of the adjusting screw upward until
the pivot nut is backed off as far as it will go.
NOTE: Note the position of each spring, they must be re-assembled in the same position.
5. Pull the brake shoe adjusting lever kit, brake shoe adjusting lever cable and brake shoe adjusting screw spring (2049) down and toward the rear to
unhook the pivot hook from the large hole in the secondary shoe web. Do not pry the pivot hook out of the hole.
6. Remove the brake shoe adjusting screw spring and brake shoe adjusting lever kit.