
Ranger 2WD V6-245 4.0L (1990)
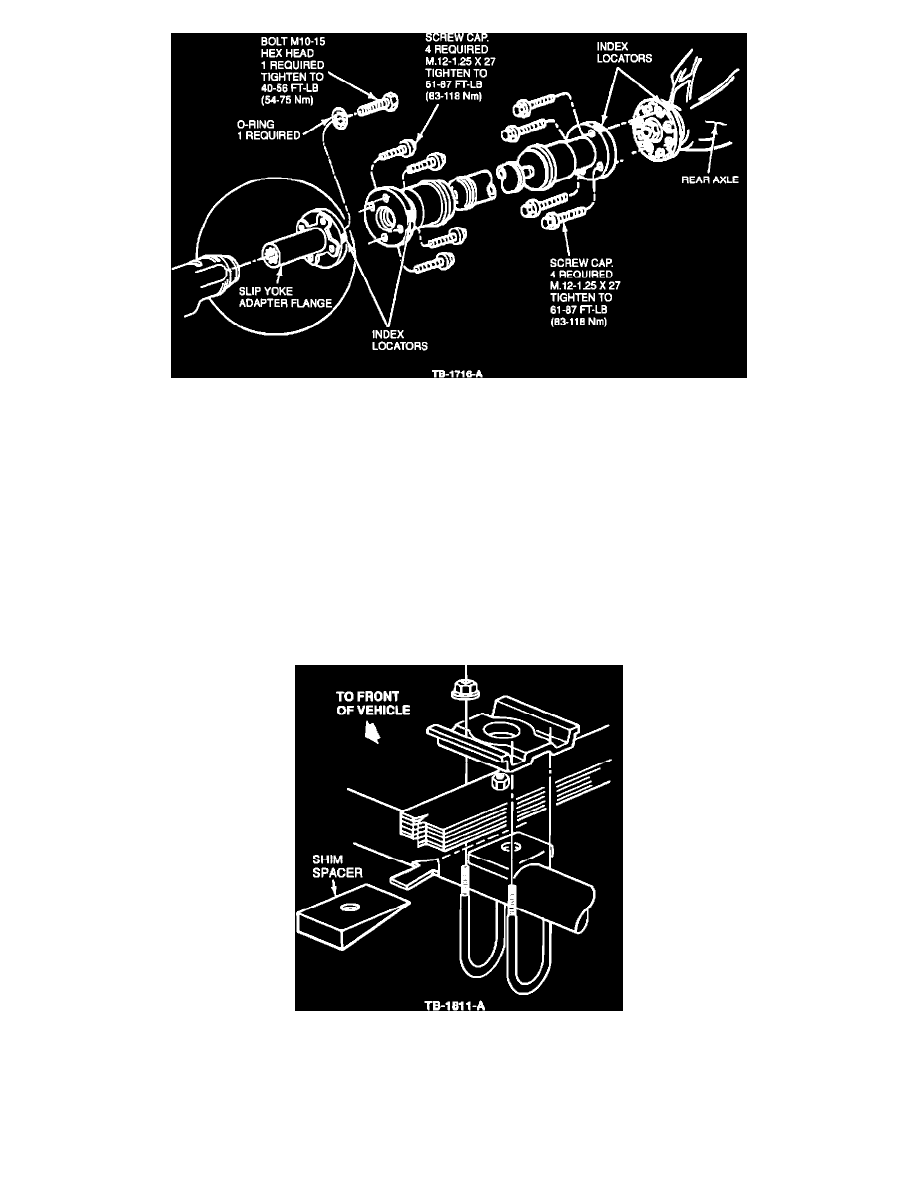
Figure 1
6.
Install the new driveshaft and transmission adaptor flange, Figure 1.
a.
Make sure all components are properly indexed and the yellow dots are aligned.
b.
Coat the yoke on the adaptor flange with automatic transmission fluid before assembly.
c.
Tighten screw cap bolts to 61-87 lb.ft. (83-118 N-m).
NOTE: THE DRIVESHAFT AND SLIP YOKE ADAPTOR FLANGE ARE SUPPLIED AS AN ASSEMBLY IN THE SERVICE KIT. THEY
MUST BE SEPARATED BEFORE INSTALLATION SO THAT THE "O" RING AND BOLT CAN BE INSTALLED TO SECURE THE
SLIP YOKE ADAPTOR FLANGE TO THE TRANSMISSION OUTPUT SHAFT.
d.
Tighten the hex head bolt to 40-55 lb.ft. (54-75 N-m).
Figure 2
7.
Install shims between the rear axle and rear springs as shown in Figure 2.
PART NUMBER
PART NAME
CLASS
FOTZ-7K060-A
Service Kit, Transmission
CG