
Ranger 2WD V6-245 4.0L VIN X SFI (1997)
Vacuum Control Motor: Service and Repair
Air Door Actuator
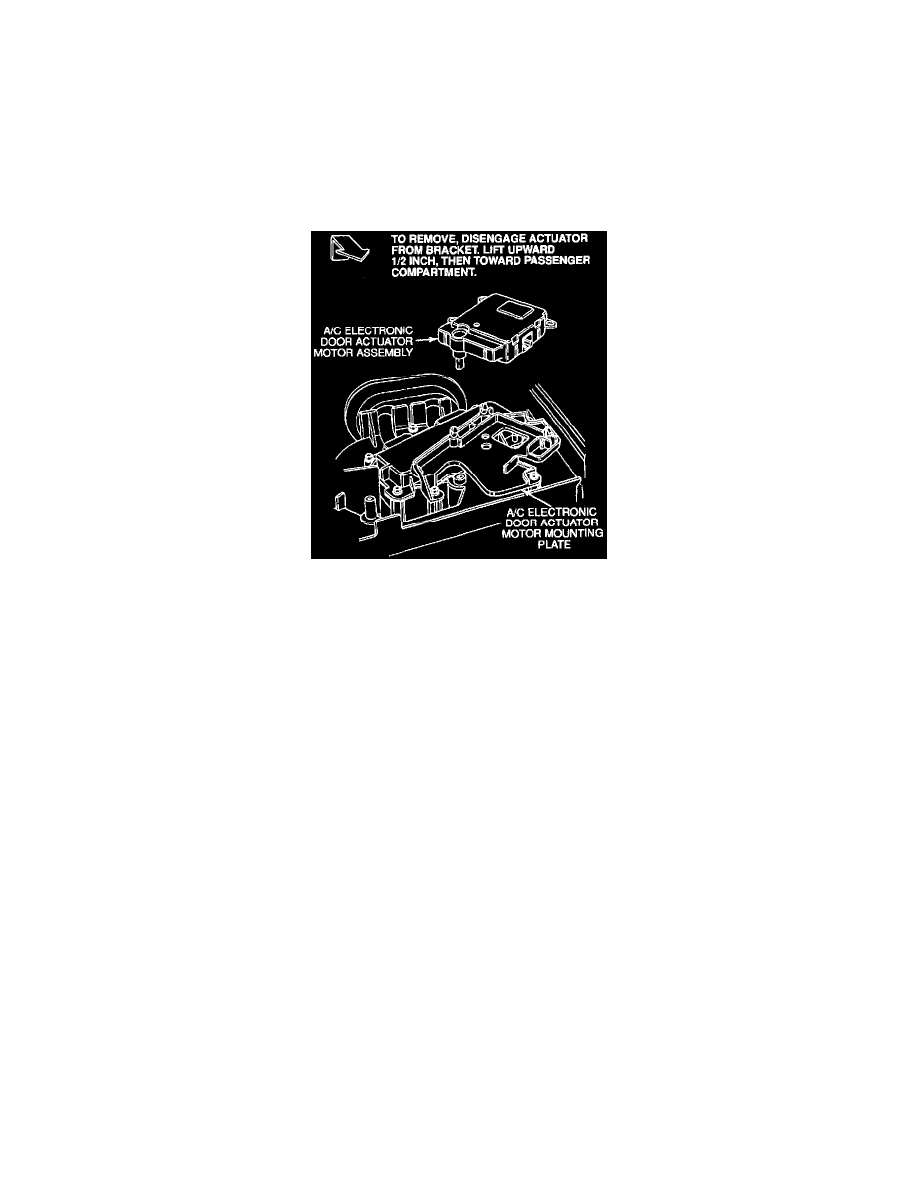
A/C Electronic Door Actuator Motor
REMOVAL
1. Disconnect battery ground cable.
2. Loosen instrument panel and pull back from cowl.
3. Remove A/C electronic door actuator motor electrical connector from bracket on A/C evaporator housing.
4. Remove three A/C electronic door actuator motor retaining screws.
5. Lift A/C electronic door actuator motor vertically approximately 12 mm (1/2 inch) to disengage it from bracket and actuator shaft, then pull A/C
electronic door actuator motor back toward passenger compartment.
NOTE: The mounting bracket remains in place on the A/C evaporator housing.
INSTALLATION
1. Insert A/C electronic door actuator motor horizontally over actuator bracket on A/C evaporator housing.
2. Insert actuator shaft into A/C air temperature control door. (Manually moving A/C air temperature control door will help engage shaft.)
3. Attach actuator bracket with three retaining screws.
4. Attach actuator electrical connector to bracket on A/C evaporator housing.
5. Install instrument panel.
6. Connect battery ground cable.
Manual A/C-Heating
REMOVAL
1. Open glove compartment, and remove contents. Press in sides of glove compartment and pull back so it hangs down. The vacuum control motor
should be visible on the right side of heater air plenum chamber.
2. Disconnect vacuum hose from nipple.
3. Remove two screws attaching the vacuum control motor to the heater air plenum chamber.
4. Release vacuum control motor arm from shaft on heater air plenum chamber and remove.
INSTALLATION
1. For installation, follow removal procedures in reverse order.
2. Check system for proper operation.
Recirculation/Fresh Air Door (Heating and Defrosting)