
Ranger 2WD V6-245 4.0L VIN X SFI (1997)
Headlamp Bulb: Service and Repair
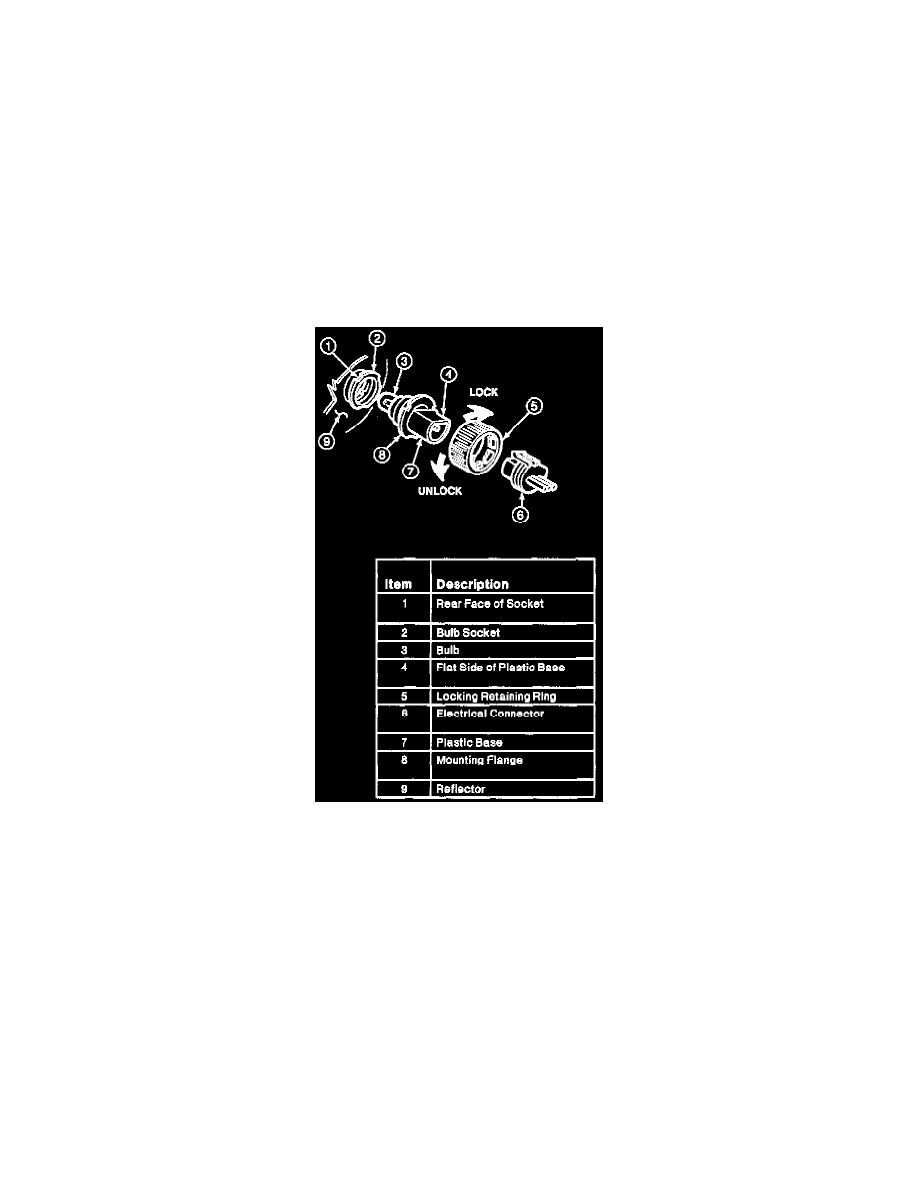
REMOVAL
WARNING: THE HEADLAMP BULB CONTAINS HALOGEN GAS UNDER PRESSURE. THE HEADLAMP BULB MAY SHATTER IF
THE GLASS ENVELOPE IS SCRATCHED OR DROPPED. HANDLE CAREFULLY. GRASP ONLY BY PLASTIC BASE. AVOID
TOUCHING THE GLASS ENVELOPE. KEEP OUT OF REACH OF CHILDREN. ENERGIZE ONLY WHEN INSTALLED IN THE
HEADLAMP.
NOTE: A properly aimed headlamp normally need not be reaimed after installation of this headlamp bulb. A burned out headlamp bulb should not be
removed from the headlamp until just before a replacement is to be installed. Removal for an extended period of time may allow contaminants (dust,
moisture, smoke) to affect the performance of the headlamp.
1. Check that headlamp switch is in the OFF position.
2. Lift hood.
3. Release latch and swing filler panel to left or right.
4. Remove electrical connector from headlamp bulb by releasing lock tab and grasping wires firmly and snapping connector rearward.
5. Remove headlamp bulb retainer by rotating counter-clockwise (when viewed from rear) about one-eighth turn and sliding ring off plastic base.
Keep headlamp bulb retainer as it may be used again to retain new headlamp bulb.
6. Carefully remove headlamp bulb from socket by gently pulling straight backward out of socket. Do not rotate headlamp bulb during removal.
INSTALLATION
1. With flat side of plastic base of headlamp bulb facing upward, insert glass envelope of headlamp bulb into socket. Turn base slightly to left or
right. if necessary, to align grooves in forward part of plastic base with corresponding locating tabs inside socket. When grooves are aligned, push
headlamp bulb firmly into socket until mounting flange on base contacts rear face of socket.
2. Slip headlamp bulb retainer over rear of plastic base against mounting flange. Lock headlamp bulb retainer into socket by rotating clockwise. A
stop will be felt when headlamp bulb retainer is fully engaged.
3. Push electrical connector into rear of plastic base until it snaps and locks into position.
4. Close filler panel.
5. Turn headlamps on and check for proper operation.