
Ranger 2WD V6-245 4.0L VIN X SFI (1997)
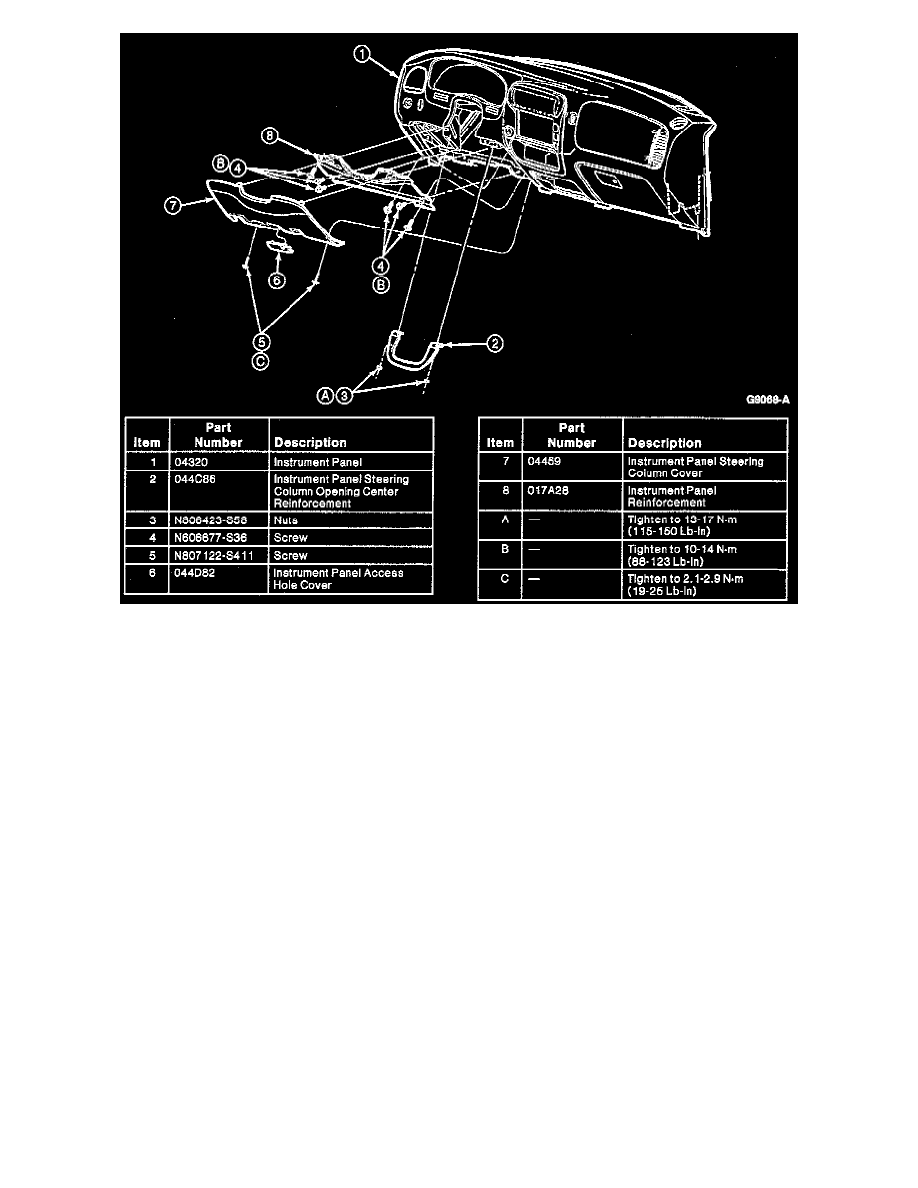
2. Remove two screws and instrument panel steering column cover.
3. Remove three screws and instrument panel steering column cover reinforcement.
4. Unscrew and remove tilt wheel handle and shank, if equipped.
5. Remove retaining screws and lower steering column shroud.
INSTALLATION
1. Position lower steering column shroud into place on upper steering column shroud.
2. Install retaining screws and tighten to 0.7-1.1 Nm (7-9 inch lbs.).
3. Install tilt wheel handle and shank, if equipped with tilt wheel.
4. Install instrument panel steering column cover reinforcement and retaining screws. Tighten screws to 10-14 Nm (88-123 inch lbs.).
5. Install instrument panel steering column cover and two screws. Tighten to 2.1-2.9 Nm (19-25 inch lbs.).
6. Reconnect battery ground cable.
NOTE: When the battery has been disconnected and reconnected, some abnormal drive symptoms may occur while the powertrain control
module (PCM) relearns its adaptive strategy. The vehicle may need to be driven 16 km ( 10 miles) or more to relearn the strategy.