
Ranger 2WD V6-245 4.0L VIN X SFI (1997)
10. Pull the driveshaft centering socket yoke off the center stud. Remove the rubber seal from the centering ball stud.
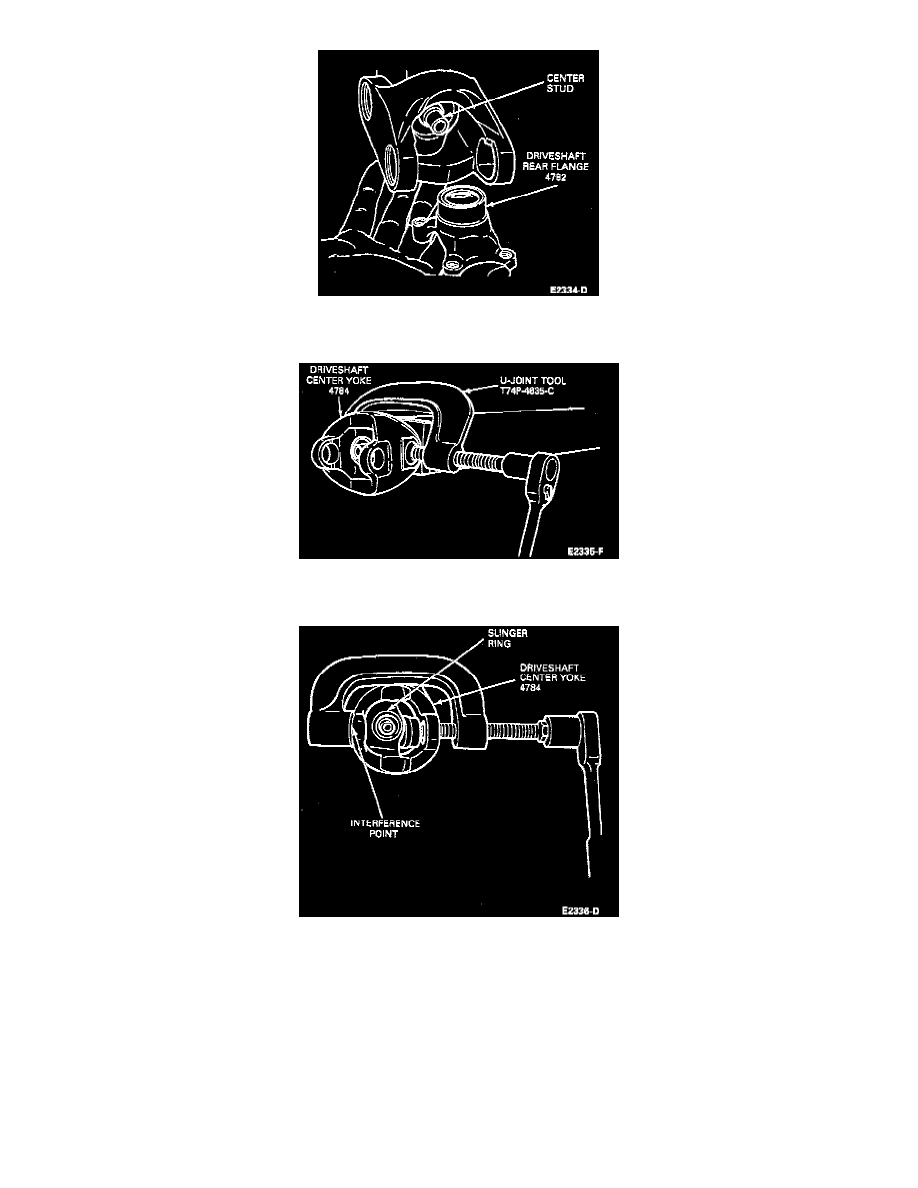
11. Remove the snap rings from the driveshaft center yoke and from the driveshaft yoke.
12. Position the tool on the driveshaft yoke and press the bearing outward until the inside of the driveshaft center yoke almost contacts the slinger ring
at the front of the driveshaft yoke.
Pressing beyond this point can distort the slinger ring. The arrow shown illustrates the interference point.
13. Clamp the exposed end of the bearing in a vise and drive on the driveshaft center yoke with a soft-faced hammer to free it from the bearing.
14. Reposition the tool and press on the spider to remove the opposite bearing.
15. Remove the driveshaft center yoke from the spider.
16. Remove the spider from the driveshaft yoke in the same manner.
17. Clean all serviceable parts in cleaning solvent. If using a repair kit, install all of the parts supplied in the kit. If the driveshaft is damaged, replace
the complete shaft to be assured of a balanced assembly.
ASSEMBLY
1. To assemble the universal joint, position the spider in the driveshaft yoke. Make sure the spider bosses (or lubrication plugs on kits) will be in the
same position as originally installed. Press in the bearing using U-joint Tool T74P-4635-C. Install the snap rings.