
Ranger 2WD V6-245 4.0L VIN X SFI (1997)
Synchronizer Hub: Service and Repair
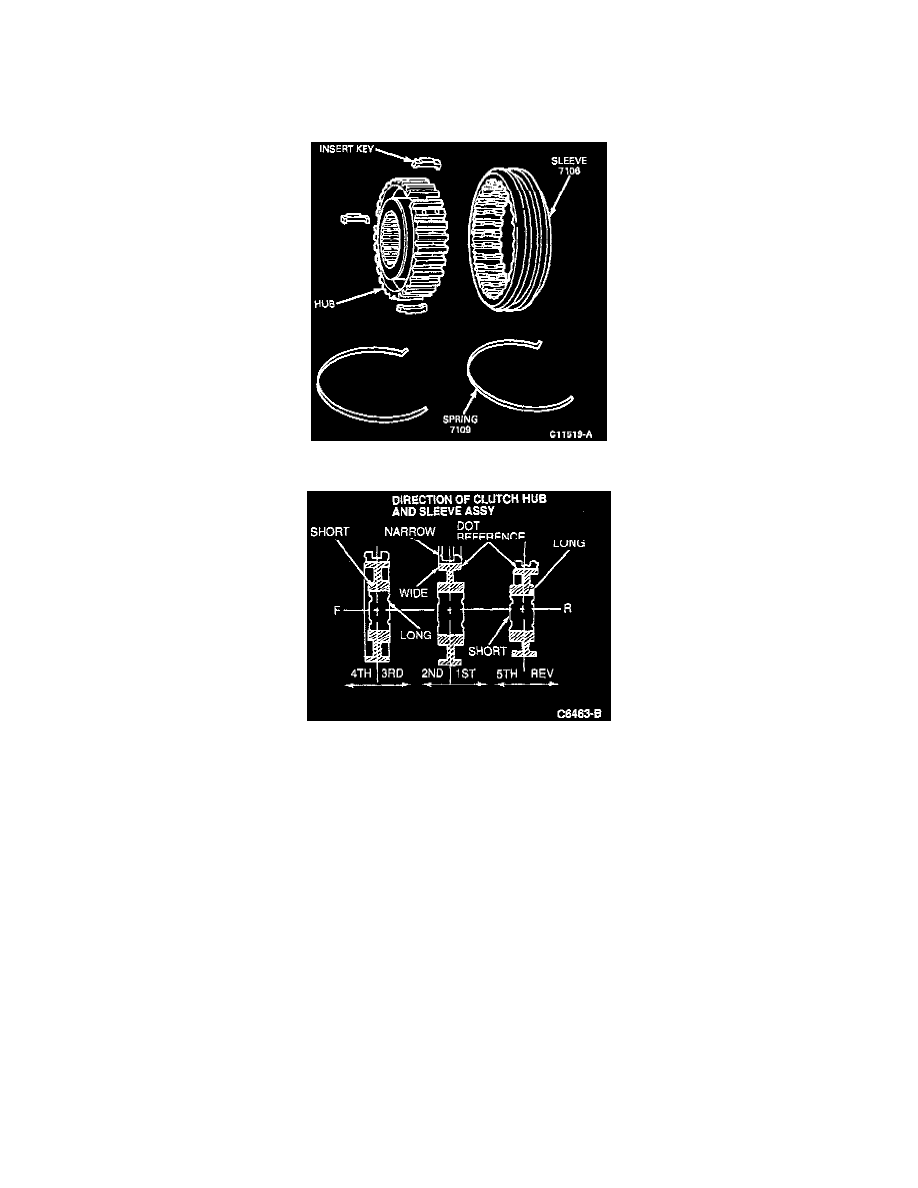
ASSEMBLY
1. Lay synchronizer face down and remove one synchronizer blocking spring, using a suitable tool.
2. Hold synchronizer sleeve and hub assembly in place and turn assembly over to the opposite face and lay flat on work table.
3. Remove second synchronizer blocking spring and three insert keys.
4. Slide synchronizer sleeve from hub. Replace parts as necessary.
ASSEMBLY
1. Locate indented dot reference mark on the shoulder of one face side of synchronizer sleeve. Check drawing for direction of clutch hub to sleeve
assembly. Insert hub into synchronizer sleeve with one of the three insert slots of hub aligned with reference mark. This will make certain of
proper orientation of hub to sleeve splines. Make sure hub moves freely on synchronizer sleeve.
2. Lay hub and sleeve assembly face down on work table and place three insert keys into hub slots.
3. Insert one synchronizer blocking spring into clip hole located in inner shoulder of synchronizer sleeve, and place synchronizer blocking spring
under protruding edge of each insert key.
4. Holding hub and synchronizer sleeve together turn assembly over to opposite face side.
5. Insert second synchronizer blocking spring just like the first, but in the opposite direction. One synchronizer blocking spring should be
counterclockwise to the other.
6. When sliding synchronizer assembly onto shaft do not allow excessive movement between hub and sleeve. This will cause insert keys to pop out of
hub slots and require reassembly.