
Ranger 2WD V6-3.0L VIN V Flex Fuel (2001)
2.
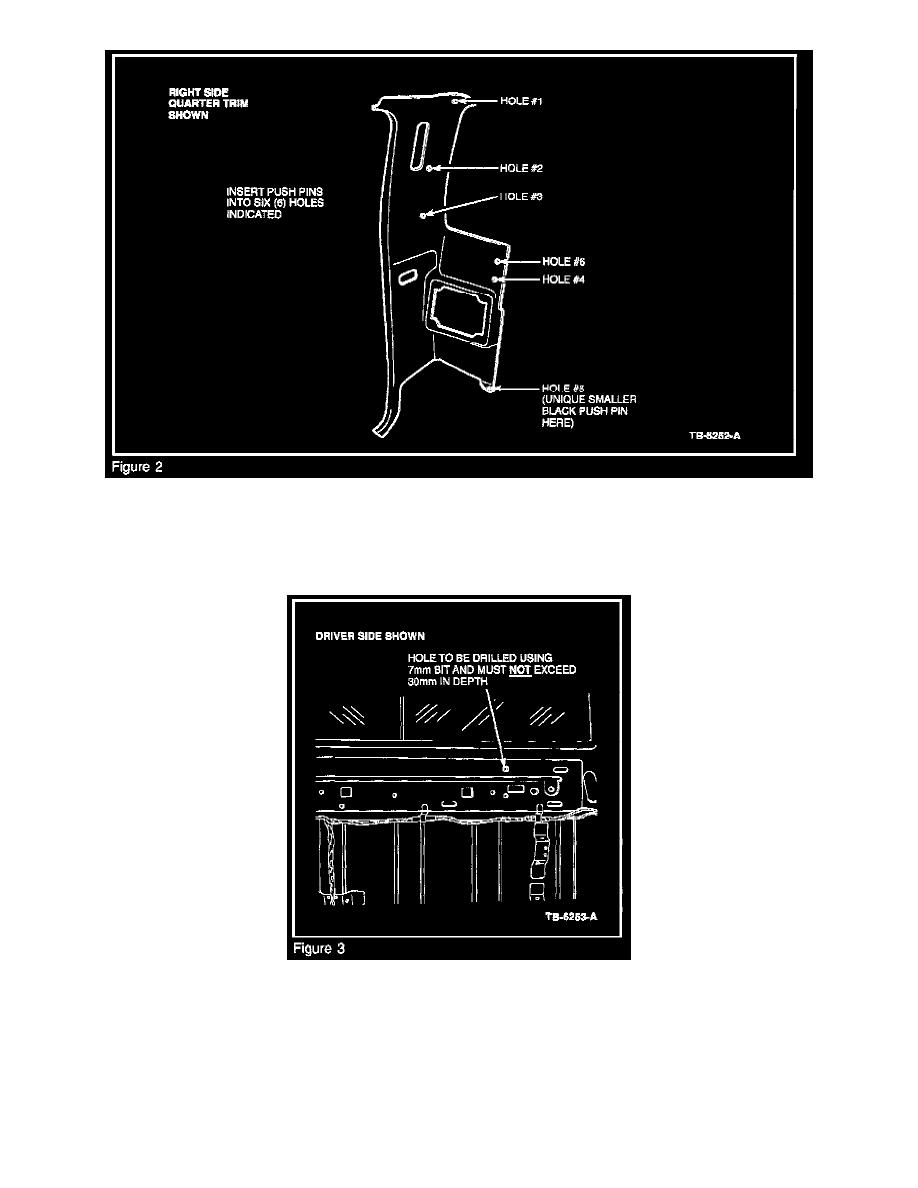
Install new quarter trim panel(s) and five (5) colored push pins in holes # 1, # 2, # 3, # 4, # 6 and one unique black push pin in hole # 5 as shown
in Figure 2.
NOTE
HOLE # 6 WILL REQUIRE STEP 3, PRIOR TO INSTALLATION OF THE PUSH PIN. REFERENCE FIGURE 2.
3.
On the side where a quarter trim panel is being replaced, hole # 6 will require drilling through the back center trim panel and sheet metal as shown
in Figure 3. Use the new quarter trim panel as a guide to determine where to drill hole # 6. If the existing quarter trim panel is not being replaced,
on the opposite side a new hole needs to be drilled through the existing quarter trim panel, back center trim panel AND the sheet metal. To
determine the centerline of the additional hole, measure 60mm from the top of the quarter trim panel to get the vertical axis. To determine the
horizontal axis, measure from the side of the quarter trim panel to pin # 4 and adjust the measurement to the previous vertical axis spot. Make sure
holes # 4 and # 6 line up vertically. Use a 7mm diameter drill bit and DO NOT EXCEED 30mm (3 cm or 1-3/16") in depth.
4.
After drilling required hole(s), install corresponding colored push pins in holes # 4 and # 6 on both sides.