Ranger 2WD V6-3.0L VIN V Flex Fuel (2001)

bleeder screw and the drag is reduced or eliminated, the master cylinder may not be allowing the brake fluid to return to the reservoir.
b.
Check the master cylinder push rod adjustment. Refer to section 206-07 of the appropriate model year Workshop Manual for service details.
c.
Check the brake pedal to determine if it is fully returning.
4.
Remove both calipers and check piston retraction using a C-clamp and wooden block. The piston should easily move back into the bore under the
force of the clamp. Service as needed.
NOTE
LUBRICATE THE CALIPER SLIDES WITH SILICONE BRAKE CALIPER GREASE AND DIELECTRIC COMPOUND (XG-3-A OR
EQUIVALENT) MAKING SURE NOT TO GET ANY GREASE ON FRICTION MATERIAL OR THE PAD SLIPPERS. THIS CAN
AGGRAVATE OR CAUSE A PULL.
5.
If Steps 1 through 4 of Diagnostic Procedure 2 have not determined the condition, swap brake pads and rotors side-to-side and if pull changes
from right to left or vice versa; machine the rotors, put a non-directional finish on the rotors, install new pads, burnish the brakes, and retest.
6.
Test drive the vehicle with 10 or more stops from 40 mph (64 km/h) before evaluating brake drift. If there is no change while braking, it may be
assumed the condition is not the result of the front brakes.
7.
Check the rear brakes. Remove the rear wheels and brake drums.
a.
Check for contaminants (ie: grease, axle lube, leaking brake fluid, etc.)
b.
Check for broken components, frozen parking brake cables or improperly installed parts.
c.
Check the cage diameter using the Brake Shoe Adjustment Gauge (D81L-1103-A). If either side is out of specification, check for proper
function of the adjusting mechanism and service as required.
d.
Check the rear wheel cylinders by the following method:
(1)
Re-install one of the brake drums.
(2)
Have another person apply the brakes and watch for movement of one of the brake shoes on the other wheel.
(3)
Reapply the brakes while holding in place the shoe that moved. The opposite shoe should now move. If no movement is observed,
replace the wheel cylinder.
(4)
Reinstall the drum and repeat the procedure for the other rear brake.
8.
If the condition still exists, swap rear shoes from side-to-side and drive the vehicle. If the pull is significantly reduced, replace the rear linings.
If the pull is not significantly reduced, go to Diagnostic Procedure 3.
Diagnostic Procedure 3
1.
Check upper control arm shims - front an rear shims on each control arm on both left and right sides of the vehicle. Make sure the shims are seated
properly and torqued to spec: 98 Lb-ft. (133 N.m).
2.
Check the front stabilizer bar. The blue paint mark is on the left hand (driver's side) of the vehicle. If it is not, then the stabilizer bar was installed
upside down. Reinstall correctly.
3.
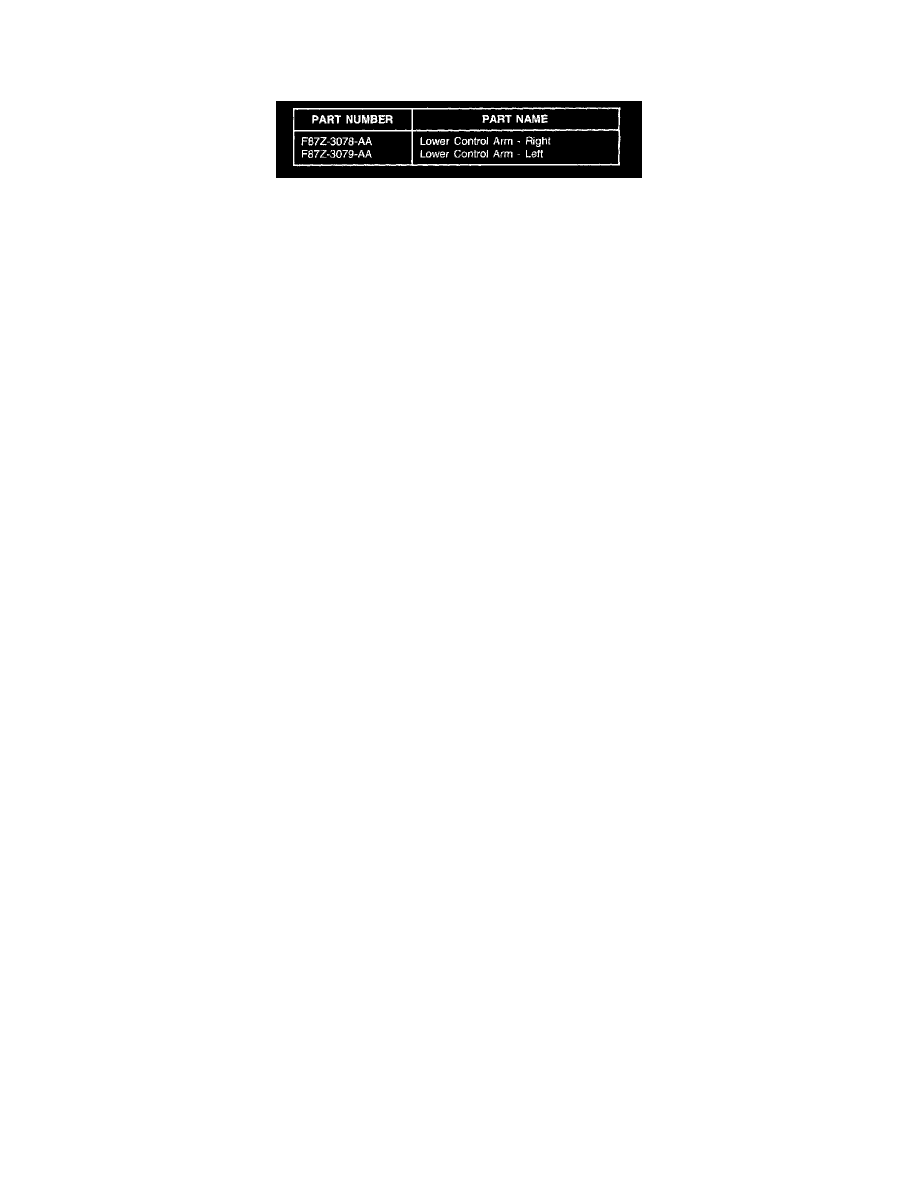
Replace the Lower Control Arms (LCA) and double check alignment. Use LCA (right) Part F87Z-3078-AA and LCA (left) Part F87Z-3079-AA
(these LCA's have harder bushings).
OTHER APPLICABLE ARTICLES: NONE
SUPERSEDES: 02-10-10
WARRANTY STATUS: INFORMATION ONLY
OASIS CODES: 301000, 303000, 304000
