
Ranger 2WD V6-4.0L (2010)
retention of these parts.
1. With the vehicle in NEUTRAL, position it on a hoist. For additional information, refer to Vehicle Jacking and Lifting.
2. Using a suitable jack, support the rear axle.
3. Remove and discard the lower shock absorber bolt and nut.
-
To install, tighten the new nut to 80 Nm (59 lb-ft).
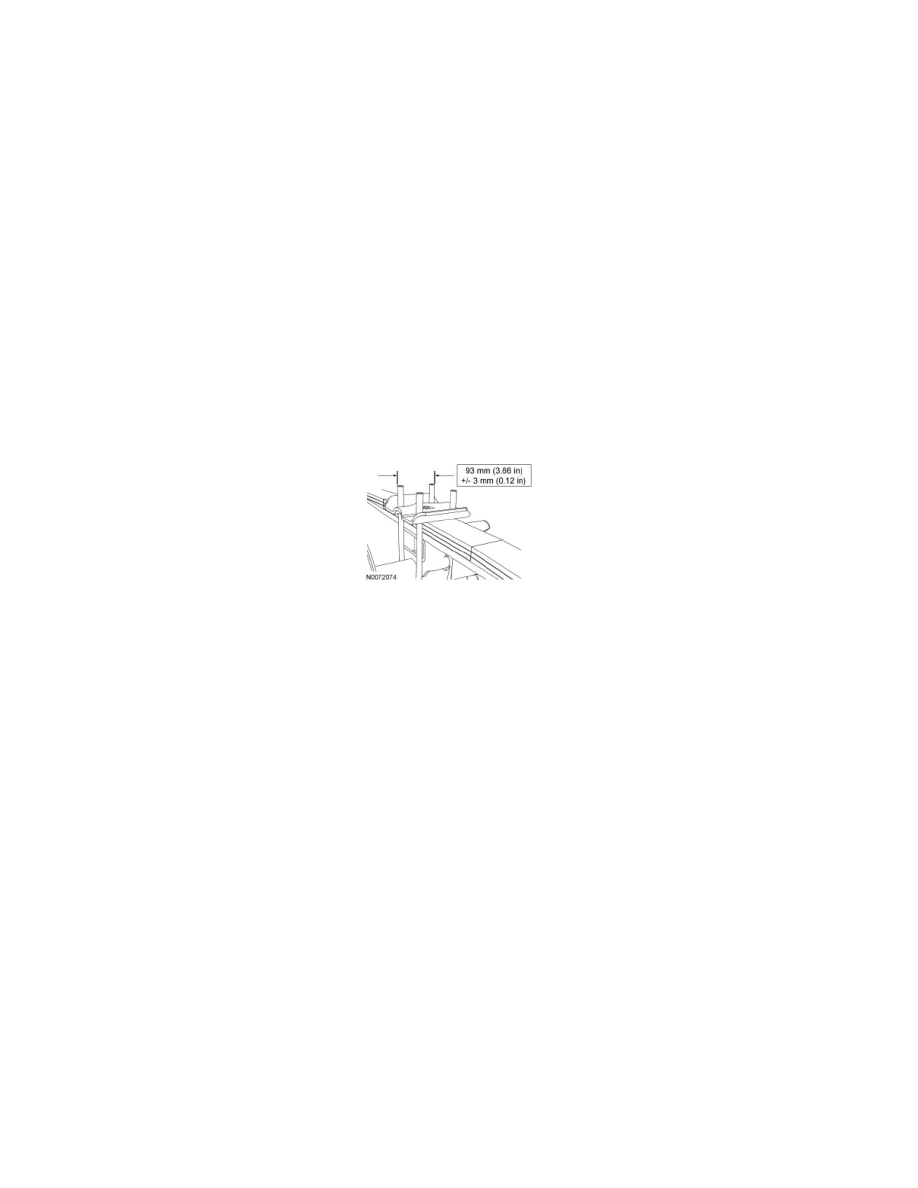
4. NOTE: When installing new U-bolts, the distance between the U-bolts should be 93 mm (3.66 in) ± 3 mm (0.12 in). This is important for
providing the correct U-bolt clamp load and retention of parts.
Remove and discard the 4 rear U-bolt nuts.
-
Remove the U-bolts and the spring plate.
-
To install, tighten the U-bolt nuts in 4 stages.
-
Stage 1: Tighten in a cross pattern to 30 Nm (22 lb-ft).
-
Stage 2: Tighten in a cross pattern to 60 Nm (44 lb-ft).
-
Stage 3: Tighten in a cross pattern to 90 Nm (66 lb-ft).
-
Stage 4: Tighten in a cross pattern to 115 Nm (85 lb-ft).
5. If equipped, carefully lower the rear axle and remove the rear spring spacer.
6. Remove and discard the spring-to-frame bracket bolt and flagnut.
-
To install, tighten the new bolt to 200 Nm (148 lb-ft).
7. Remove and discard the spring shackle-to-spring bolt and nut and remove the spring.
-
To install, tighten the new nut to 133 Nm (98 lb-ft).
8. If necessary, remove the spring shackle.
-
Remove and discard the spring shackle-to-frame bracket bolt and flagnut.
-
Remove the shackle.
-
To install, tighten the new bolt to 115 Nm (85 lb-ft).
9. To install, reverse the removal procedure.