
Ranger 4WD L4-122 2.0L SOHC (1984)
Ball Joint: Service and Repair
Ball Joint, Upper
REMOVAL
1. Remove the spindle and shaft and joint assembly.
2. If the tie rod has not been removed, then remove cotter pin from the tie rod nut and then remove nut. Tap on the tie rod stud to free it from the
steering arm.
Ball Joint Service
3. Remove the upper ball joint cotter pin and nut.
4. Loosen the lower ball joint nut to the end of the stud.
5. Strike the inside of the knuckle near the upper and lower ball joints to break the knuckle loose from the ball joint studs.
6. Remove the camber adjuster sleeve. Note the orientation of the slot in the camber adjuster. The slot should be installed in the same position during
reassembly to maintain alignment. If required, use Pitman Arm Puller T64P-3590-F or equivalent to remove the adjuster from the knuckle.
7. Remove lower ball joint nut.
8. Place knuckle in vise and remove snap ring from bottom ball joint socket if so equipped.
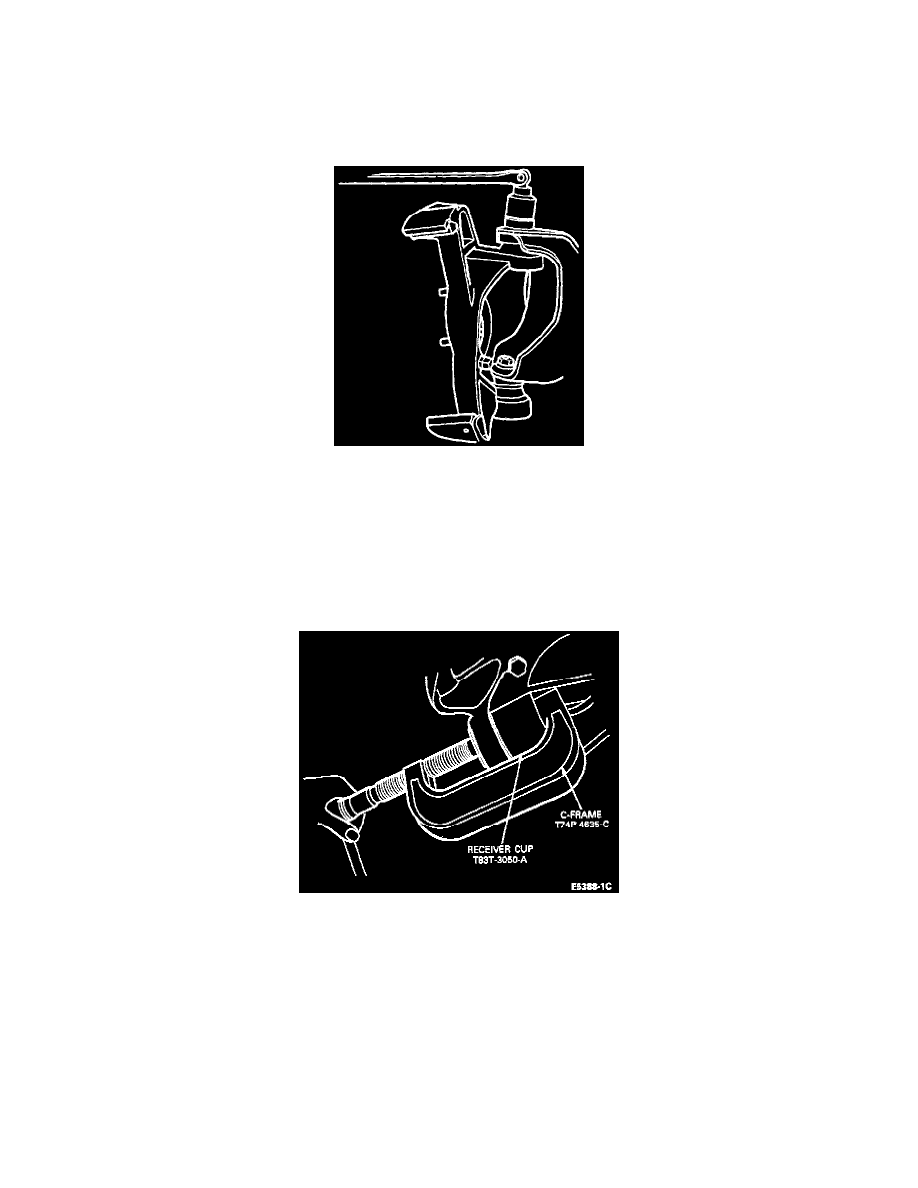
Ball Joint Remover
9. Assemble C-Frame, T74P-4635-C, and Ball Joint Remover, T83T-3050-A (or their equivalents) on the lower ball joint.
10. Turn forcing screw clockwise until the lower ball joint is removed from the steering knuckle.
11. Assemble C-Frame, T74P-4635-C and Ball Joint Remover T83T-3050-A (or equivalents) on the upper ball joint.