
Ranger 4WD L4-134 2.2L DSL (1983)
Crankshaft Gear/Sprocket: Service and Repair
Fig. 8 Front oil seal installation
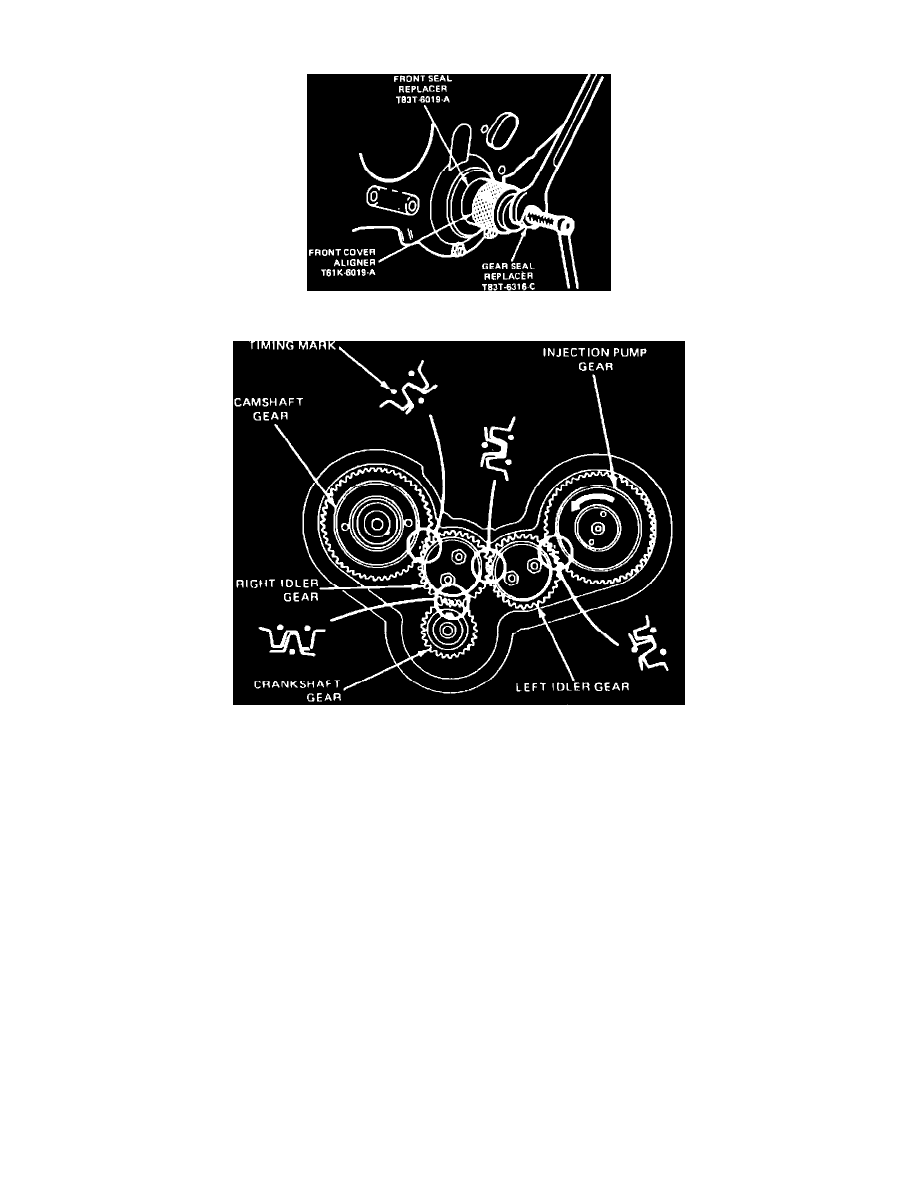
Fig. 9 Valve timing marks
REMOVAL
1.
Disconnect ground cables from both batteries.
2.
Remove engine cooling fan and fan shroud.
3.
Drain cooling system and engine oil.
4.
Remove A/C compressor and/or power steering pump drive belt, if equipped.
5.
Remove alternator and vacuum pump drive belt.
6.
Remove water pump as described under ``Water Pump, Replace.''
7.
Remove crankshaft pulley lock bolt using tool No. T83T-6316-D or equivalent.
8.
Remove timing gear case cover attaching bolts and the cover.
9.
Remove oil pan as described in ``Oil Pan, Replace.''
10.
Rotate crankshaft until timing gear marks are aligned, Fig. 9.
11.
Remove camshaft gear and injection pump gear attaching bolts, washers and friction gears.
12.
Remove camshaft and injection pump gears using a suitable puller.
13.
Remove idler gear attaching bolts, thrust plates and spindles, then the idler gears. Remove gears in order so they can be reinstalled in their original
positions.
14.
Disconnect injection pump from timing gear case and position aside.
15.
Remove timing gear case attaching bolts and the case.
INSTALLATION
1.
Clean timing gear case, water pump, oil pan and engine block mating surfaces.
2.
Install timing gear case, using a new gasket, and torque attaching bolts to 15 ft. lbs.
3.
Install timing gears so all timing marks are aligned, Fig. 9, in the following order: right idler gear, camshaft gear, left idler gear, injection pump
gear.