
Ranger 4WD L4-153 2.5L SOHC VIN C SFI (2001)
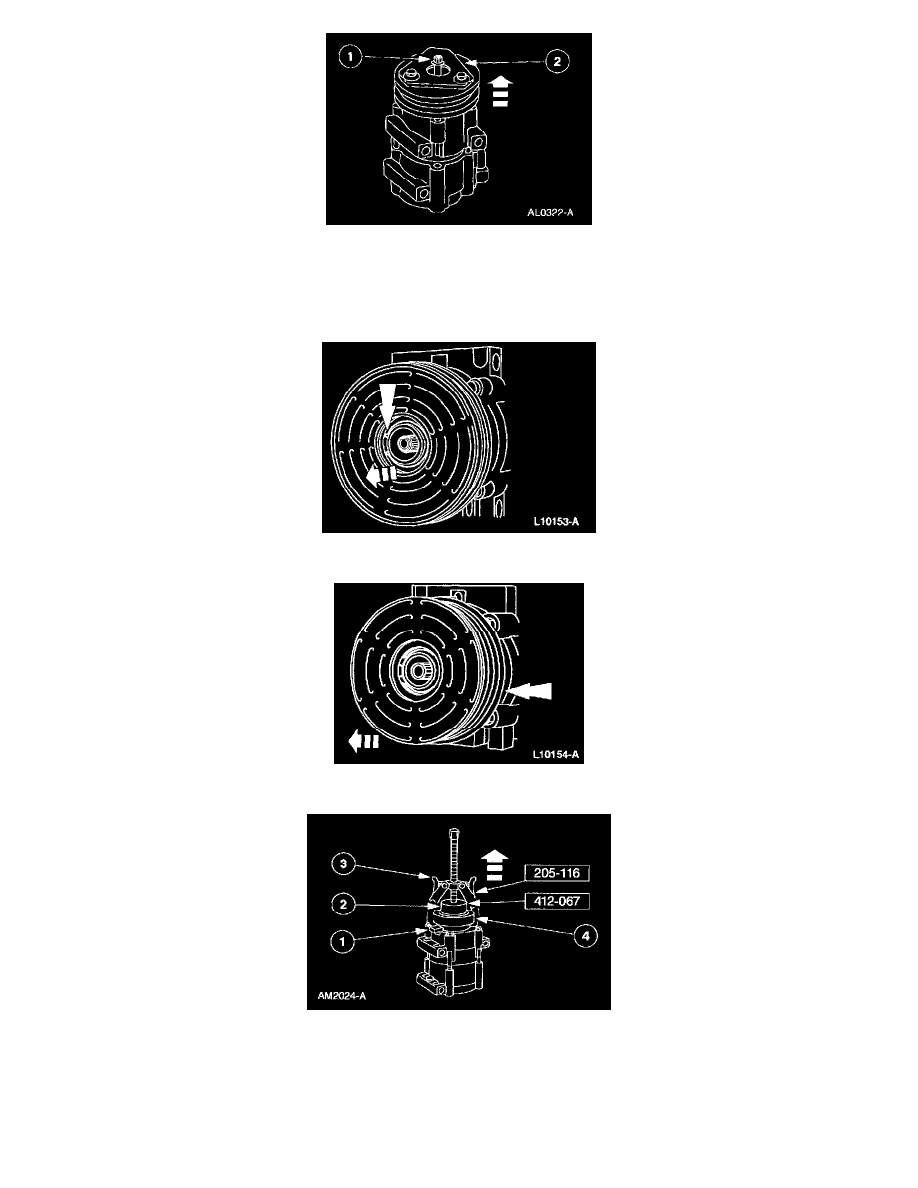
5. Remove the A/C clutch and the A/C clutch hub spacer.
1
Thread an 8 x 1.25 mm bolt into the A/C clutch to force it from the compressor shaft.
2
Lift the A/C clutch and the A/C clutch hub spacer from the compressor shaft.
All vehicles
6. Remove the A/C clutch pulley snap ring.
7. Remove the A/C clutch pulley.
8. Remove the A/C compressor clutch field coil.
1
Note the location of the A/C compressor clutch field coil electrical connector.
2
Install the special tool on the nose opening of the A/C compressor.
3
Install the special tool.
4
Remove the A/C compressor clutch field coil.
CAUTION: Do not use air tools. The A/C compressor clutch field coil can be easily damaged.