
Ranger 4WD L4-153 2.5L SOHC VIN C SFI (2001)
1. Position the safety belt buckle and pretensioner.
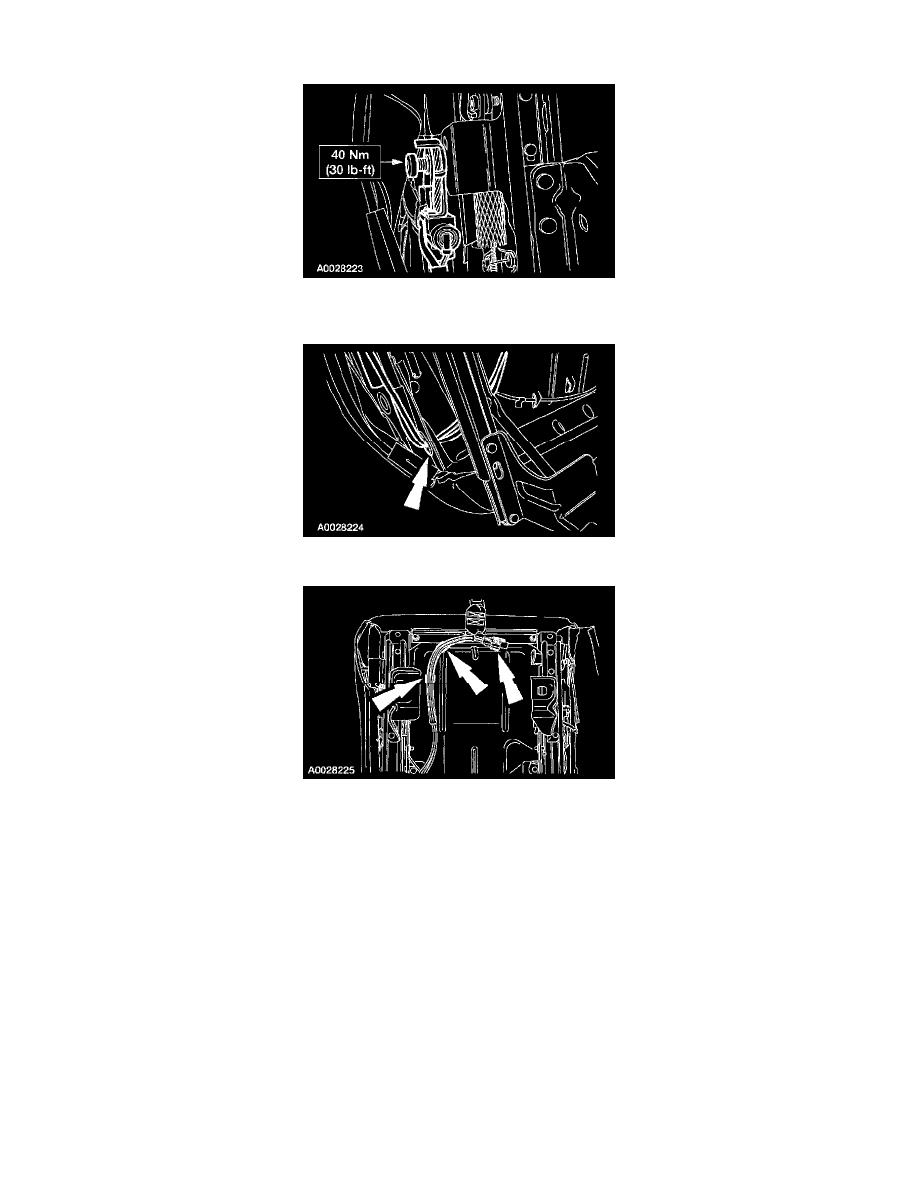
2. Using special tool 501-010, install the bolt.
3. Fasten the J-clip.
4. Route the wiring. Install the grommet.
5. Route the wiring.
6. Install the affected seat. Do not reactivate the supplemental restraint system at this time.
WARNING: TO REDUCE THE RISK OF SERIOUS PERSONAL INJURY, READ AND FOLLOW ALL WARNINGS, CAUTIONS
AND NOTES AT THE BEGINNING OF THE REMOVAL PROCEDURE.
7. Remove the shipping cap.
8. Connect the safety belt buckle and pretensioner electrical connector.
9. Connect the battery ground cable.
10. With the restraint system diagnostic tools still installed at the remaining deployable devices, prove out the supplemental restraint system (SRS).
11. Disconnect the battery ground cable and wait at least one minute.
WARNING:
^
TO AVOID ACCIDENTAL DEPLOYMENT AND POSSIBLE PERSONAL INJURY, THE BACKUP POWER SUPPLY MUST BE
DEPLETED BEFORE REPAIRING OR REPLACING ANY FRONT OR SIDE AIR BAG SUPPLEMENTAL RESTRAINT
SYSTEM (SRS) COMPONENTS AND BEFORE SERVICING, REPLACING, ADJUSTING OR STRIKING COMPONENTS NEAR
THE FRONT OR SIDE AIR BAG SENSORS, SUCH AS DOORS, INSTRUMENT PANEL, CONSOLE, DOOR LATCHES,
STRIKERS, SEATS AND HOOD LATCHES.
^
PLEASE REFER TO THE APPROPRIATE COMPONENT OR SYSTEM TO DETERMINE LOCATION OF THE FRONT AIR
BAG SENSORS.
^
THE SIDE AIR BAG SENSORS ARE LOCATED AT OR NEAR THE BASE OF THE B-PILLAR.