
Ranger 4WD V6-171 2.8L (1983)
Distributor: Service and Repair
Removal and Installation
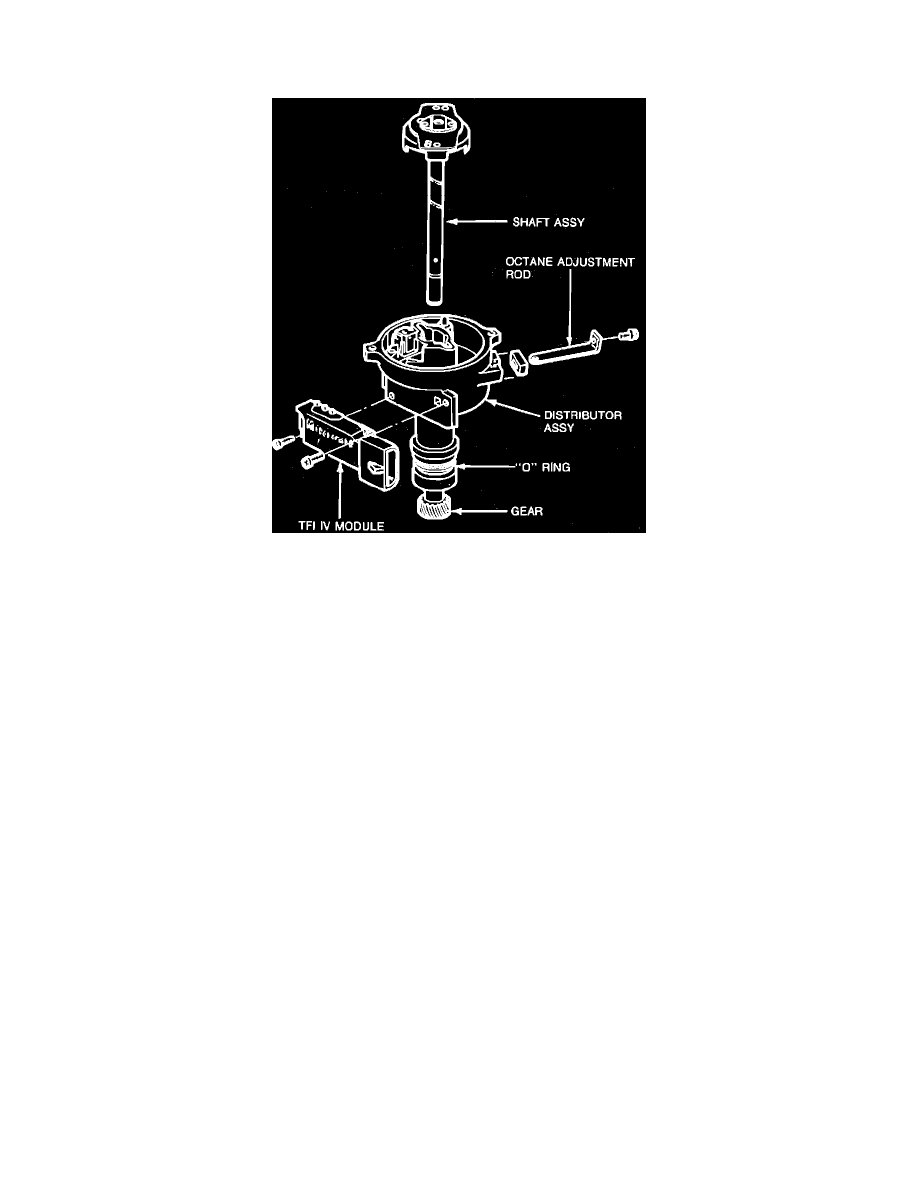
Distributor (Typical) - Exploded View
1.
Disconnect primary wiring connector from distributor.
2.
Mark position of No. 1 wire tower on distributor base.
3.
Remove distributor cap and adapter and position aside leaving wiring attached.
4.
Remove rotor to prevent damage.
5.
Remove TFI connector.
6.
Remove distributor hold-down bolt and clamp. Remove distributor. On vehicles equipped with security-type hold-down bolt, use tool
T82L-12270-A or equivalent to remove hold-down bolt.
7.
Turn engine until No. 1 piston is on compression stroke.
8.
Align timing marks to proper initial timing.
9.
Turn distributor shaft so rotor tip is pointing toward mark made in step 2 on distributor base.
10.
Continue turning distributor shaft slightly so leading edge of vane is centered in switch stator assembly.
11.
Rotate distributor in engine block to align leading edge of vane and vane switch and verify that rotor is pointing at No. 1 cap terminal. If vane and
vane switch stator cannot be aligned by rotating distributor in engine block, pull distributor out of block enough to disengage distributor and to
engage a different distributor gear tooth. Repeat steps 9, 10, and 11 as necessary.
12.
Install distributor hold-down bolt and clamp without tightening.
13.
Connect distributor TFI and primary wiring harnesses.
14.
Install distributor rotor, cap adapter, and cap.
15.
Using timing light, set initial timing according to specification given on Vehicle Emission Control Information Decal.
16.
Torque distributor hold-down bolt to 17---25 ft. lbs.
17.
Recheck timing and adjust, if necessary.