
Ranger 4WD V6-182 3.0L (1994)
10. Apply Premium Long-Life Grease XG-1-C or -K (ESA-M1C75-B) or equivalent to the threads and the socket end of the adjusting screw (part of
brake adjuster screw. Turn the adjusting screw into the brake shoe adjusting screw nut (2047) to the end of the threads and then loosen it one-half
turn.
11. Place the brake shoe adjusting screw socket on the brake adjuster screw and install the assembly between the shoe ends with the brake adjuster
screw nearest the secondary rear brake shoe and lining.
12. Hook the cable hook into the hole in the brake shoe adjusting lever kit from the outboard plate side. The brake shoe adjusting lever kits are also
stamped with an R or L to indicate their installation on the right or left hand brake assembly.
13. Place the hooked end of the brake shoe adjusting screw spring in the large hole in the primary shoe web. Connect the loop end of the brake shoe
adjusting screw spring to the adjuster lever hole.
14. Pull the brake shoe adjusting lever kit, brake shoe adjusting lever cable and brake shoe adjusting screw spring down toward the rear to engage the
pivot hook in the large hole in the secondary shoe web.
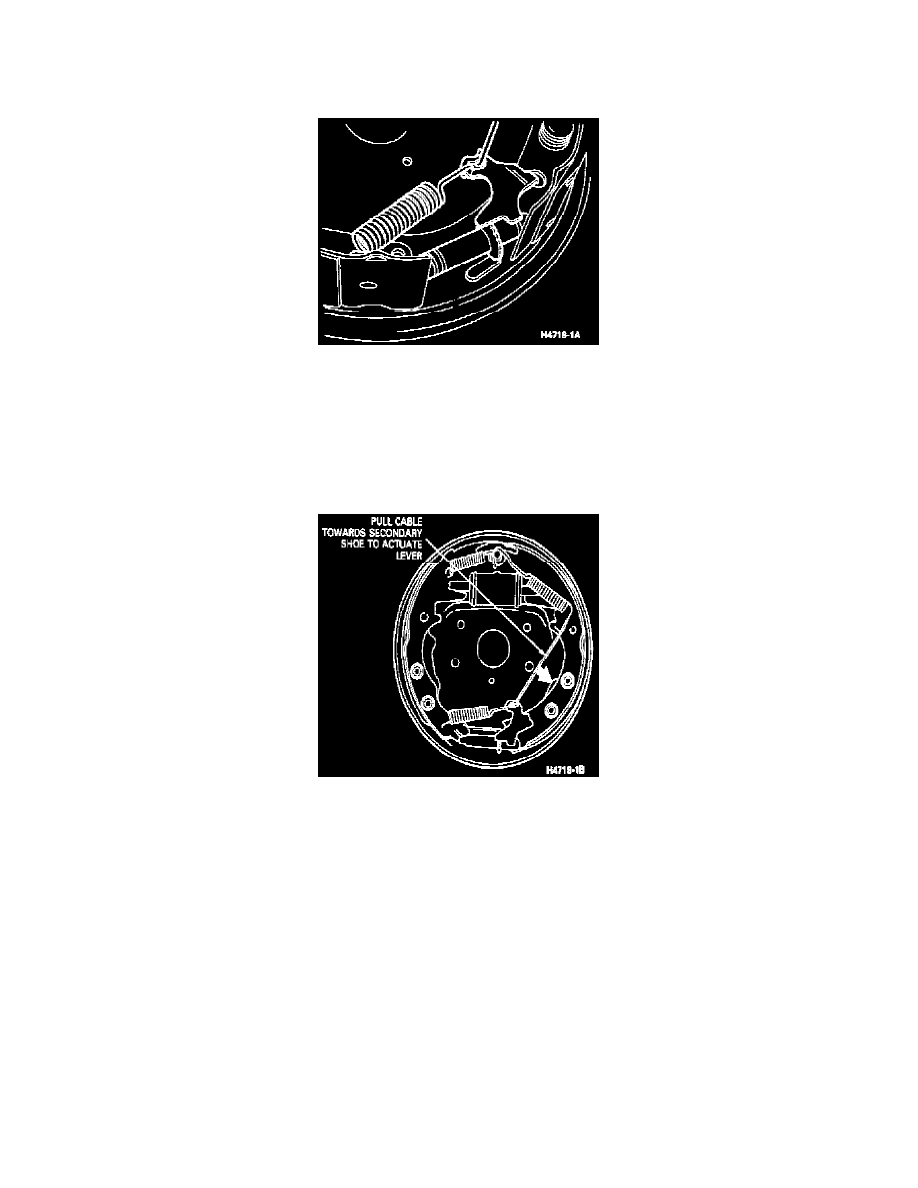
15. Check the action of the adjuster by pulling brake shoe adjusting lever cable toward secondary shoe, activating brake shoe adjusting lever kit. Brake
shoe adjusting lever kit should snap in behind the next tooth of adjuster. Release brake shoe adjusting lever cable to return brake shoe adjusting
lever kit to original position and the adjuster should turn one notch.
NOTE: If pulling the brake shoe adjusting lever cable does not produce the action described, or if brake shoe adjusting lever kit action is sluggish
instead of positive and sharp, check the position of the brake shoe adjusting lever kit on the adjusting screw toothed wheel. The brake shoe
adjusting lever kit should contact the adjusting wheel one tooth above the center line of the brake adjuster screw. If the contact point is below this
center line, the brake shoe adjusting lever kit will not lock on the teeth in the adjusting screw wheel, and the brake adjuster screw will not be
turned as the brake shoe adjusting lever kit is actuated by the brake shoe adjusting lever cable. Service adjuster as needed.