
Ranger 4WD V6-182 3.0L (1994)
Removing Shift Forks
5. Remove spring pins retaining shift forks to shift rails, then discard spring pins.
6. Ensure 5th/reverse shift rail is in full forward position, then remove spring pin from end of 5th/reverse rail.
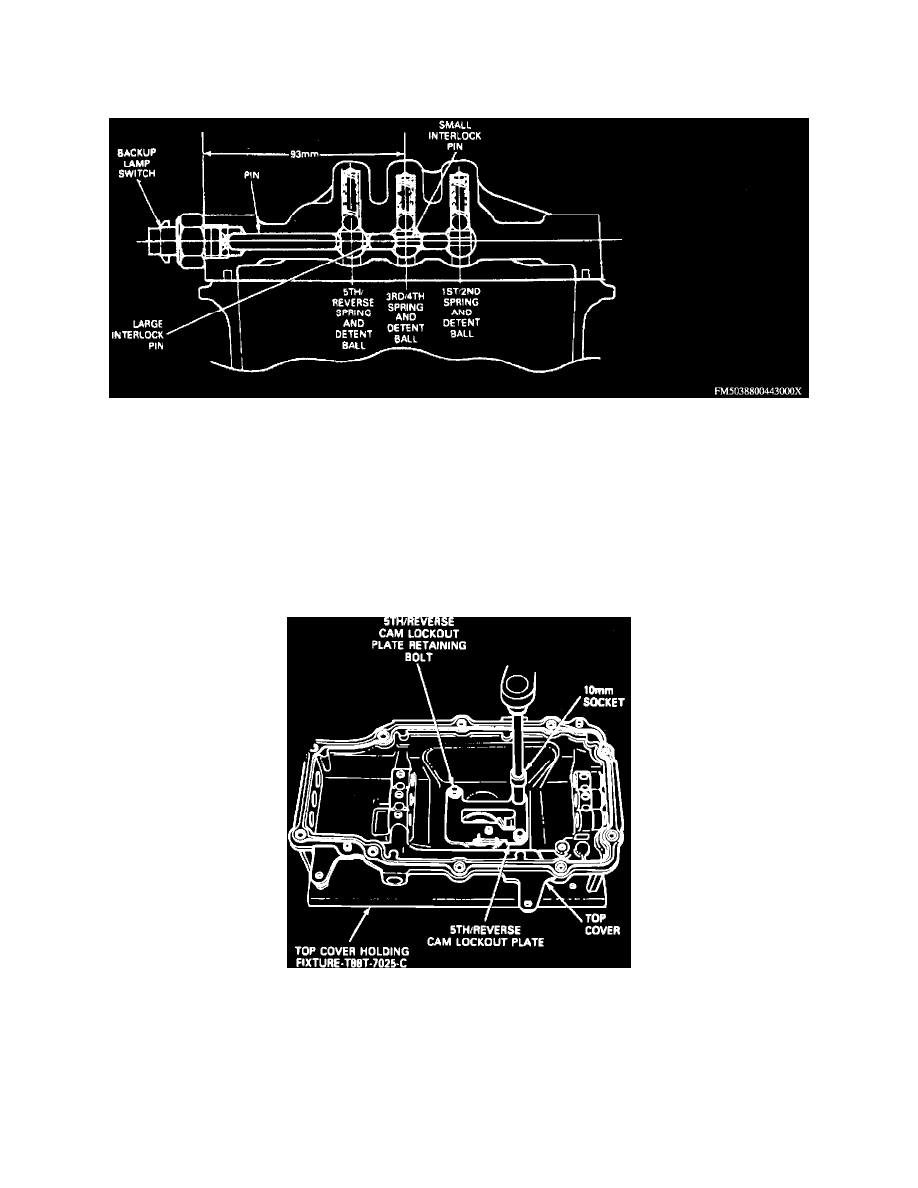
Cross-sectional View Of Shift Rail Assembly
7. Remove three rubber plugs blocking shift rod service bores.
CAUTION: To prevent component loss when performing the following procedures, cover lock balls, friction device, and spring seats with a
suitable clean cloth held firmly in place. Wear safety glasses during shift rail removal.
8. Remove 5th/reverse shift rail from top cover through service bore. If necessary, insert a 5/16 inch drift punch through spring pin bore and gently
rock shift rail from side to side while maintaining rearward pressure.
9. Remove 3rd/4th shift rail from top cover through service bore. If necessary, insert a suitable drift through spring pin bore and gently rock shift rail
from side to side while maintaining rearward pressure.
Removing 5th/Reverse Cam Lockout Plate
10. Remove 5th/reverse cam lockout plate retaining bolts, then the 5th/reverse cam lockout plate.
ASSEMBLE
1. Place top cover in a suitable holding fixture.
2. Position 5th/reverse cam lockout plate to top cover. Install 5th/reverse cam lockout plate retaining bolts, then torque to 6-7 ft lbs.
3. Position 3rd/4th shift rail into top cover through service bore. If necessary, insert a 5/16 inch drift punch through spring pin bore and gently rock
shift rail from side to side while maintaining forward pressure.