
Ranger 4WD V6-3.0L VIN U (1997)
Vacuum Brake Booster: Service and Repair
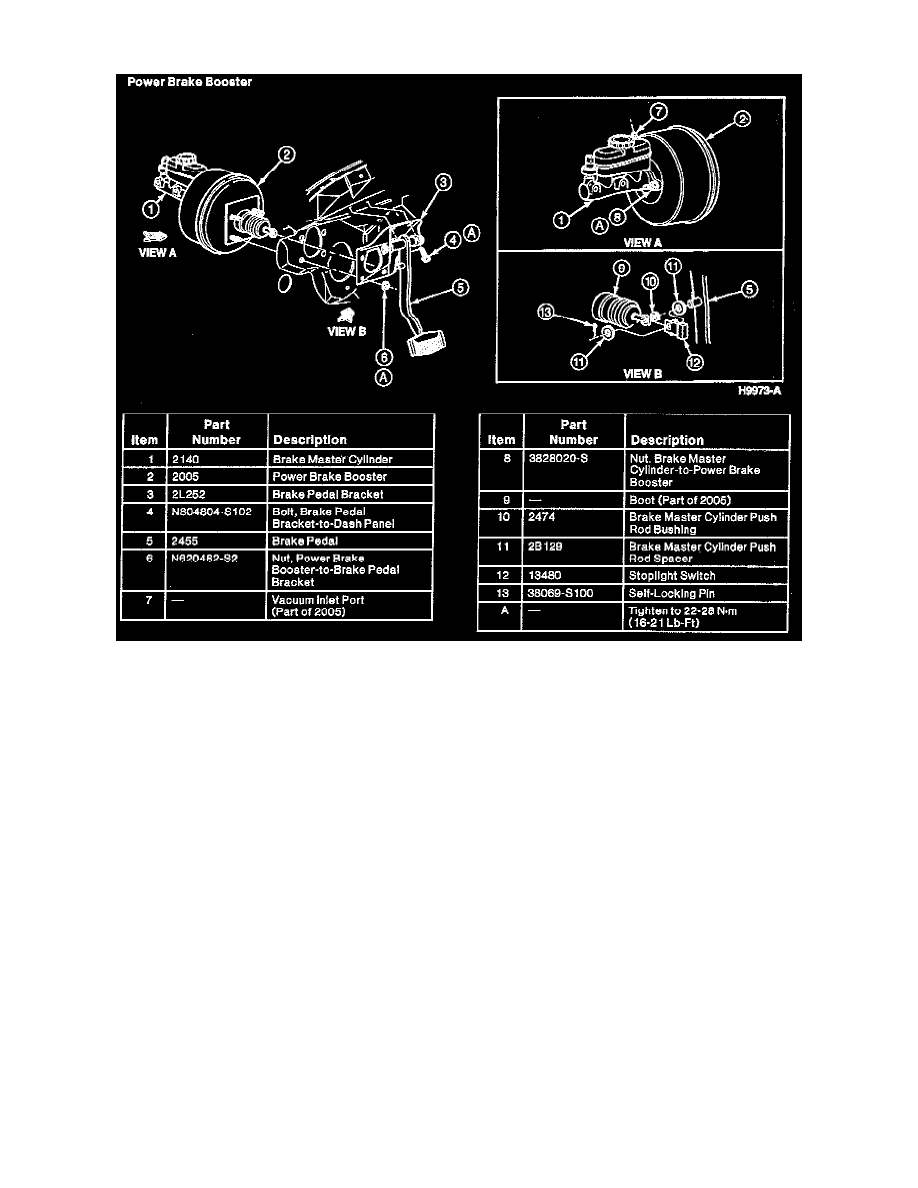
Power Brake Booster Components
REMOVAL
1. Disconnect the battery ground cable.
2. To prevent strain on the brake lines, support the brake master cylinder with a wire or prop.
3. Remove the two brake master cylinder-to-power brake booster nuts.
4. Carefully pull the brake master cylinder off the power brake booster.
5. Using care not to strain the brake lines, position the brake master cylinder out of the way.
6. Disconnect the vacuum hose from the power brake booster vacuum inlet port.
7. Working under the instrument panel, disconnect the electrical connector from the stoplight switch.
8. Remove the self-locking clip from the brake pedal pin.
NOTE: Before the next step, observe the position of the brake pedal push rod. The Aerostar brake pedal push rod has the large loop pointing
down.
9. Remove the brake master cylinder push rod spacers, the brake pedal push rod, the stoplight switch and the brake master cylinder push rod bushing
from the brake pedal pin.
10. Remove the four power brake booster-to-brake pedal bracket nuts.
11. At the engine compartment, pull the power brake booster off the dash panel.
INSTALLATION
To install, reverse the removal procedure, noting the following:
^
Tighten all mounting nuts to 22-28 Nm (16-21 ft. lbs.).
^
If necessary, adjust the brake master cylinder push rod. See: Hydraulic System/Brake Master Cylinder/Adjustments