
Ranger 4WD V6-3.0L VIN U (1997)
Drive Belt: Service and Repair
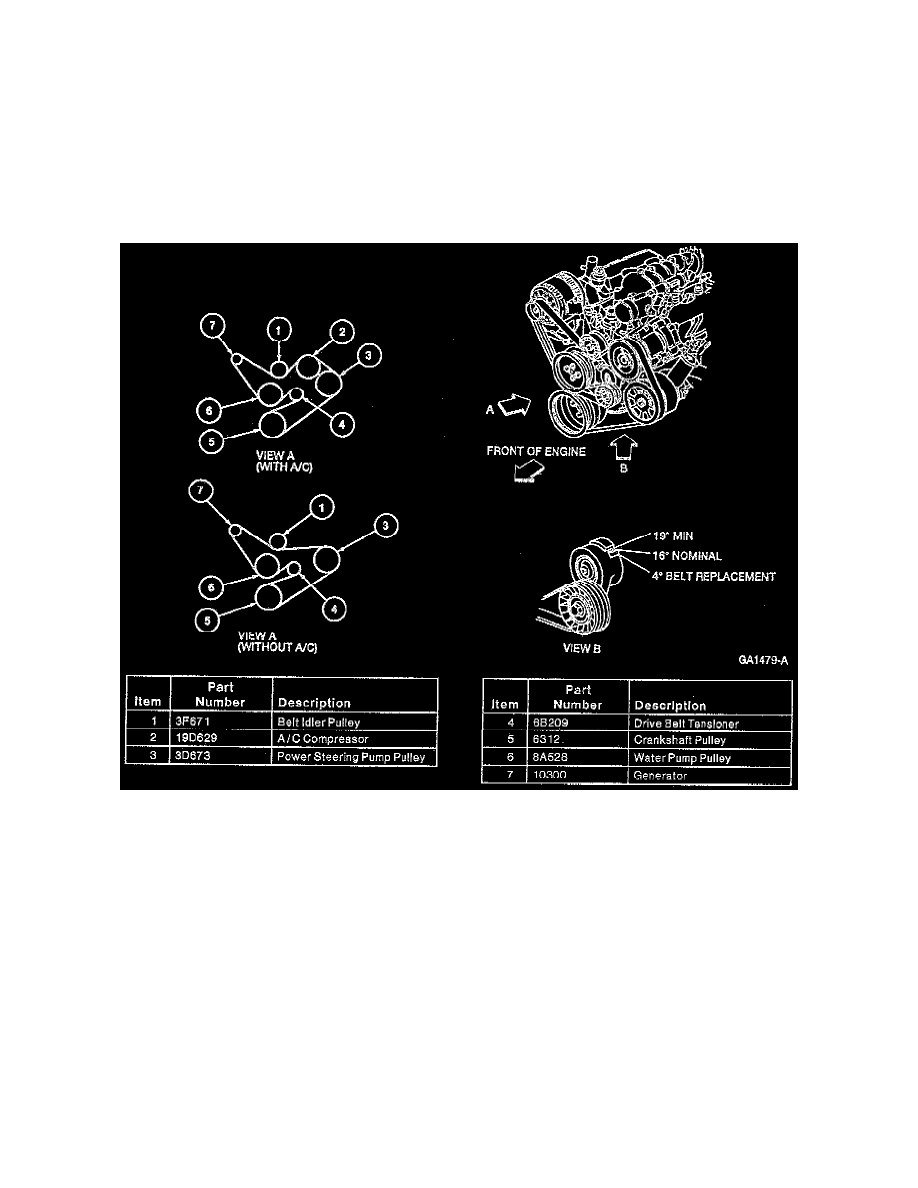
NOTE: Conditions requiring replacement of drive belt are excessive cracking or wear, severe glazing or frayed cords. Replace drive belts exhibiting
any of these conditions. Minor cracks in the back of the drive belt are considered acceptable. The engine is equipped with drive belt tensioners that
indicate when the drive belt is worn (stretched). A pointer and gauge are built into the drive belt tensioner. When the pointer no longer registers within
the range limits of the gauge, the drive belt must be replaced:
REMOVAL
1. Disconnect the intake air temperature (IAT) sensor electrical connector.
2. Disconnect crankcase ventilation hose:
3. Loosen air cleaner outlet tube clamps and remove tube.
4. Lift drive belt tensioner by rotating it clockwise and remove the drive belt.
INSTALLATION
1. Position new drive belt over pulleys.
-
Make sure that all V-grooves make proper contact with the pulley.
-
Make sure that drive belts are properly seated on the pulleys. One revolution of the engine with an incorrectly seated drive belt may snap the
drive belt cords.
2. Lift drive belt tensioner and route drive belt under drive belt tensioner pulley. Release drive belt tensioner to rest on drive belt.
3. Install air cleaner outlet tube and tighten clamps to 2-3 Nm (18-26 inch lbs.).
4. Connect crankcase ventilation hose.
5. Connect the intake air temperature (IAT) sensor electrical connector.