
Ranger 4WD V6-3.0L VIN U (1997)
Timing Chain: Service and Repair
REMOVAL
1. Disconnect ground cable at battery and set aside.
2. Remove engine front cover.
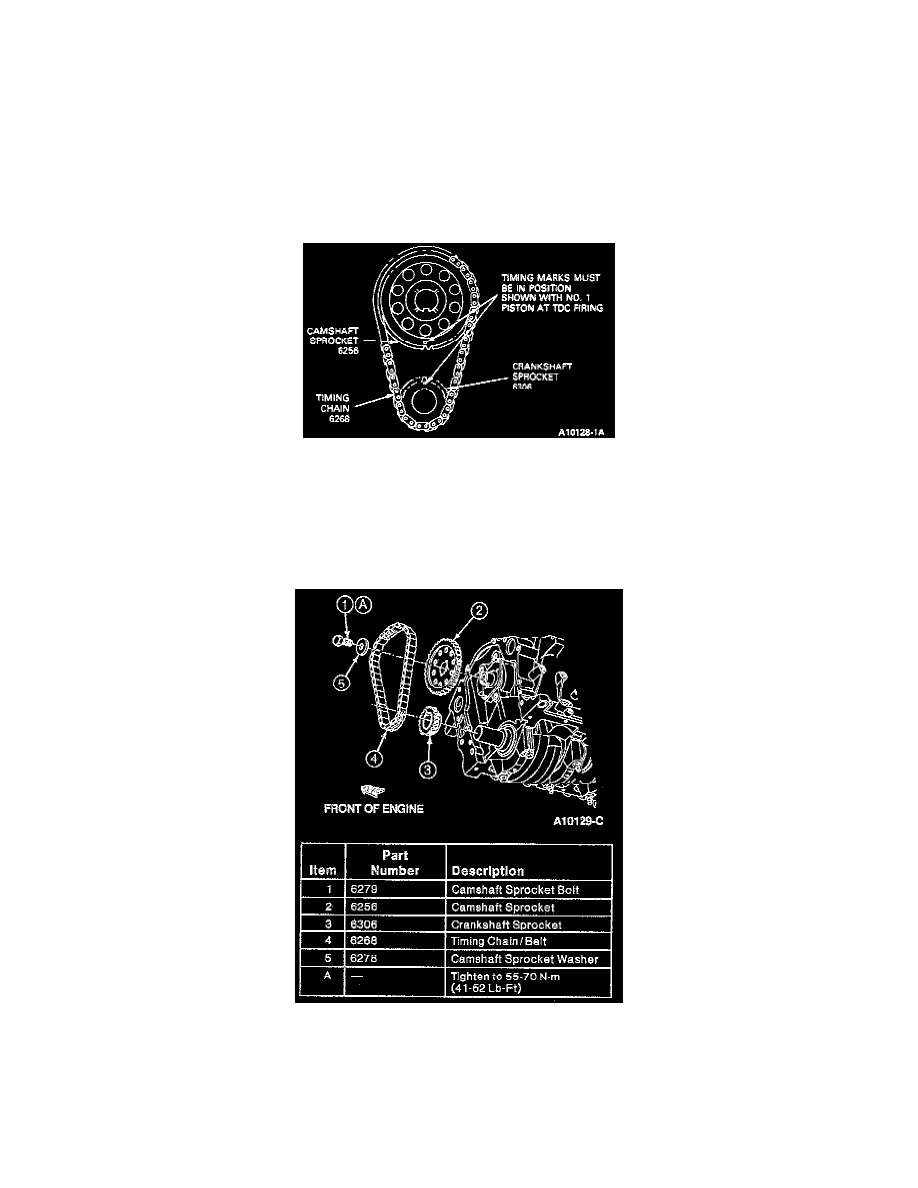
3. Rotate crankshaft until No. 1 piston is at top dead center (TDC) and the timing marks are aligned as illustrated.
4. Check timing chain deflection for excessive wear.
5. Slide camshaft sprocket, crankshaft sprocket and timing chain forward and remove as an assembly.
Timing Gear Timing Marks
6. Clean timing cover and oil pan sealing surfaces of all gasket material and silicone sealer.
INSTALLATION
1. Clean and inspect all parts before installation.
2. Slide camshaft sprocket, crankshaft sprocket and timing chain on as an assembly with timing marks aligned as illustrated.
3. Install timing chain sprocket bolt and crankshaft pulley retaining washer. Tighten bolt to 55-70 Nm (41-52 ft. lbs.). Lubricate chain and sprockets
with engine oil.
NOTE: The timing chain sprocket bolt has a drilled oil passage for timing chain lubrication. If damaged, do not replace with standard bolt. Clean
oil passage with solvent.
4. Inspect crankshaft front seal for burrs or cuts. If required, replace seal using Front Cover Seal Installer T70P-6B070-A.