
Ranger 4WD V6-3.0L VIN U (1997)
Seat Belt Height Adjuster: Service and Repair
REMOVAL
1. Remove D-ring cover. Apply pressure on the lower edge of the cover and push inboard.
2. Remove the nut/bolt holding the shoulder belt to the adjuster. Separate the D-ring from the adjuster.
3. Lift the floor carpet and remove the bolt holding the floor anchor to the front floor pan.
4. Pull the quarter trim panel away from the vehicle sheet metal to allow for access to the height adjuster.
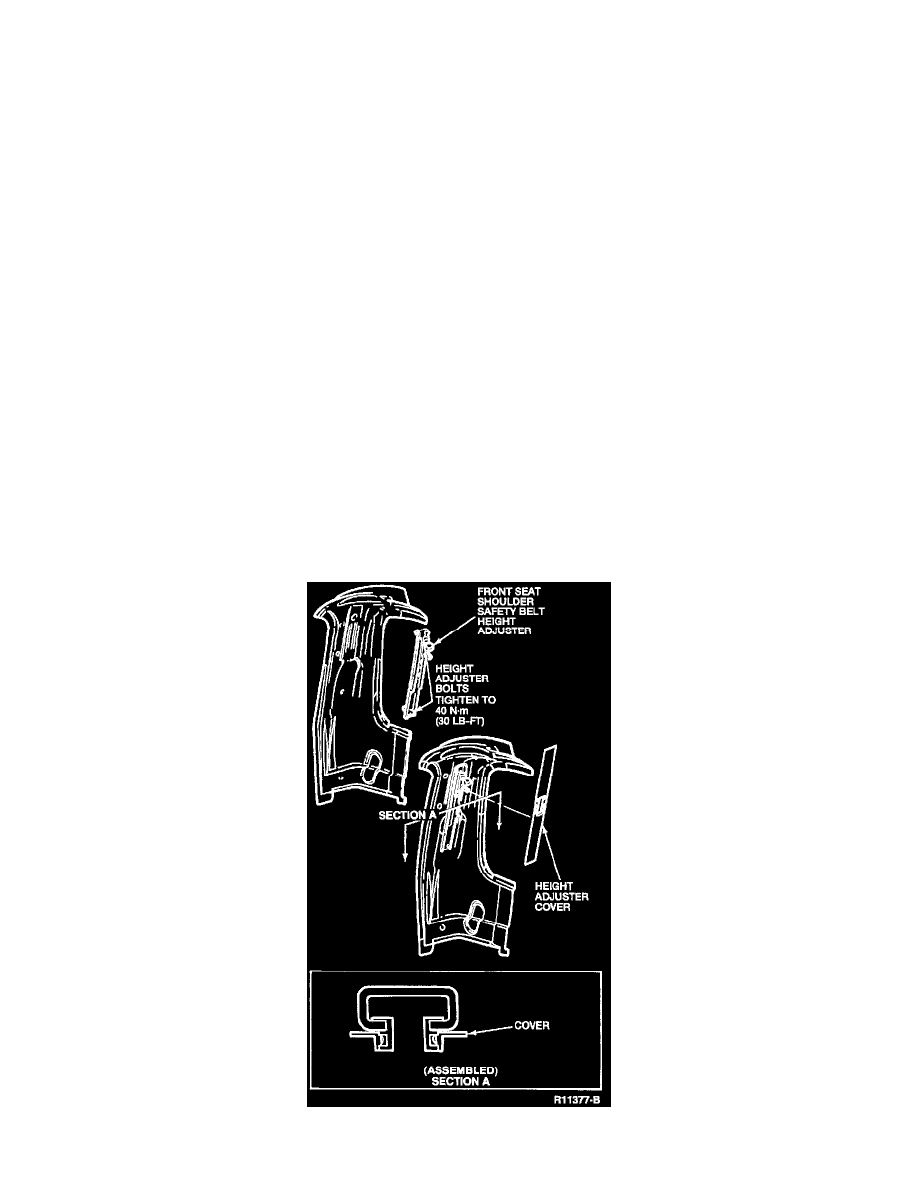
5. Remove the height adjuster cover from the height adjuster by grasping the cover on both sides of the adjuster at the center and peel/pull the cover
inboard.
6. Remove the two height adjuster bolts and the height adjuster.
INSTALLATION
1. Position the height adjuster to the vehicle:
Regular Cab: install with the four hole pattern located in the back of the height adjuster at the top.
SuperCab: align the locating tab at the top of the module with the hole in the sheet metal.
2. Hand start the lower height adjuster bolt but do not tighten.
3. Hand start the upper height adjuster bolt.
4. Tighten both height adjuster bolts to 40 Nm (30 lb ft).
5. Position the plastic height adjuster cover over the height adjuster as follows:
Shoulder Belt Height Adjuster